
Configure AS-611Bn Distance Detection
This guide describes the distance function in the supplied manual marked Ver.4.0 Jun.2026. Confirm function support and command termination for your installed firmware before applying the examples. See Quick Start for connection prerequisites.
What the mode reports
- Stationary and moving targets
- Up to 10 targets according to the manual; encoding of target 10 is unspecified
- Distance in centimeters
- Reflected signal strength
- Results sorted by distance or strength
- Documented real-time 15 Hz or once-per-second output; multi-target grouping is unspecified
The configurable range is 0.1–20 m, but the manual separately limits guaranteed human detection to 4 m. Treat 20 m as a configuration limit, not a universal detection guarantee.
Step 1: Prepare the scene
Place the radar with a clear view of the area of interest. Remove unnecessary nearby metal and moving reflectors. Start with a narrow range that contains the target.
Step 2: Select distance mode
stop
mode 1
The documented response is:
=DISTANCE!
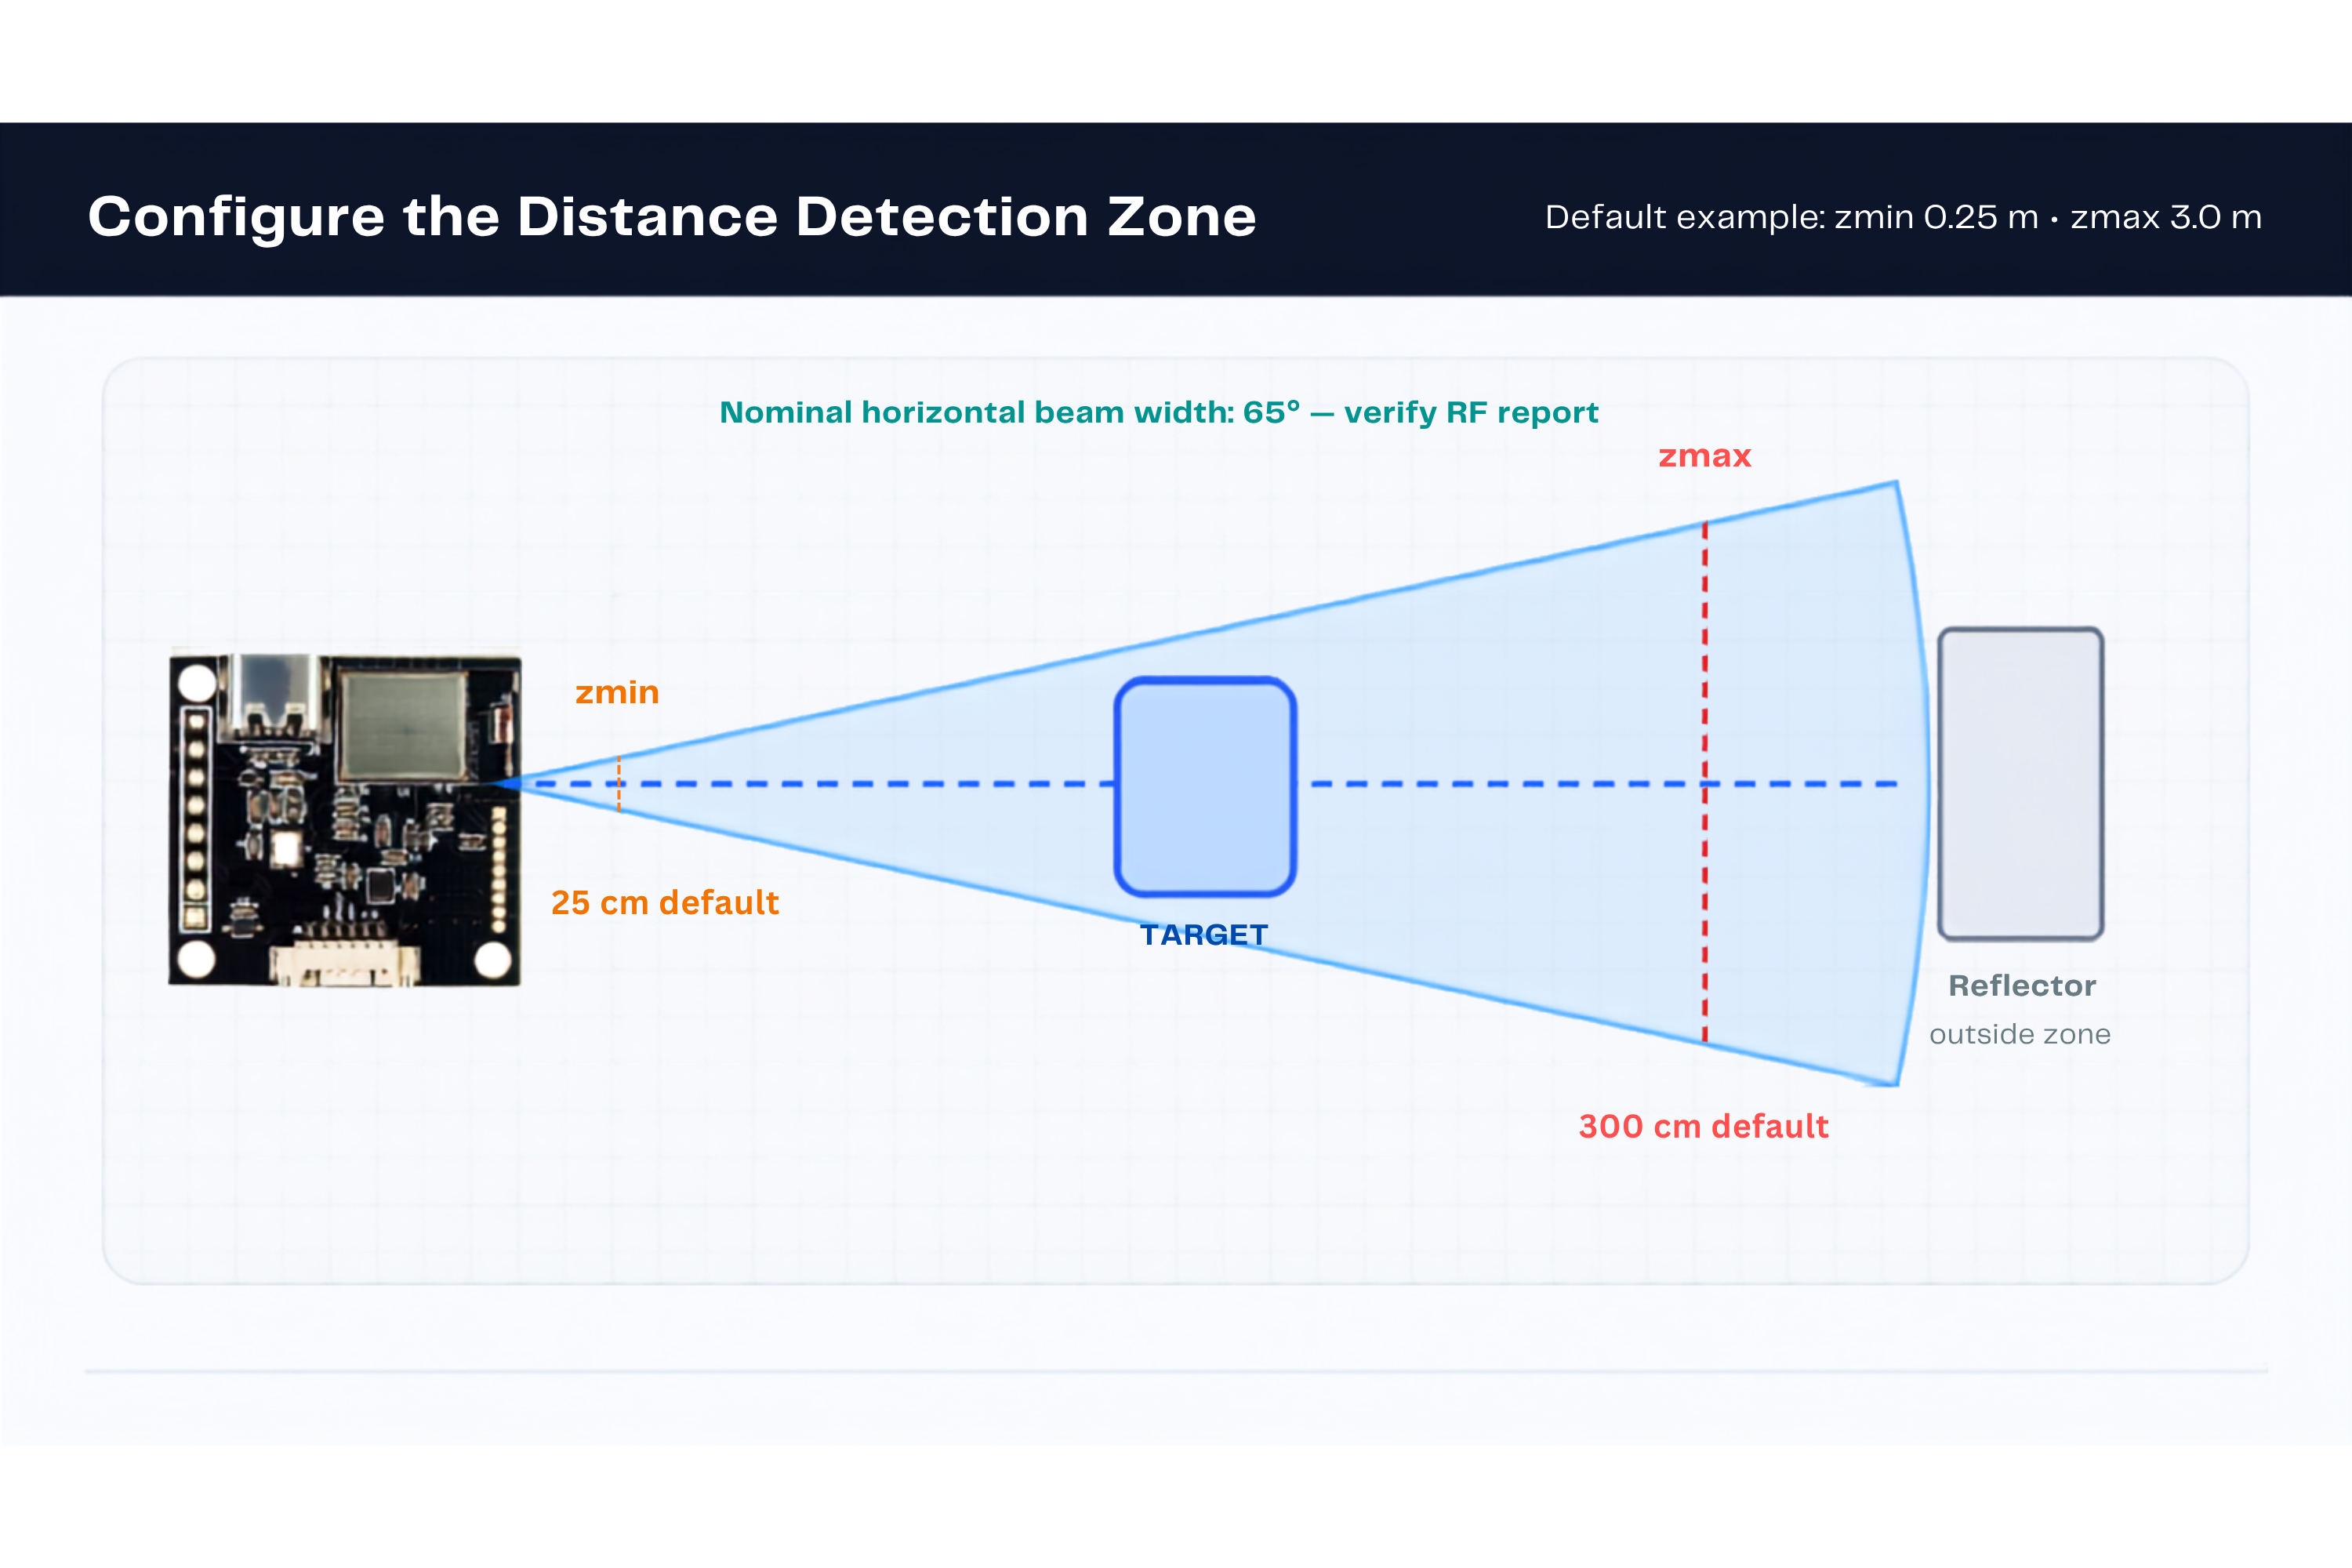
Step 3: Set the measurement range
The following sequence establishes the manual's default zone using an intermediate minimum. It is derived from the documented range constraints; use it only after confirming command termination and distance-mode support on the installed firmware.
zmin 10
zmax 300
zmin 25
The temporary zmin 10 is compatible with every documented distance-mode zmax (50–2000 cm). It avoids setting zmin 25 while an incompatible maximum is active. Send commands individually and allow reconfiguration to complete. If a command is rejected or the link drops, stop and establish the actual state before continuing; do not assume the entire sequence succeeded.
| Setting | Documented range | Default |
|---|---|---|
zmin | 10 to zmax - 25 cm | 25 cm |
zmax | 50 to 2000 cm | 300 cm |
Narrow the range to reject reflections outside the area of interest.
Step 4: Choose the performance profile
pmode 0
| Value | Profile | Use |
|---|---|---|
0 | Balanced | Default starting point |
1 | Fast | Faster update behavior |
2 | Accurate | Higher range/precision emphasis |
Step 5: Set sensitivity
sena 50
sena accepts 0–100%. Higher values detect weaker or smaller returns but can increase false detections from clutter. Change one variable at a time and record the scene and result.
Step 6: Select sorting and timing
sort 0
outtime 1
| Command | Value | Behavior |
|---|---|---|
sort | 0 | Nearest target first |
sort | 1 | Strongest target first |
outtime | 0 | Real-time output, documented as 15 Hz |
outtime | 1 | One output per second |
Step 7: Start and verify output
start
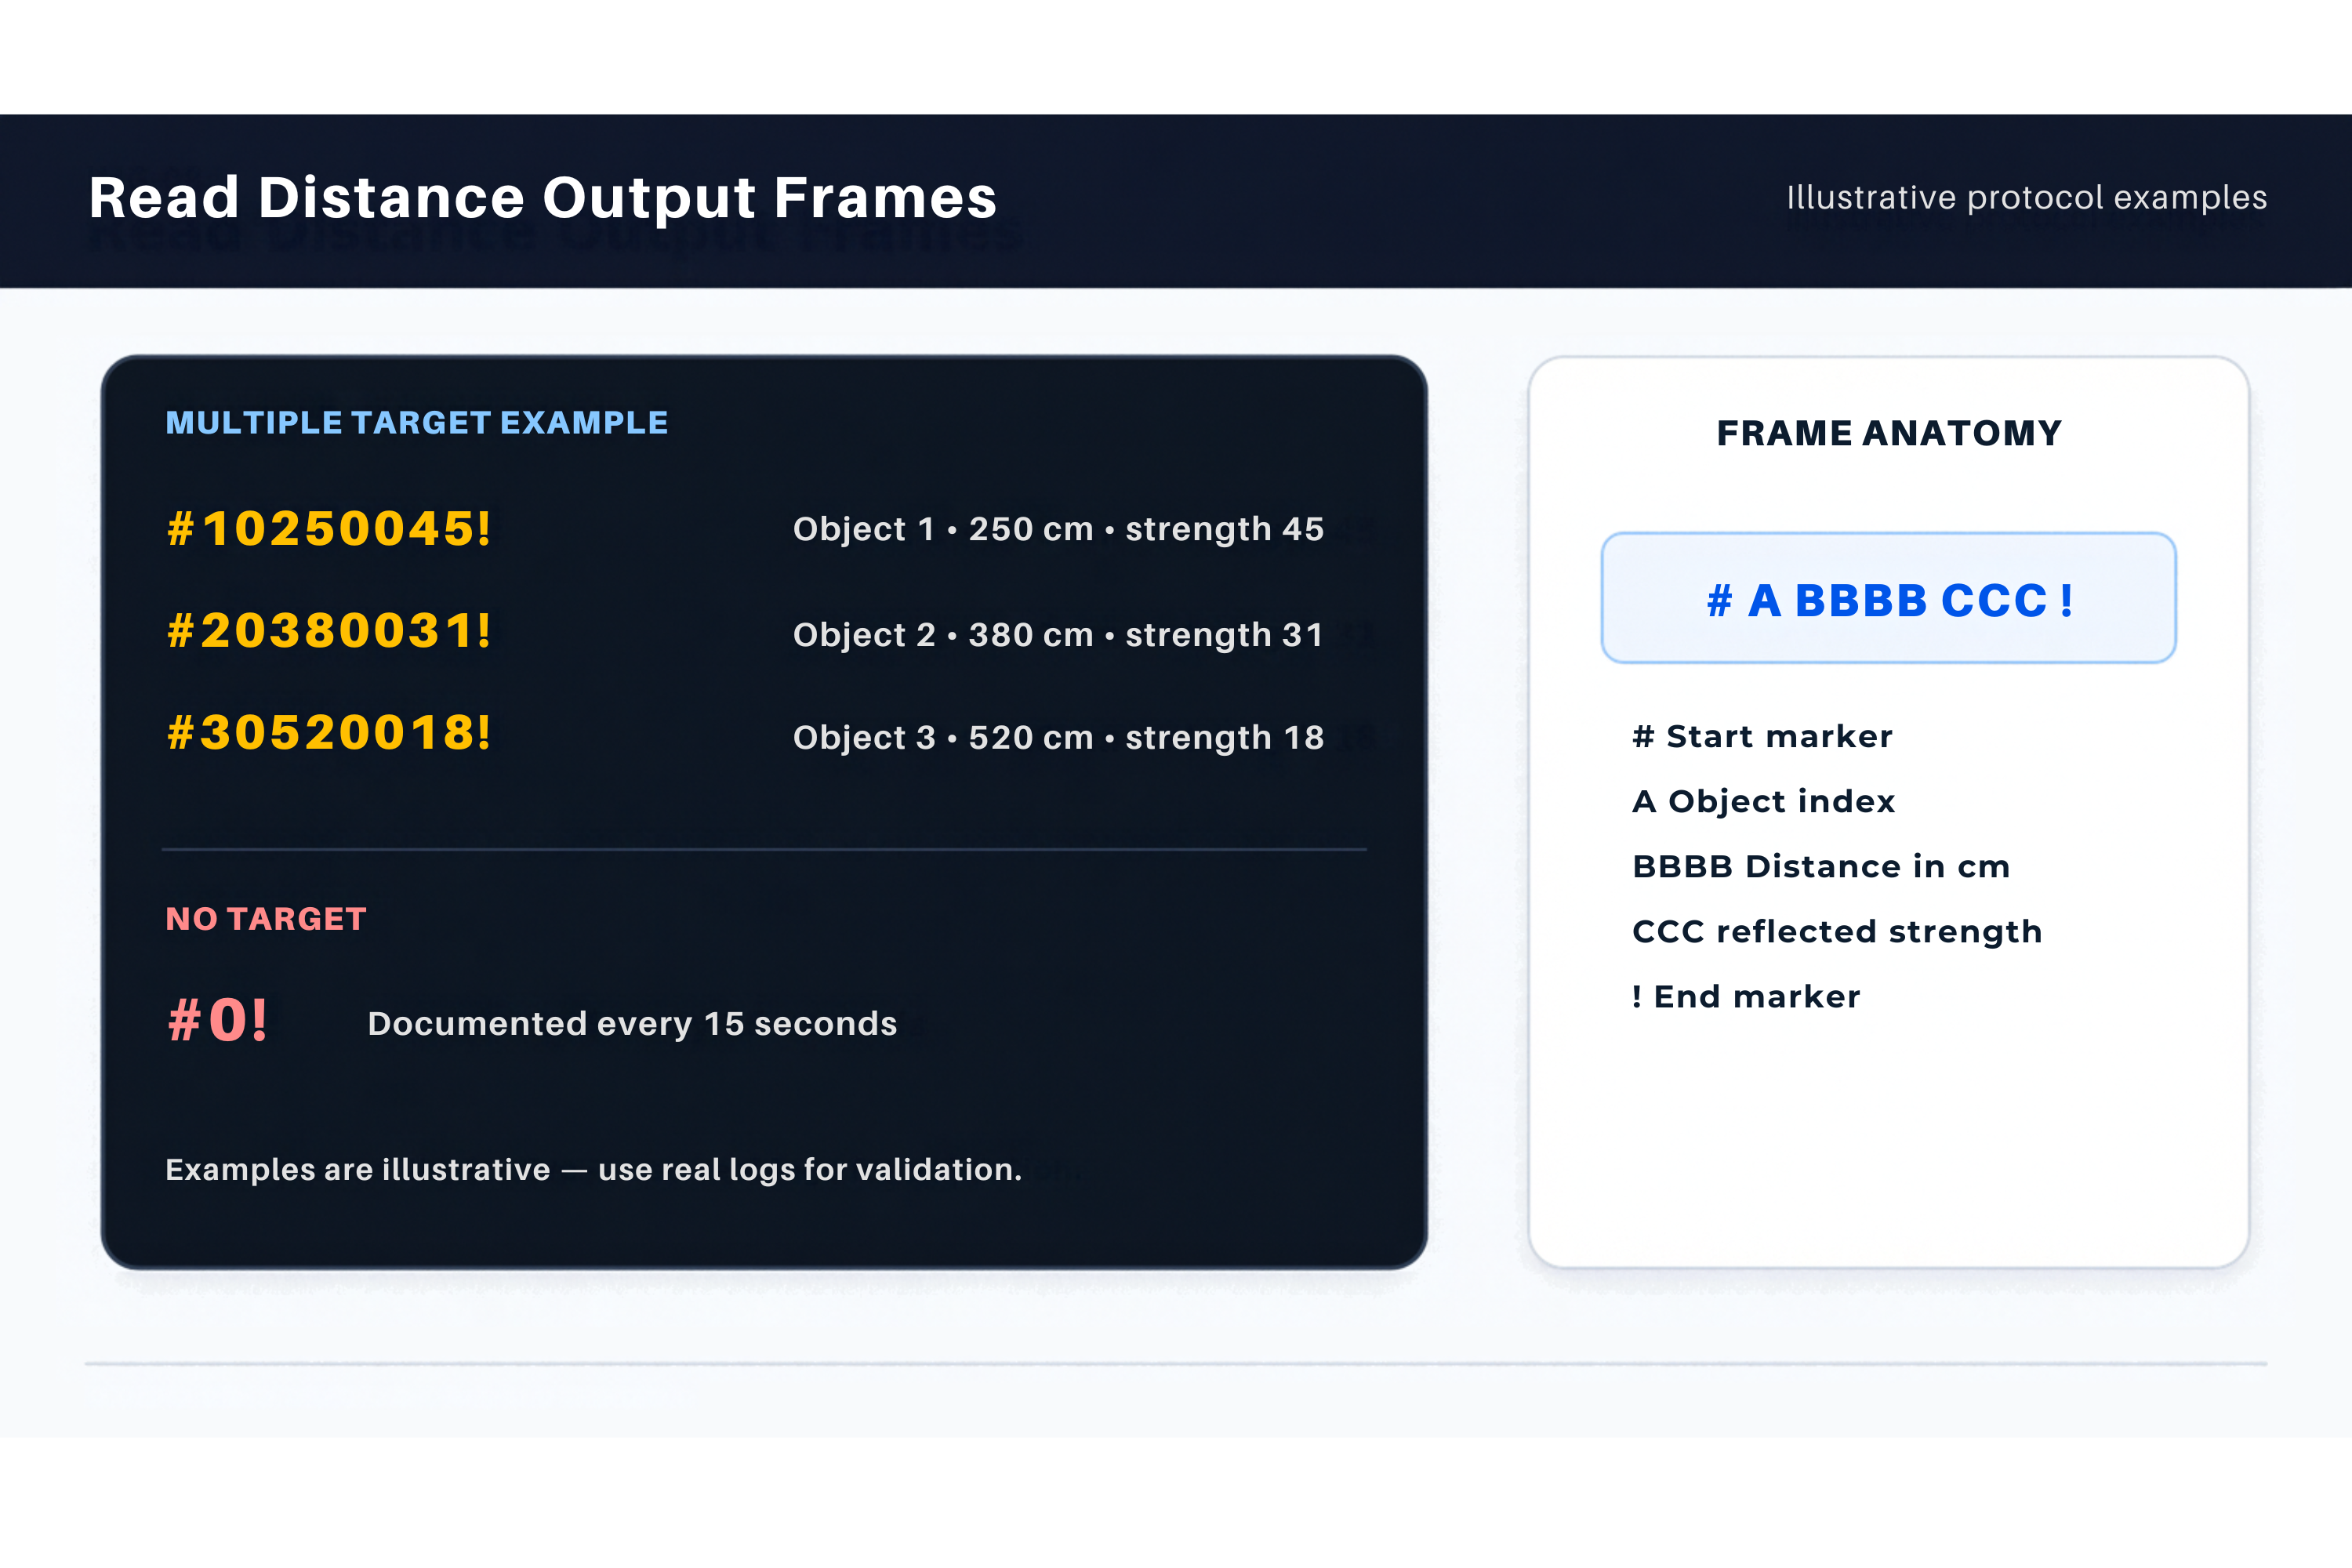
Each target frame is documented as:
#ABBBBCCC!
| Field | Width | Meaning |
|---|---|---|
# | 1 | Start marker |
A | 1 | Object number; encoding of the tenth object is not defined |
BBBB | 4 | Distance in centimeters |
CCC | 3 | Reflected signal strength |
! | 1 | End marker |
Example:
#10250045!
This manual example represents object 1 at 250 cm with strength 45; it is not a captured measurement. When no object is detected, the documented output is #0! every 15 seconds.
Recommended validation record
Record the module SKU, hardware revision, firmware version, supply, mounting, enclosure, target material/size, target distance, zmin/zmax, pmode, sena, sort, outtime, raw log, and test date.
Troubleshooting
| Result | Adjustment |
|---|---|
| Too many targets | Reduce sena, narrow zmin/zmax, or remove nearby reflectors |
| Small target is missed | Increase sena carefully and reduce clutter |
| Target order is unexpected | Confirm sort 0 versus sort 1 |
| Update is too slow | Use outtime 0; validate host throughput and mode behavior |
| Target beyond the intended zone appears | Narrow zmin/zmax and review sensor angle/enclosure reflections |