
Configure AS-613 Vital-Sign Detection
AS-613 provides two default vital-sign modes and one licensed advanced mode. All three associate valid vital-sign output with the closest detected person. A closer moving person, pet, fan, curtain, or object can take priority and invalidate the intended subject's data.
Evaluation data, not diagnosis The supplied manual does not provide medical-device certification or clinical validation. Do not use AS-613 output alone for diagnosis, treatment, emergency response, apnea alarms, or life-safety decisions.
Select a mode
| Mode | Main purpose | Vital subject | Availability |
|---|---|---|---|
| 5 | Dedicated wall/side vital-sign sensing | Closest person only | Default |
| 6 | Wall position plus vital signs | Closest position slot only | Default |
| 11 | Mode 5 plus RMSSD and SDNN | Closest person only | Additional license |
Prepare the sensing area
For the best chance of stable data:
- Mount the radar rigidly with the subject's chest facing it.
- Keep the intended subject inside a narrowed ROI.
- Remove or stop fans, air purifiers, moving curtains, robot vacuums, and other moving reflectors.
- Ensure that no person or object is closer to the radar than the subject.
- Ask the subject to lower their hands, avoid talking, and remain still.
- Do not cover the chest with moving hands, a phone, crossed arms, or keyboard activity.
- Allow the documented stabilization time before evaluating rate or HRV fields.
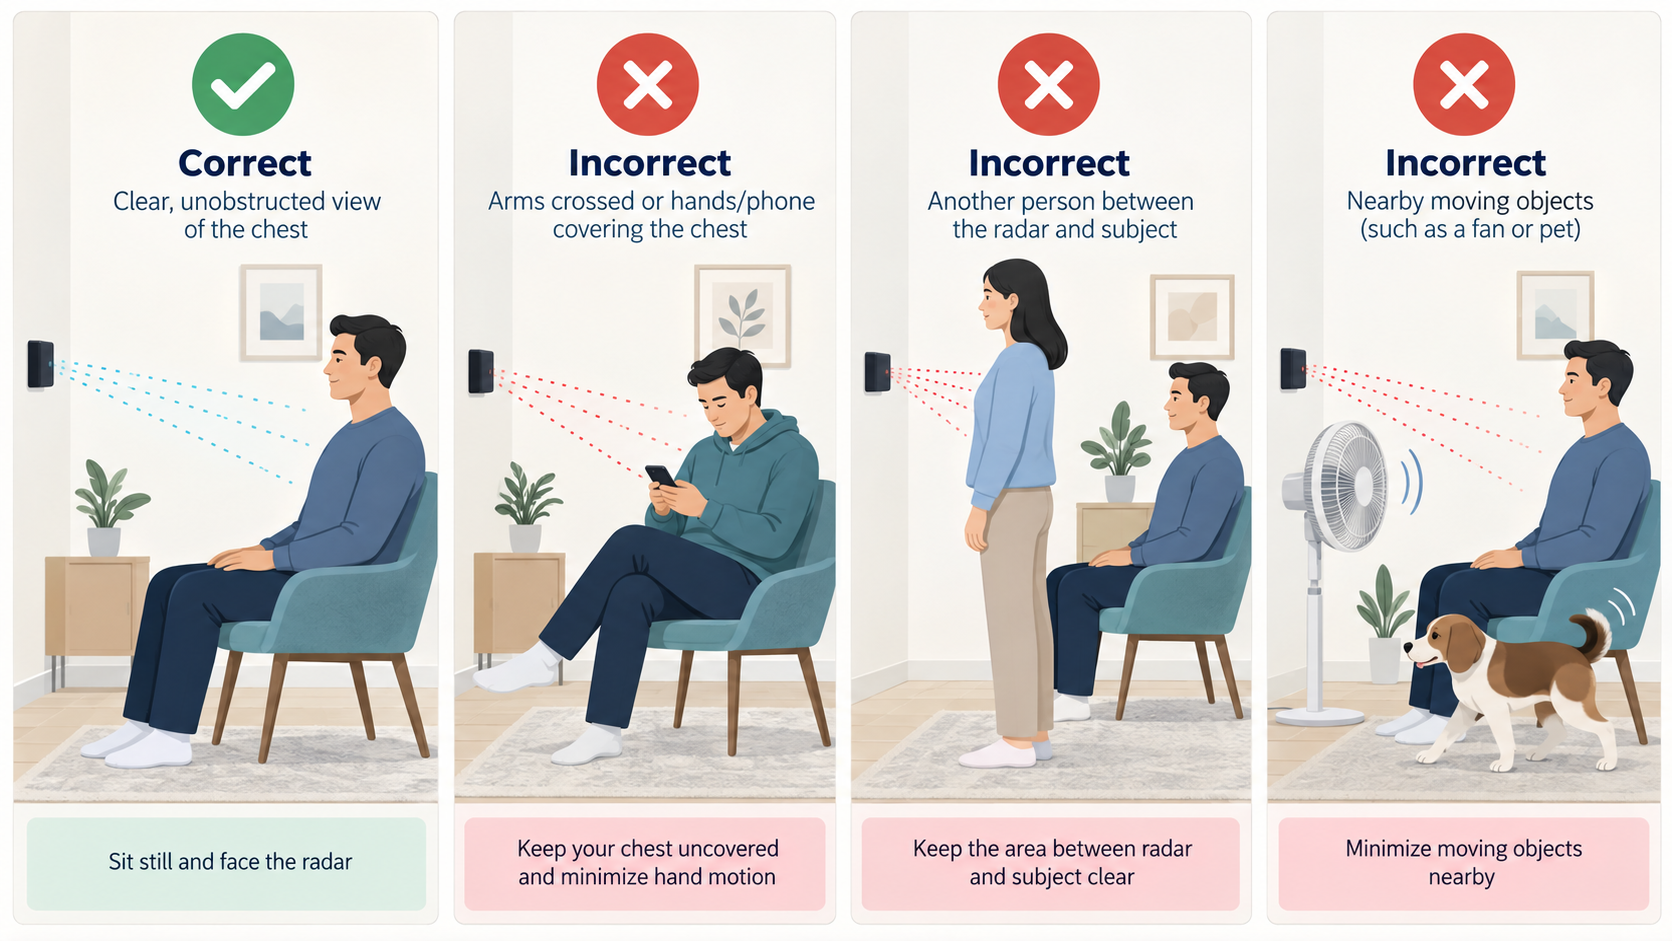
Keep a clear view of the chest and minimize subject motion, intervening people, pets, fans, and other moving objects.
Mode 5: Dedicated vital-sign mode
The mode description documents this initial ROI:
| Setting | Default |
|---|---|
| X | -125 to +125 cm |
| Y | -150 to +100 cm |
| Z | +40 to +250 cm |
| Left/right angle | -75° to +75° |
| Down/up angle | -70° to +70° |
The Mode 5 section defines a 2.5 m operating region. The feature list gives 3.0 m, while the product specification lists a 5 m maximum. Use the 2.5 m Mode 5 region for the setup below; the larger figures are general product limits rather than this mode's setup boundary.
Initial setup
Send commands individually, waiting for each response and any restart. These bench sequences include mreset, which clears the active mode settings; record existing settings first.
stop
mode 5
mreset
rotate 0
walltilt 0
wave 0
exten 0
info
start
After the base packet is stable, use wave 1 for respiration waveform output and exten 1 for position fields. wave 1 fixes the output interval to 100 ms according to the manual.
Mode 5 packet layouts
No waveform, normal:
%ABBBCCDDD!
A: state (0no target,1moving,2no valid vital signal,3valid vital signal,4fall state documented but not fully defined)BBB: heart rate per minuteCC: breathing rate per minuteDDD: selected option data, documented default distance in cm
No waveform, extended:
%ABBBCCDDDDEEEEFFFGGG!
Adds signed X (DDDD), signed Y (EEEE), Z (FFF), and distance/power (GGG).
Waveform, normal:
@ABBBCCDEEEFFF!
Adds heart pulse (D) and respiration waveform (EEE).
Waveform, extended:
@ABBBCCDEEEFFFFGGGGHHHIII!
Adds signed X (FFFF), signed Y (GGGG), Z (HHH), and distance/power (III).
Vacancy packets: %0! or @0!.
Mode 6: Vital sign plus position
The mode description documents this initial ROI:
| Setting | Default |
|---|---|
| X | -400 to +400 cm |
| Y | -200 to +150 cm |
| Z | +40 to +800 cm |
For Mode 6, the functional summary gives heart rate to 2.5 m, breathing to 3 m, and position-only output to 6 m. Use these mode-specific values for setup. The feature list's 8 m position figure is the broader product range.
Initial setup
Send commands individually, waiting for each response and any restart. These bench sequences include mreset, which clears the active mode settings; record existing settings first.
stop
mode 6
mreset
rotate 0
walltilt 0
wave 0
info
start
Only the closest/first slot has meaningful vital-sign data. Other targets are position outputs.
Mode 6 packet layouts
No waveform:
&ABBBBCCCDDDEFFFGG!
A: target indexBBBB: signed X, cmCCC: positive Z, cmDDD: reflected energyE: vital-sign stateFFF: heart rateGG: breathing rate
Waveform:
?ABBBBCCCDDDEFFFGGHIII!
Adds heart pulse (H) and respiration waveform (III). Vacancy packets: &0! or ?0!.
Mode 11: Advanced vital-sign mode
Mode 11 is a separately licensed extension of Mode 5. It adds HRV values:
- RMSSD begins after more than 30 seconds of continuously detected stable vital signs.
- SDNN begins after more than 30 seconds and is described as stabilizing after at least 5 minutes of stable measurement.
These timing statements are initialization guidance, not evidence of medical accuracy.
Initial setup
Send commands individually, waiting for each response and any restart. These bench sequences include mreset, which clears the active mode settings; record existing settings first.
stop
mode 11
mreset
wave 0
exten 0
info
start
Mode 11 packet layouts
No waveform, normal:
}ABBBCCDDEEFFF!
A: vital-sign stateBBB: heart rateCC: breathing rateDD: RMSSD, 0-99 msEE: SDNN, 0-99 msFFF: distance/power option
Waveform, normal:
{ABBBCCDDEEFGGGHHH!
Adds heart pulse (F) and respiration waveform (GGG). Extended packets add X, Y, Z, and power fields. See Command and Data Reference for the complete layouts.
Fixed-width HRV fields The manual allocates two decimal digits for RMSSD and SDNN and does not define overflow, saturation, invalid, or unavailable encodings. Treat values outside the documented fields as unsupported input.
Range-limit commands
The manual references hmax and bmax to set heart-rate and breathing detection limits. The command table is incomplete: the hmax row has no definition, while the bmax description says a 300 cm default, maximum 600 cm, and a value no greater than zmax.
The manual does not provide a complete hmax command row. Use bmax only within the documented mode geometry and do not infer an hmax syntax from bmax.
Evaluate output quality
Do not judge performance from a single displayed rate. Record:
- State transitions and valid-data time
- Raw packet stream and dropped/malformed frames
- Reference heart and breathing measurements
- Distance, angle, posture, clothing, motion, and duration
- Room dimensions, clutter, nearby moving devices, and enclosure
- Hardware revision, firmware, licensed modes, supply, and baud
- Sample count, acceptance thresholds, reviewer, and test date
Documented accuracy
The manual describes Mode 5 breathing accuracy as over 85% in a stable state and heart-rate accuracy as approximately 85%. For Mode 6, it describes breathing accuracy as over 80% within 3 m in a stable state and heart-rate accuracy as approximately 80%. It does not define the reference instrument, sample size, error metric, or test setup, so use these percentages with their documented stable-state and range conditions.