
Getting Started with Matter Quickly on NX Families
This tutorial is the shortest path from a connected NX development board to a commissioned Matter device.
You will flash a validated firmware package, commission the device over Bluetooth Low Energy, join it to a Thread network, and verify one Matter command. You do not need to build the firmware from source in this tutorial.
Publication gate Do not publish this tutorial until KORLINX provides a tested prebuilt firmware package, setup code, supported board list, flash procedure, LED and button behavior, and validated commissioner ecosystem.
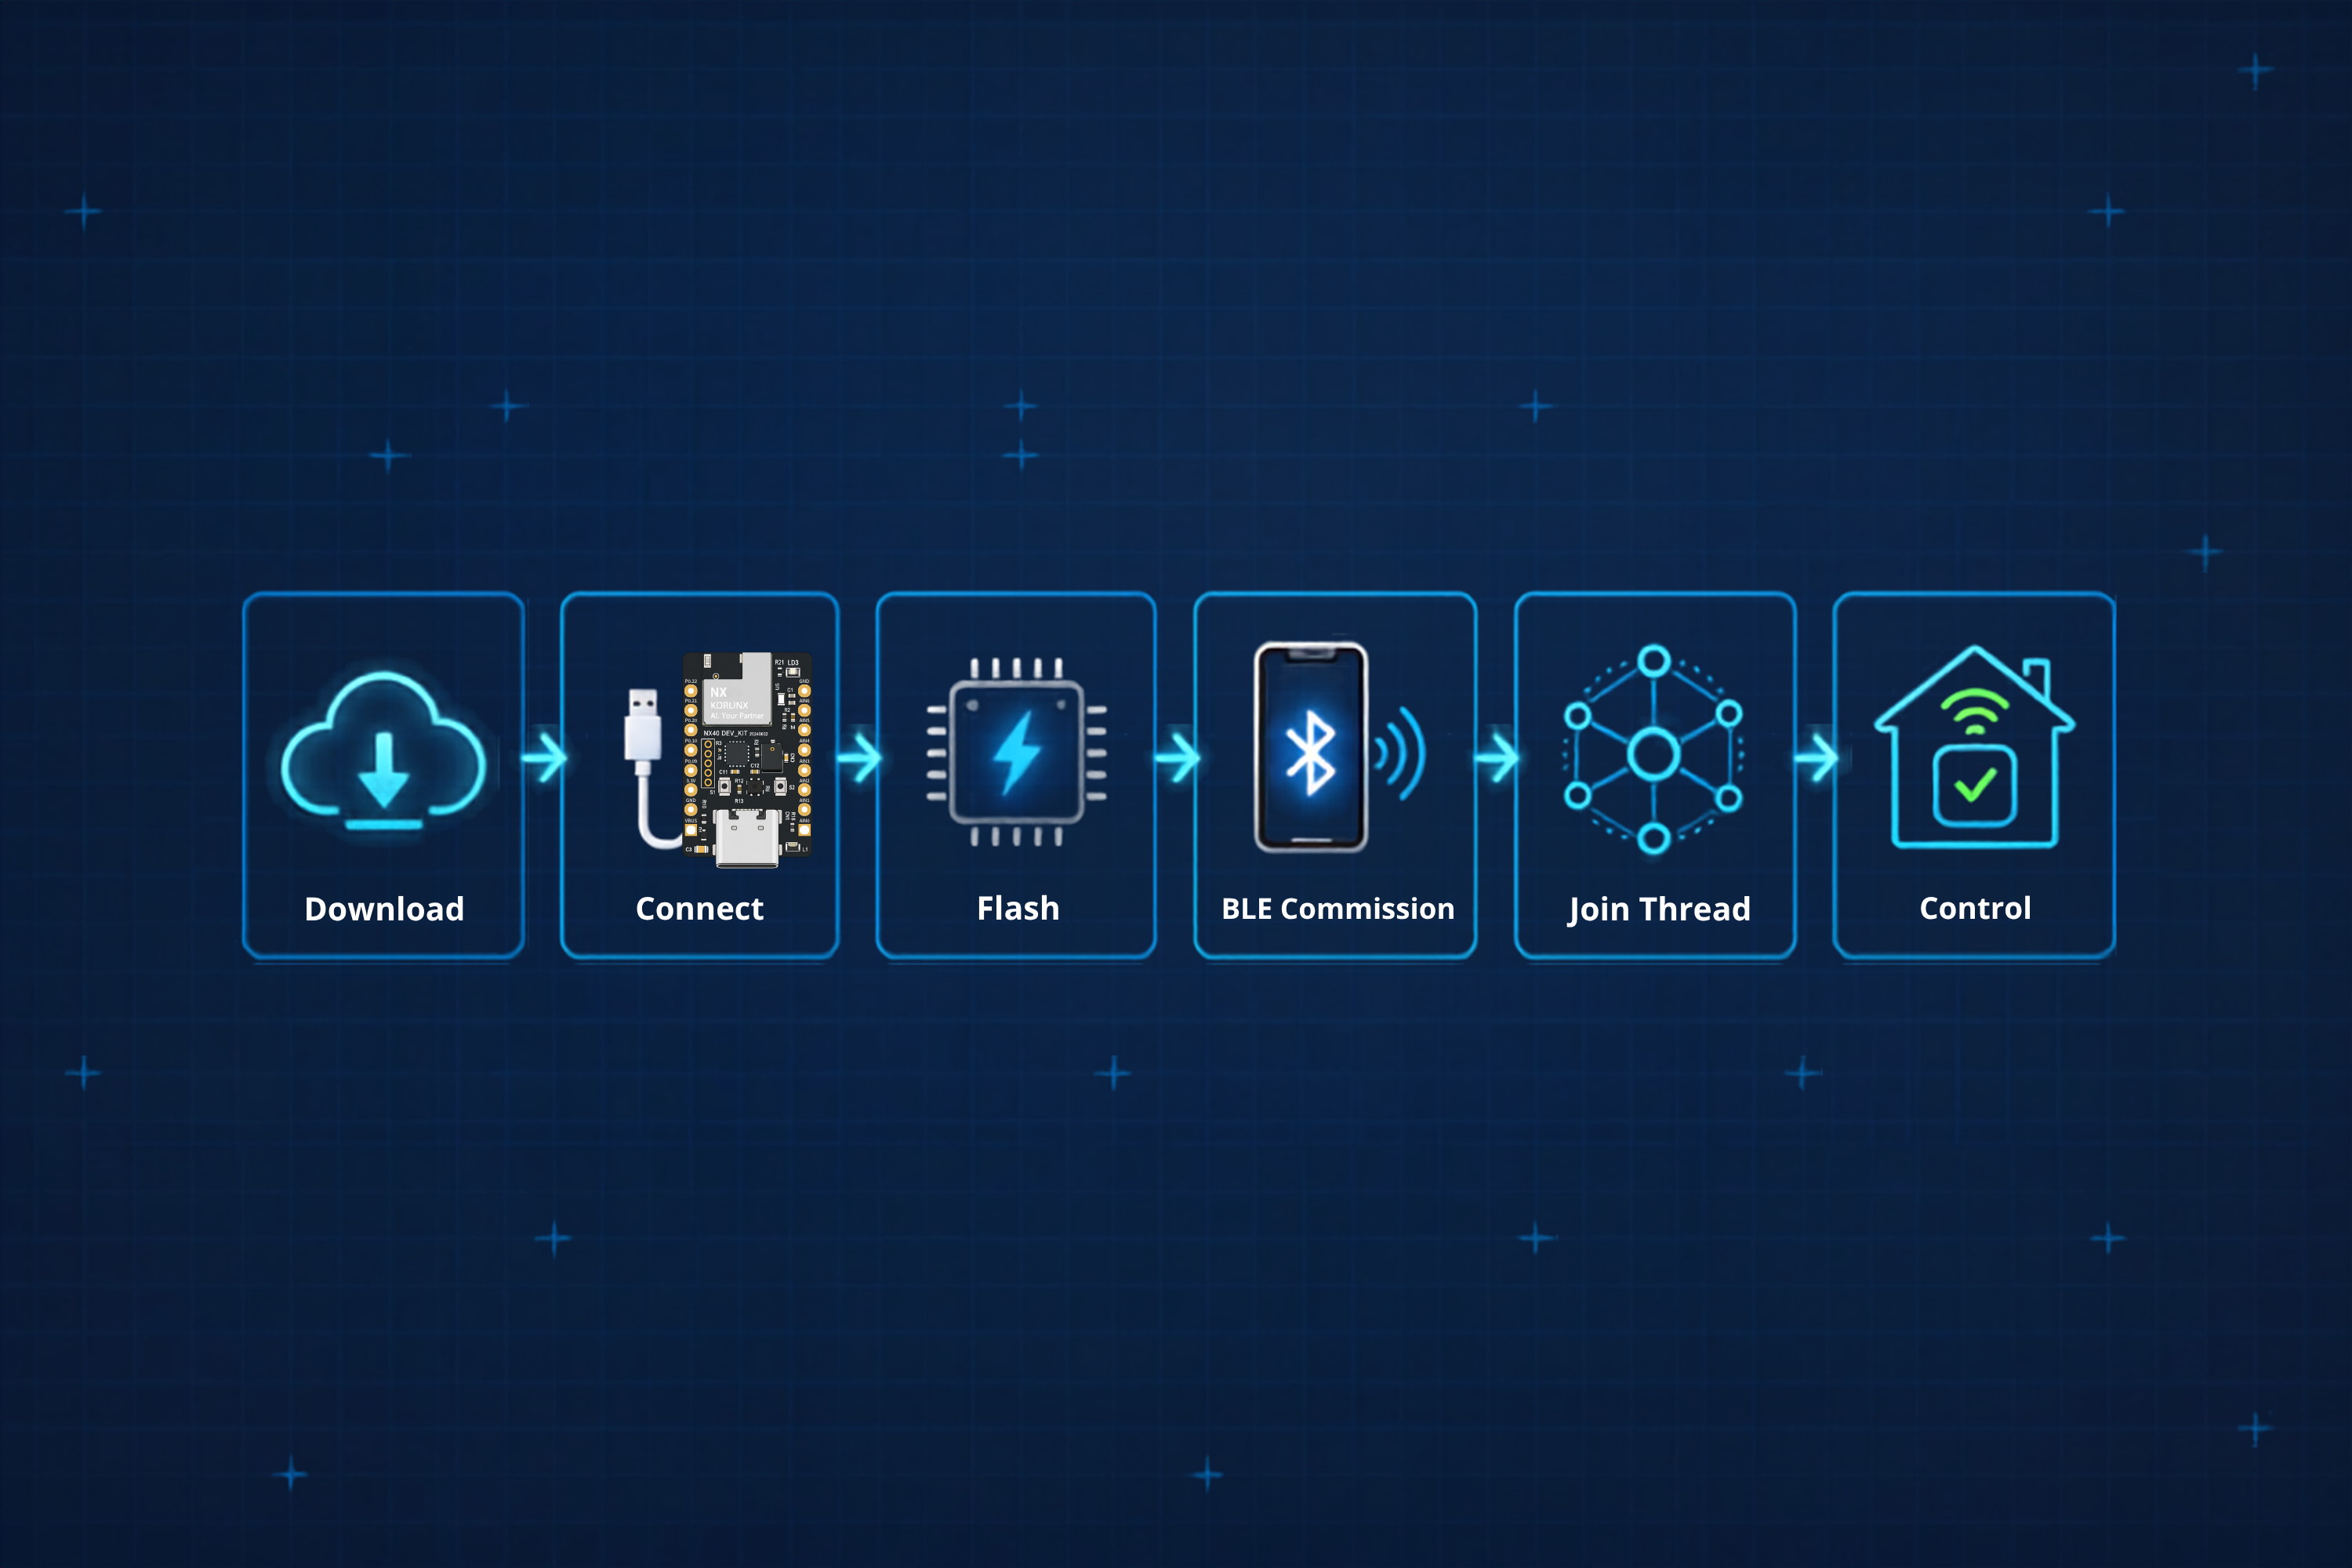
What you will do
- Download the validated Matter sample.
- Connect the NX development board.
- Erase and flash the firmware.
- Confirm Bluetooth Low Energy advertising.
- Commission the device using its QR code or manual pairing code.
- Join the device to Thread.
- Send a Matter command and confirm the device response.
Required hardware
| Item | Requirement |
|---|---|
| NX development platform | [CONFIRM: NX15, NX40, or both] |
| USB cable | Data-capable cable compatible with the selected board |
| Development host | Computer with the environment from the previous tutorial |
| Commissioner/controller | [CONFIRM: Google Home, Apple Home, CHIP Tool, or another tested option] |
| Thread Border Router | Required for the Matter over Thread workflow |
| Local network | The controller and Border Router must be reachable as required by the selected setup |
Required files and information
Before continuing, obtain all items listed below from the KORLINX release location.
| Item | Working placeholder |
|---|---|
| Firmware package | [FIRMWARE_FILE] |
| Firmware version | [FIRMWARE_VERSION] |
| SHA-256 checksum | [SHA256] |
| Supported hardware revision | [HW_REVISION] |
| Setup QR code | [QR_CODE_FILE_OR_URL] |
| Manual pairing code | [MANUAL_PAIRING_CODE] |
| Expected serial settings | [SERIAL_SETTINGS] |
| Expected LED/button behavior | [BOARD_UI_BEHAVIOR] |
Development credentials only Use only the setup code and test credentials supplied with the validated development package. Do not copy credentials from screenshots, third-party tutorials, or another device.
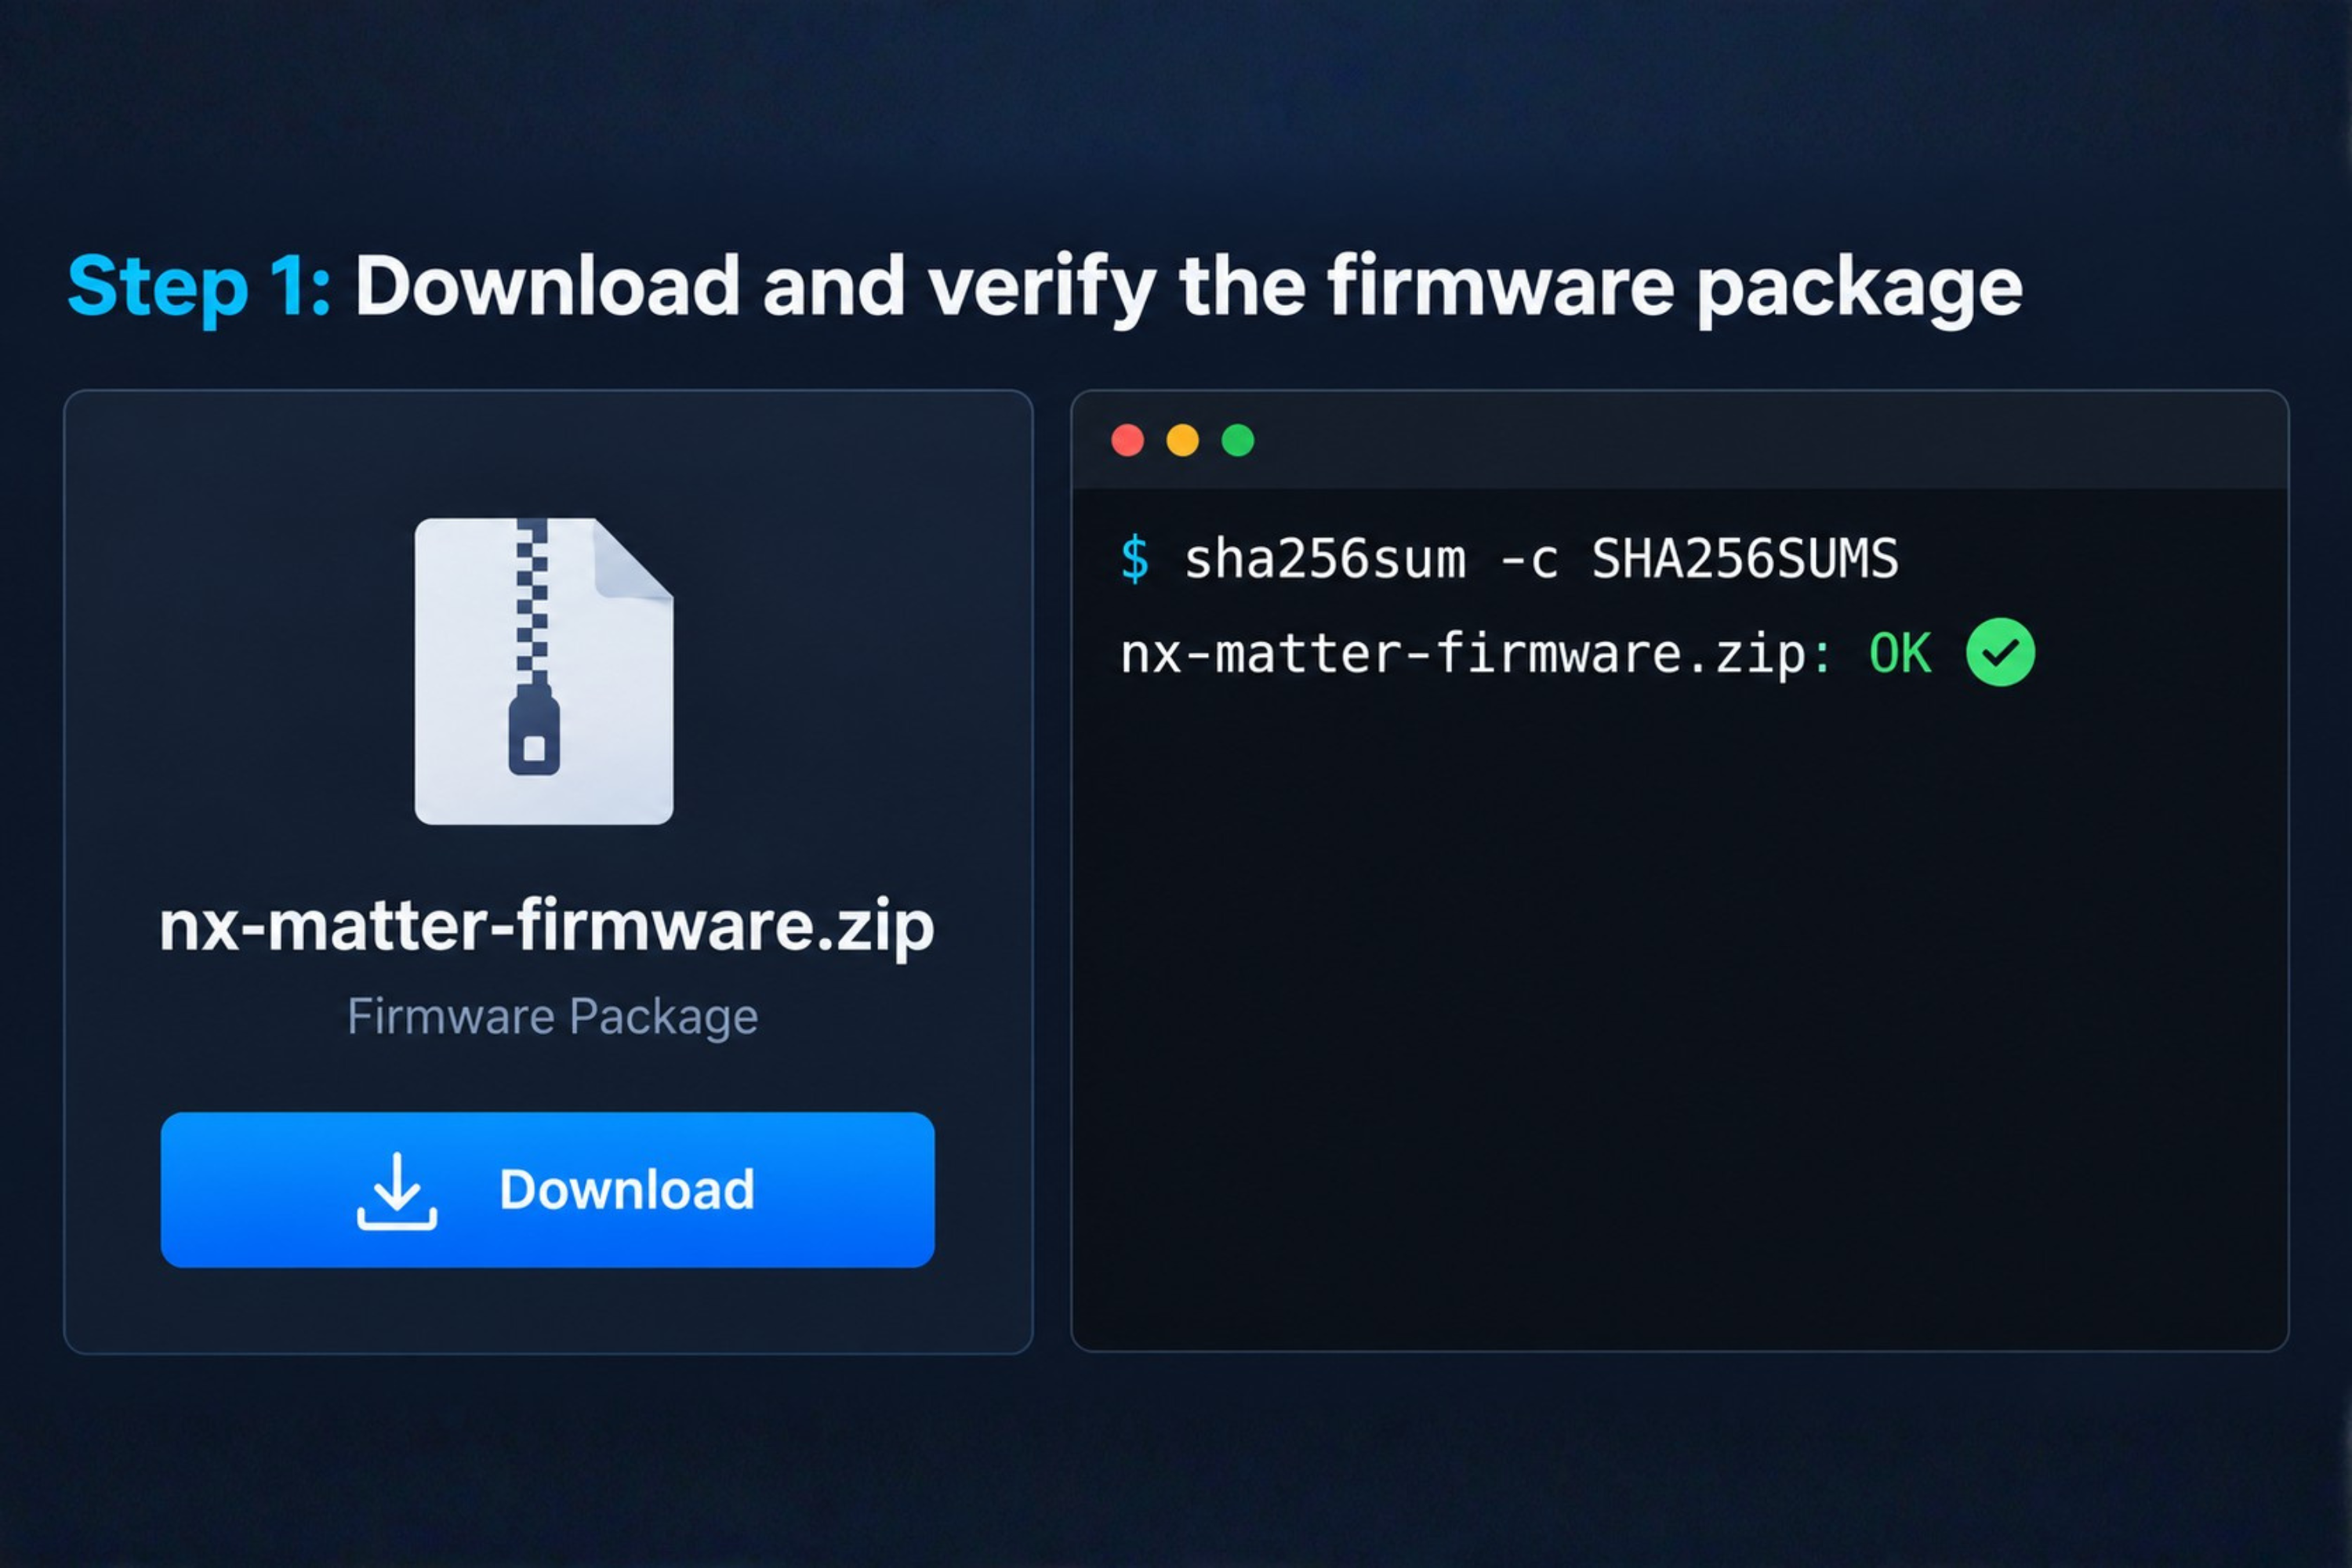
Step 1: Download and verify the firmware package
- Download
[FIRMWARE_FILE]from[KORLINX_RELEASE_URL]. - Confirm that the package supports your NX board and hardware revision.
- Calculate the SHA-256 checksum.
On Linux:
sha256sum [FIRMWARE_FILE]
On macOS:
shasum -a 256 [FIRMWARE_FILE]
On Windows PowerShell:
Get-FileHash [FIRMWARE_FILE] -Algorithm SHA256
- Compare the result with the published checksum.
Do not flash the package if the checksum does not match.
Step 2: Connect the NX development board
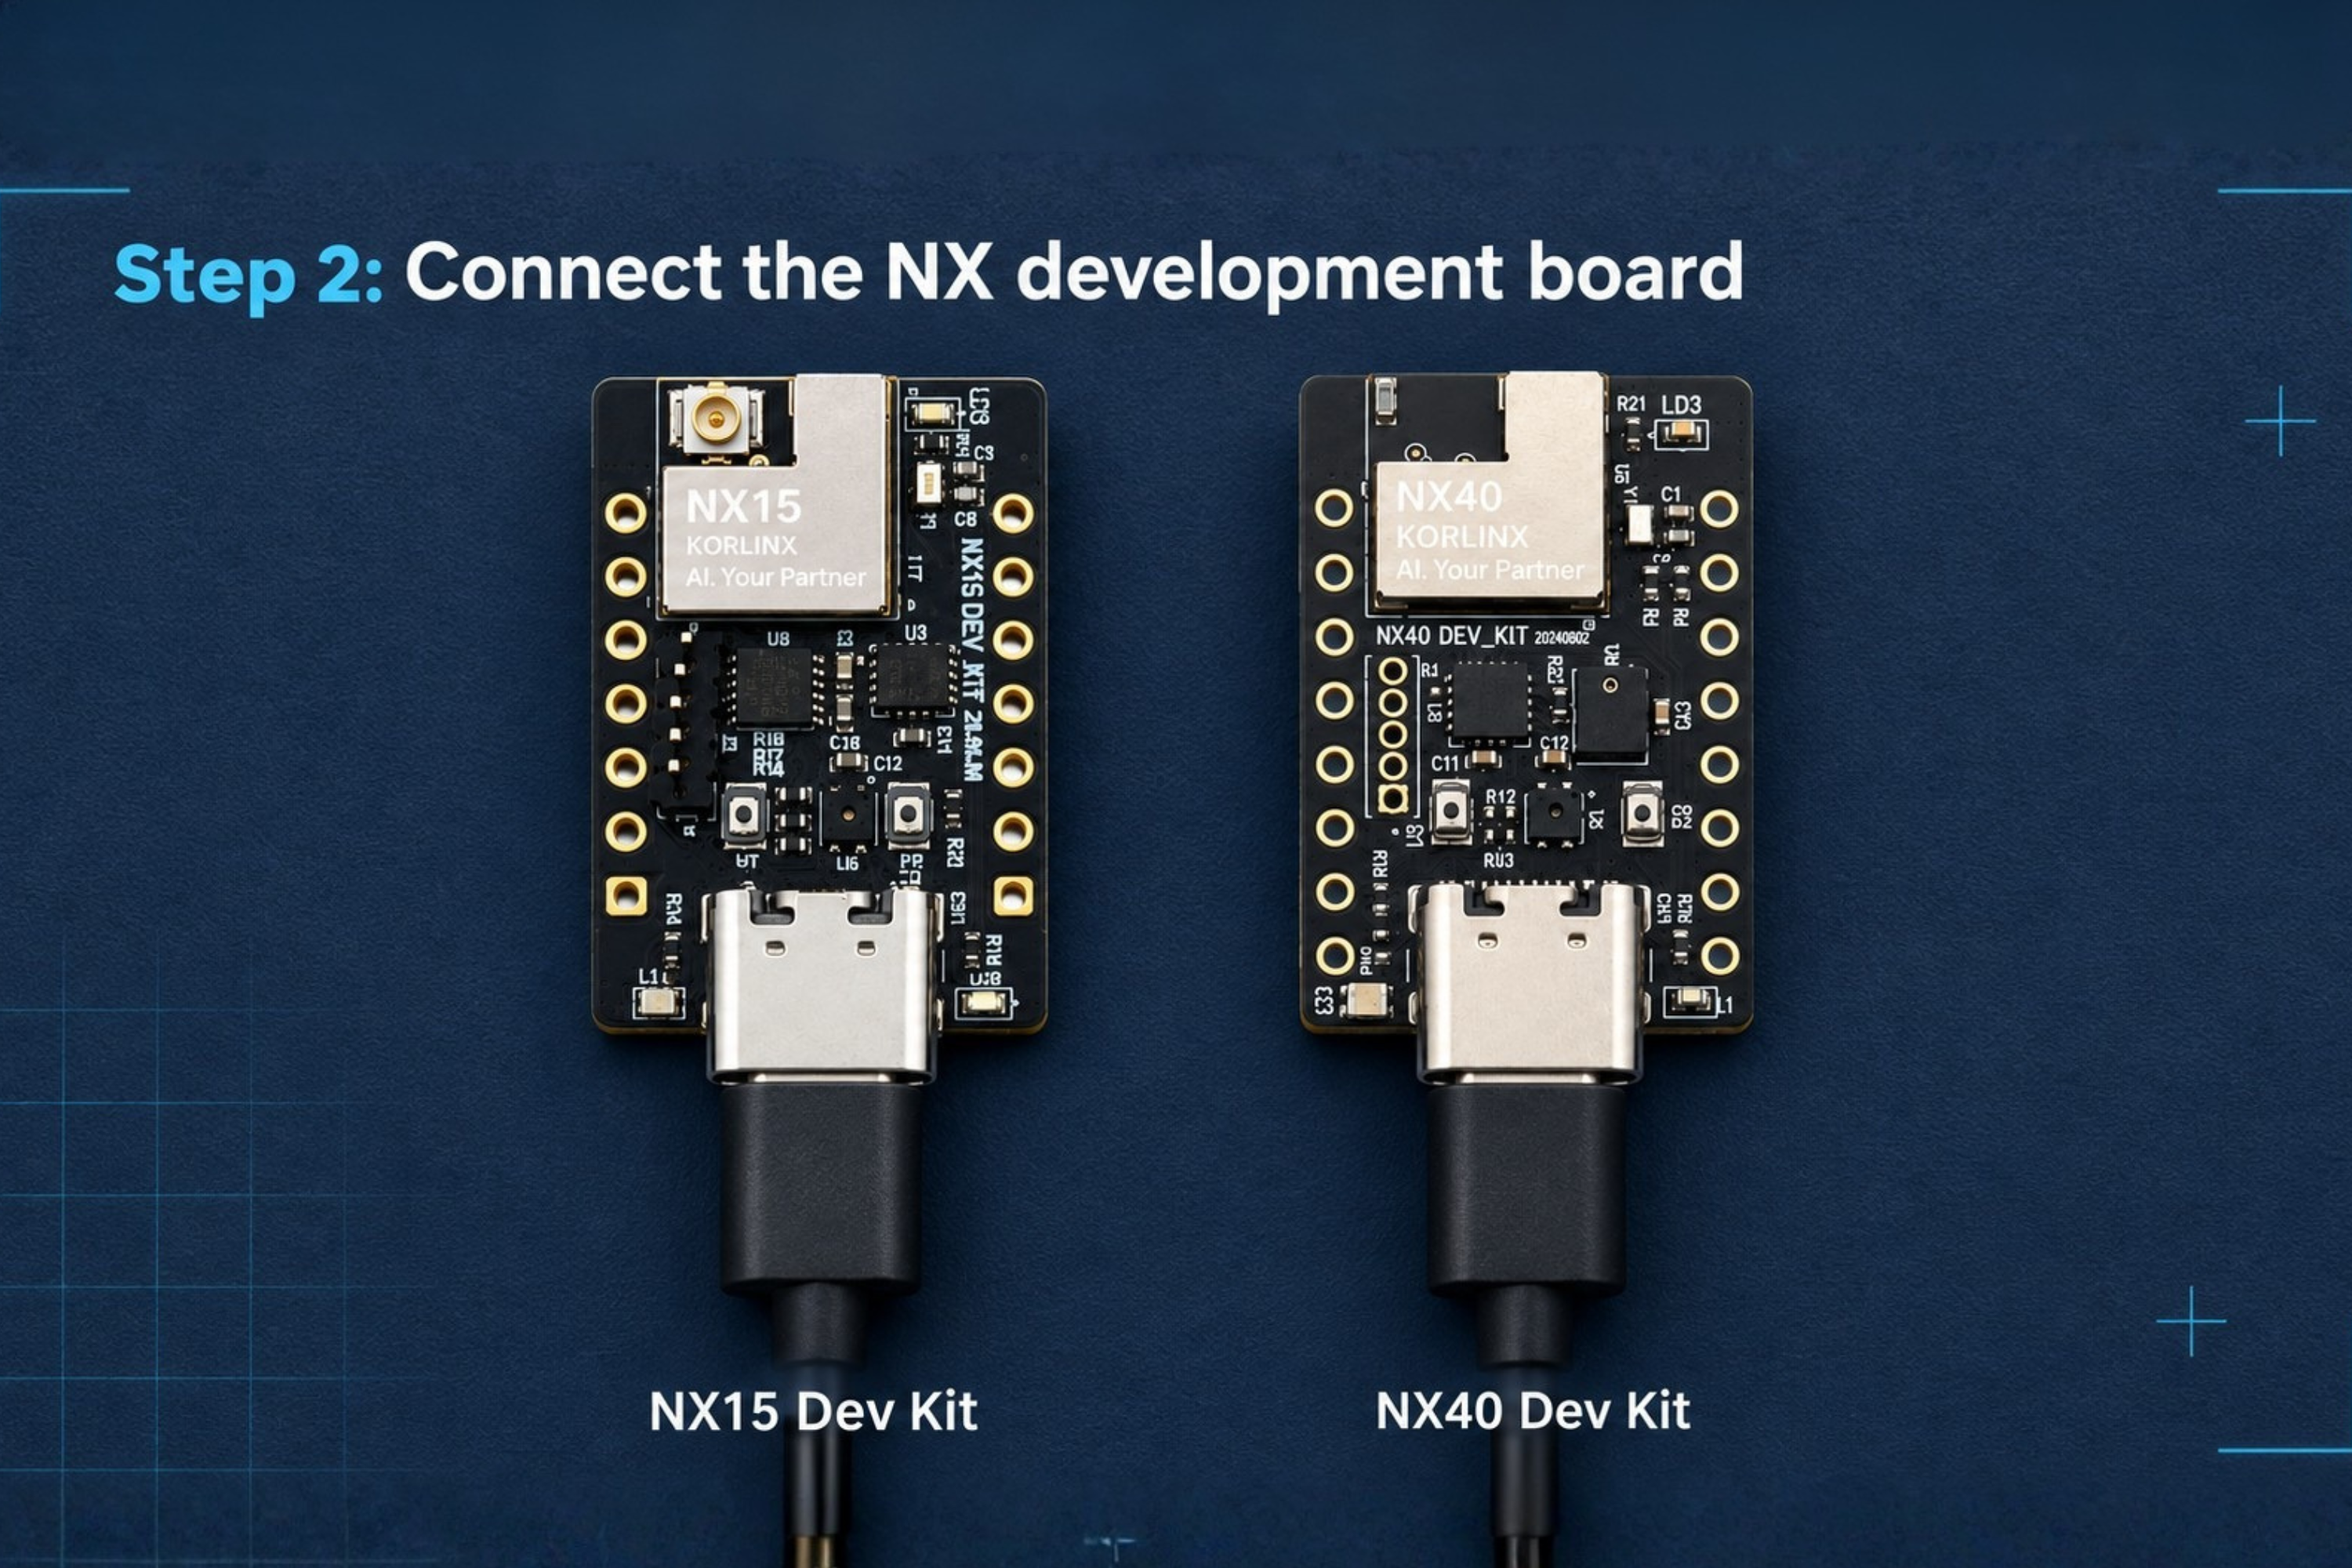
- Disconnect external loads that are not required by the sample.
- Connect the board to the development host using the approved USB or debug connection.
- Open an SDK terminal.
- Confirm that the device is detected:
nrfutil device list
- Record the device identifier and serial port.
Step 3: Erase and flash the prebuilt firmware
Use the validated KORLINX programming method.
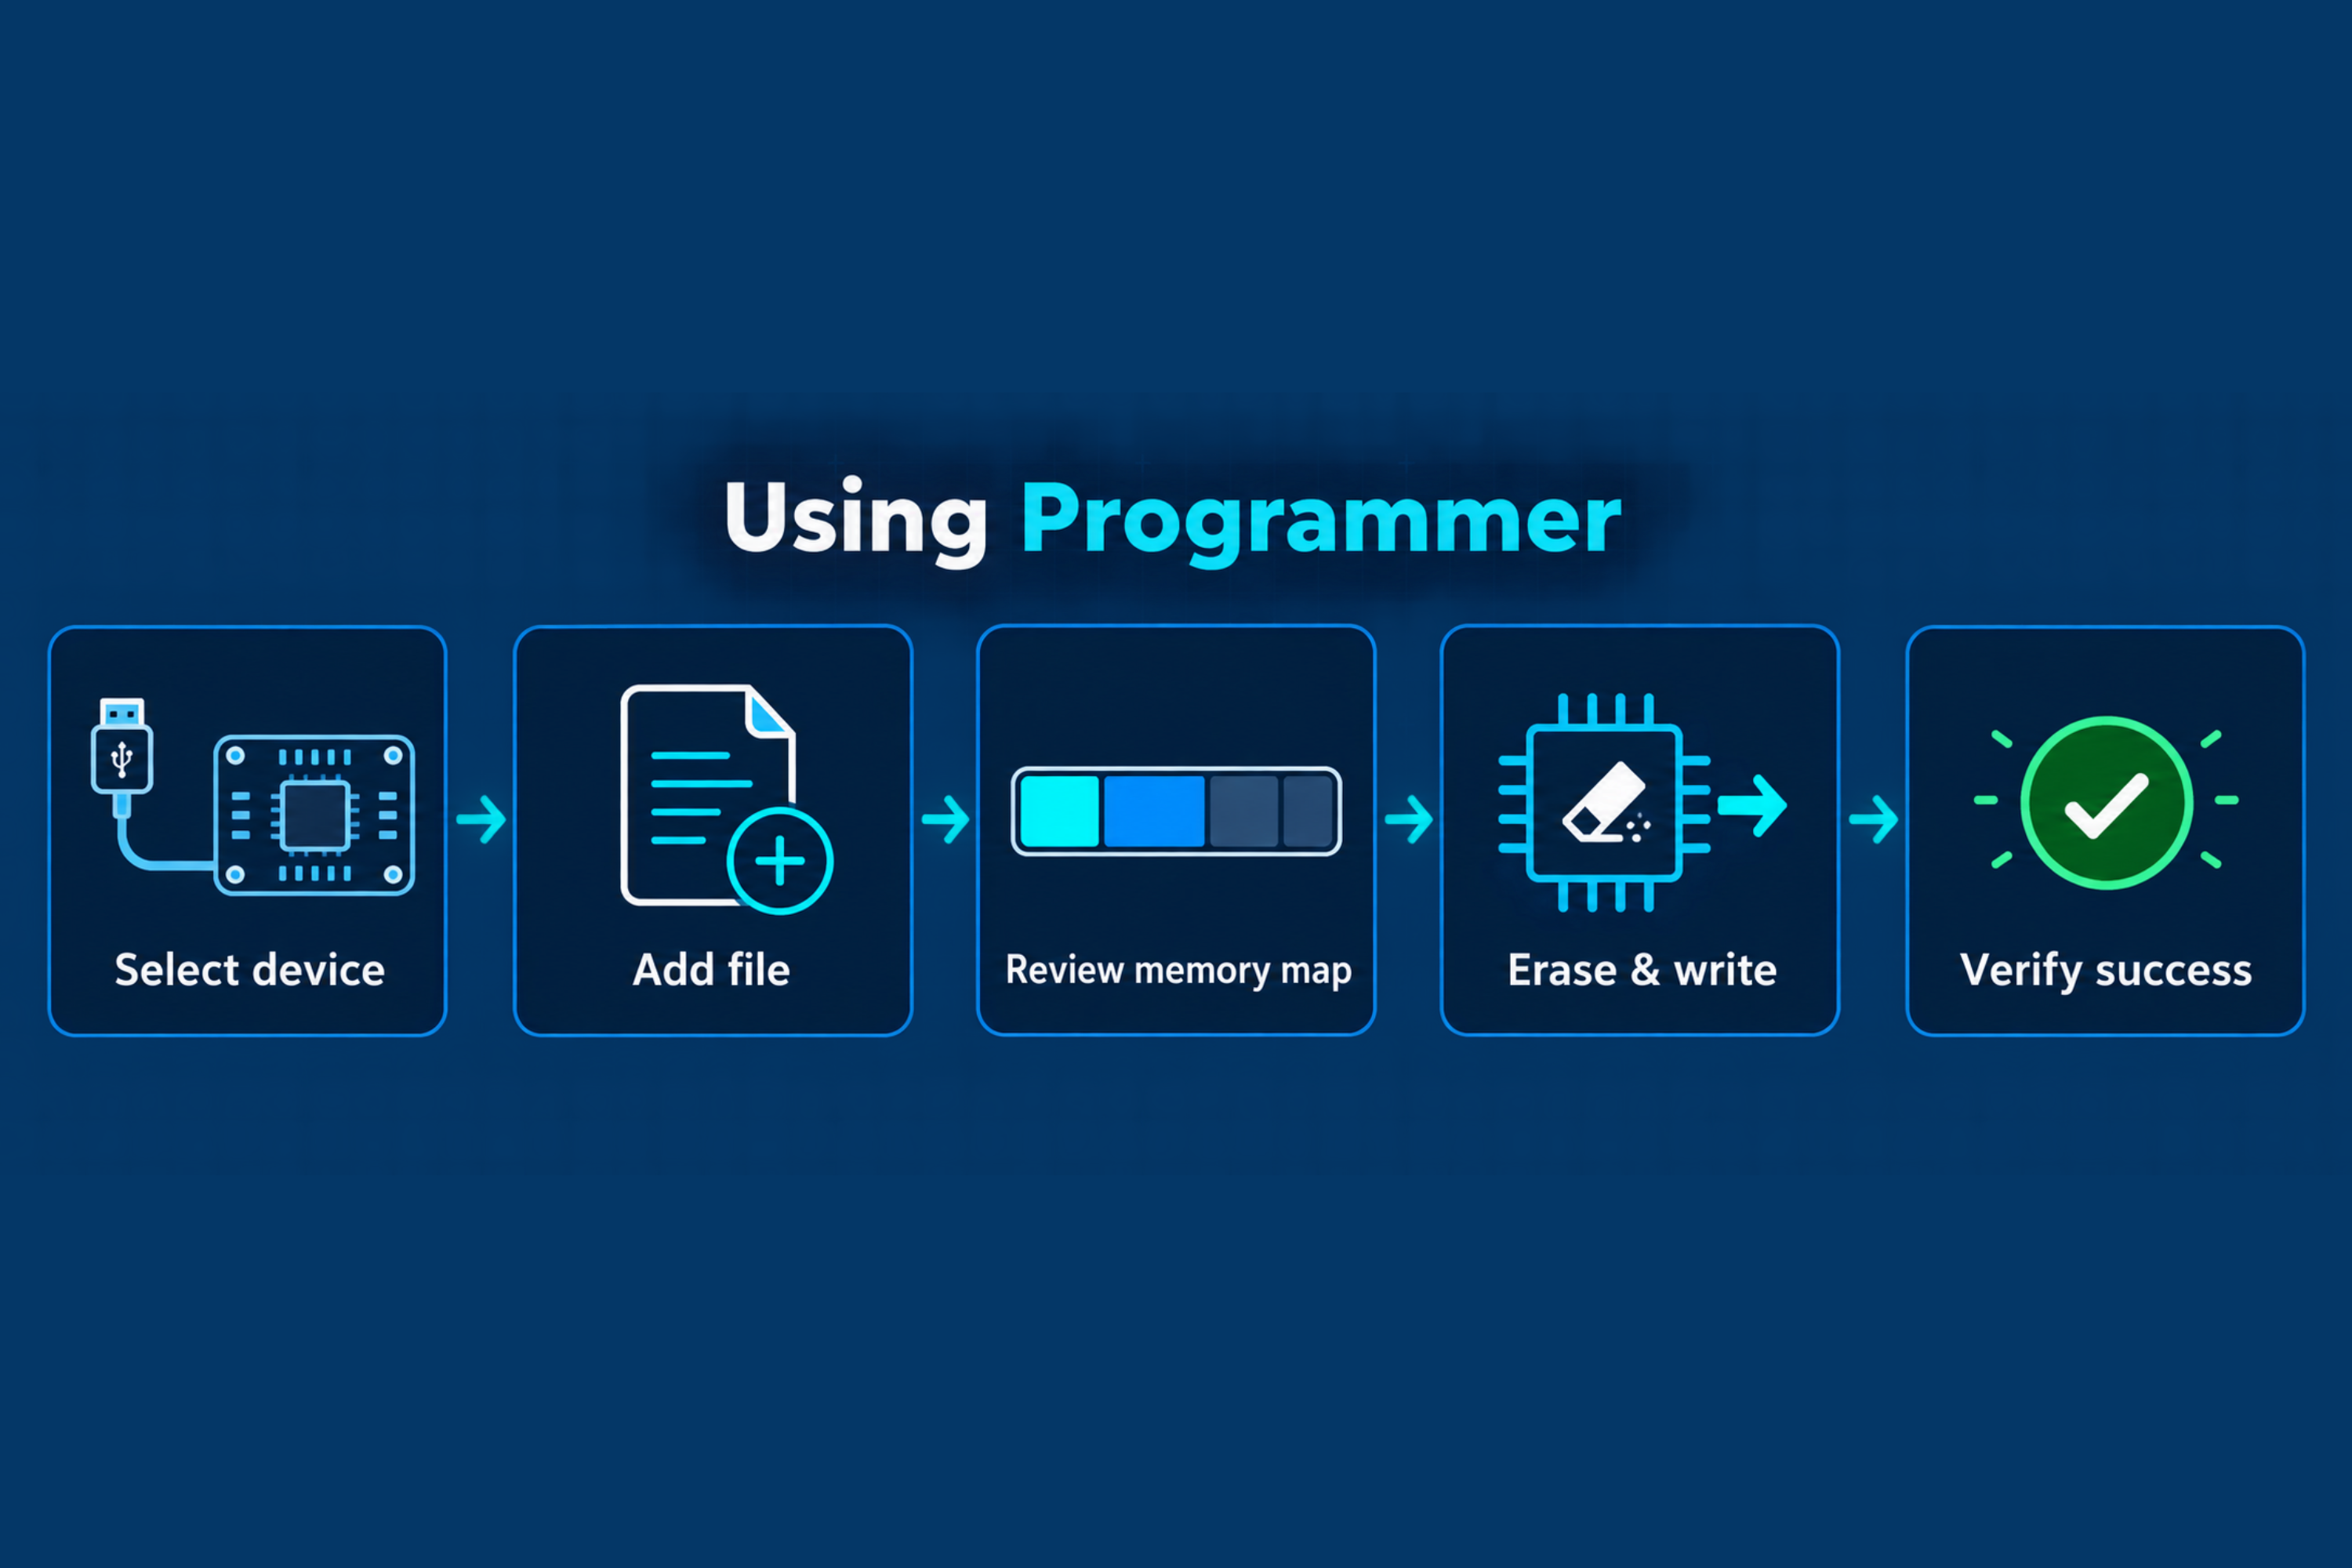
Using Programmer
- Open Programmer in nRF Connect for Desktop.
- Select the connected device.
- Select Add file and open
[FIRMWARE_FILE]. - Confirm that the memory layout is accepted.
- Select the approved erase option.
- Select Write or Erase and Write.
- Wait for the programming and verification steps to complete.
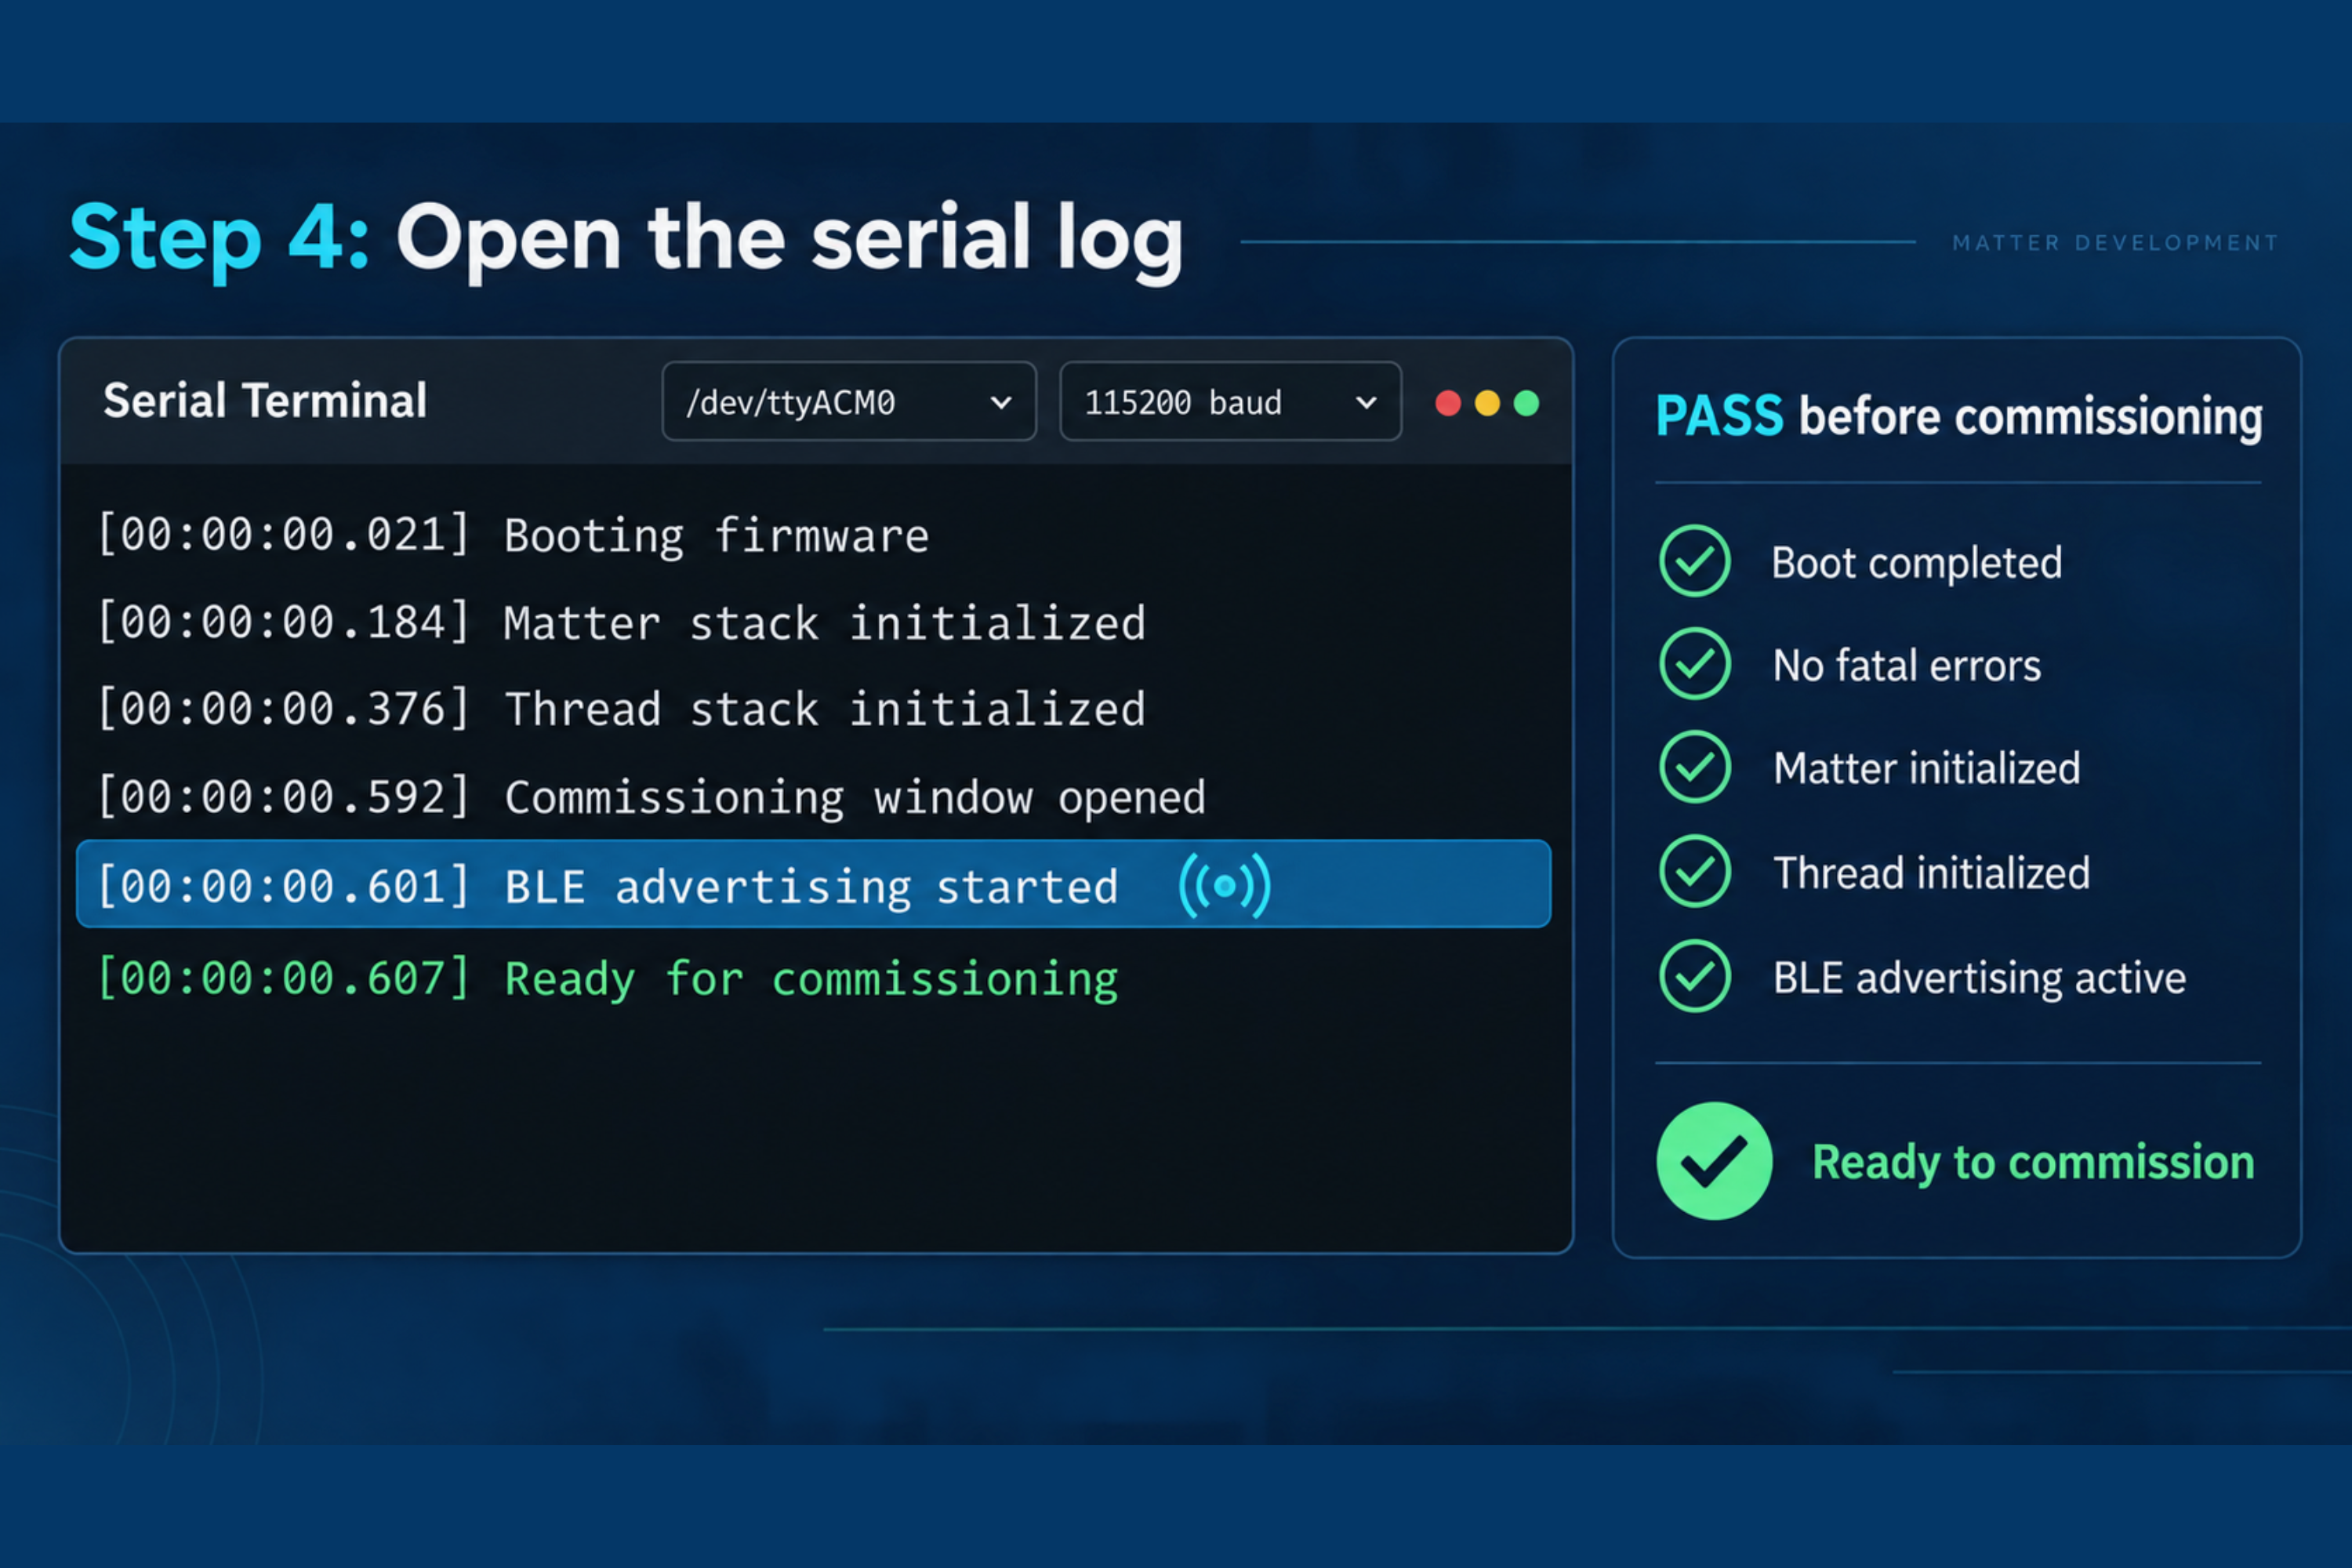
Step 4: Open the serial log
- Open the validated serial terminal.
- Select the recorded serial port.
- Apply
[SERIAL_SETTINGS]. - Reset the board.
- Confirm that the expected Matter sample log appears.
The pass condition must include a KORLINX-approved log message such as:
[EXPECTED_UNCOMMISSIONED_OR_ADVERTISING_LOG]
Step 5: Confirm the commissioning window
After startup, the sample should enter a commissionable state and advertise over Bluetooth Low Energy for a limited period.
Confirm the state using the approved LED behavior or serial log.
If the commissioning window has closed, use the validated button action or reset procedure to open it again.
Commissioning action: [CONFIRM_BUTTON_OR_RESET_ACTION]
Advertising duration: [CONFIRM_DURATION]
Expected LED state: [CONFIRM_LED_PATTERN]
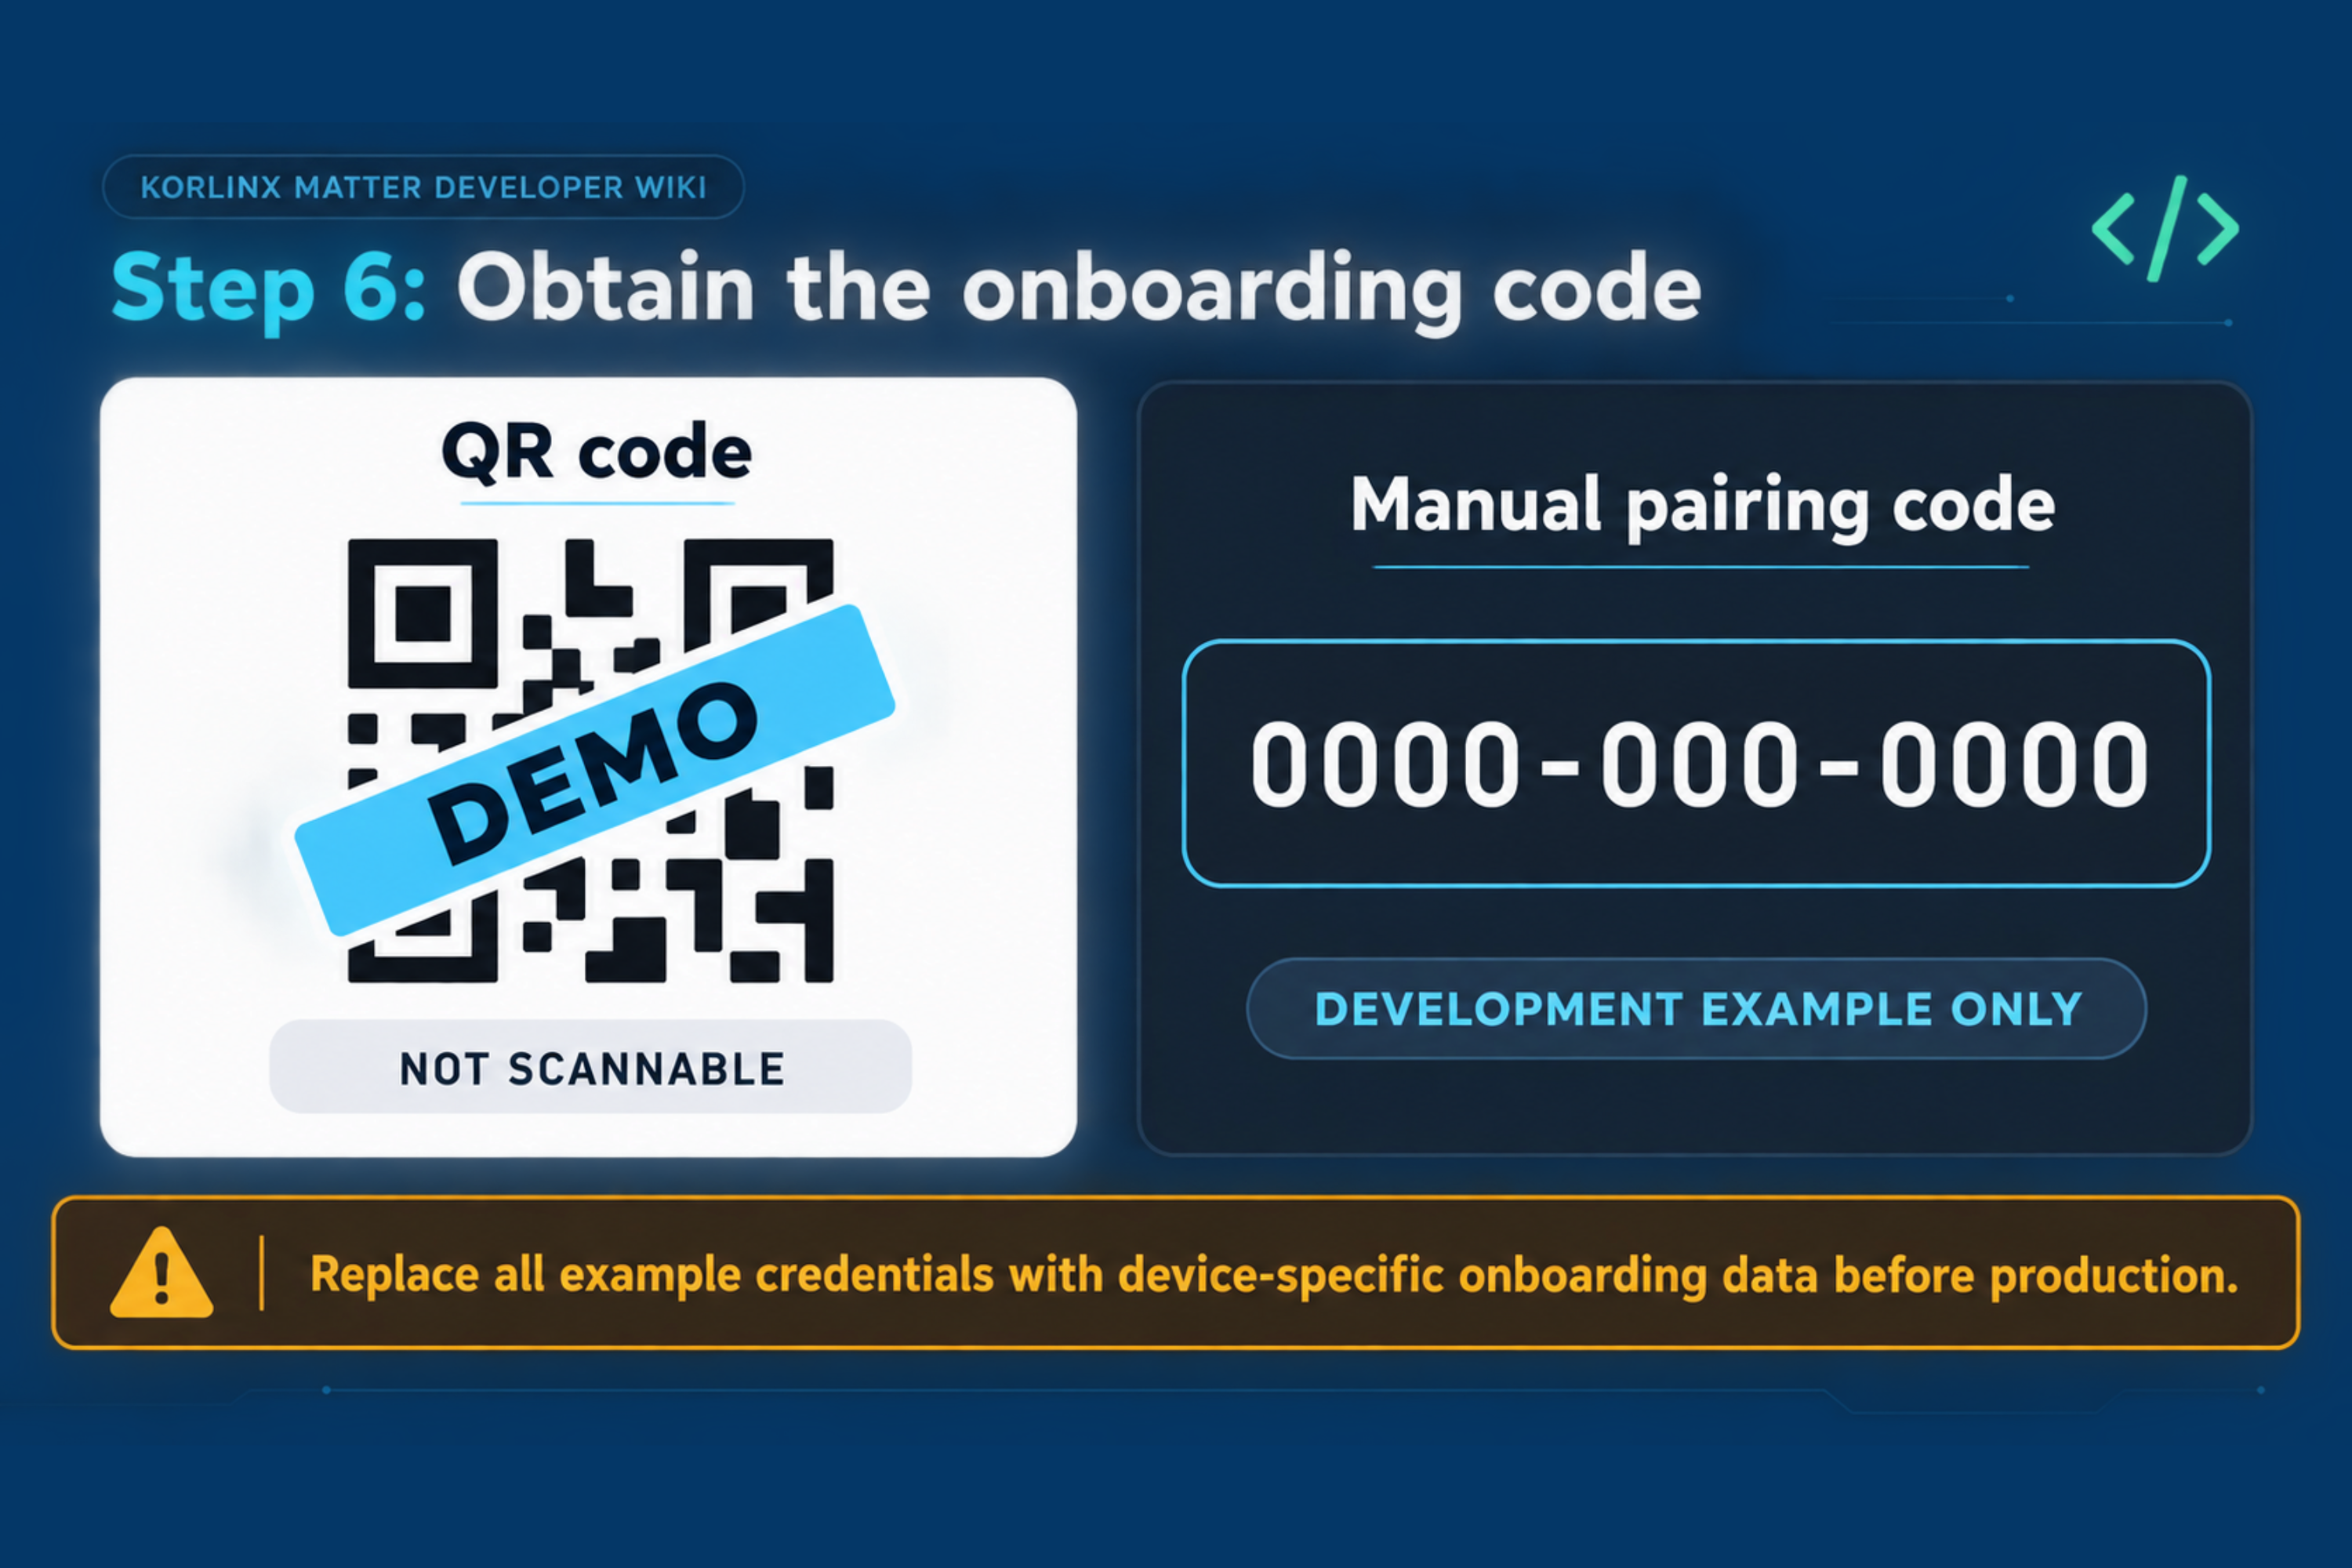
Step 6: Obtain the onboarding code
Use one of the following values supplied with the validated firmware package:
- Matter setup QR code
- Manual pairing code
- Pairing payload displayed in the approved serial log
Do not publish a shared development passcode as if it were suitable for production.
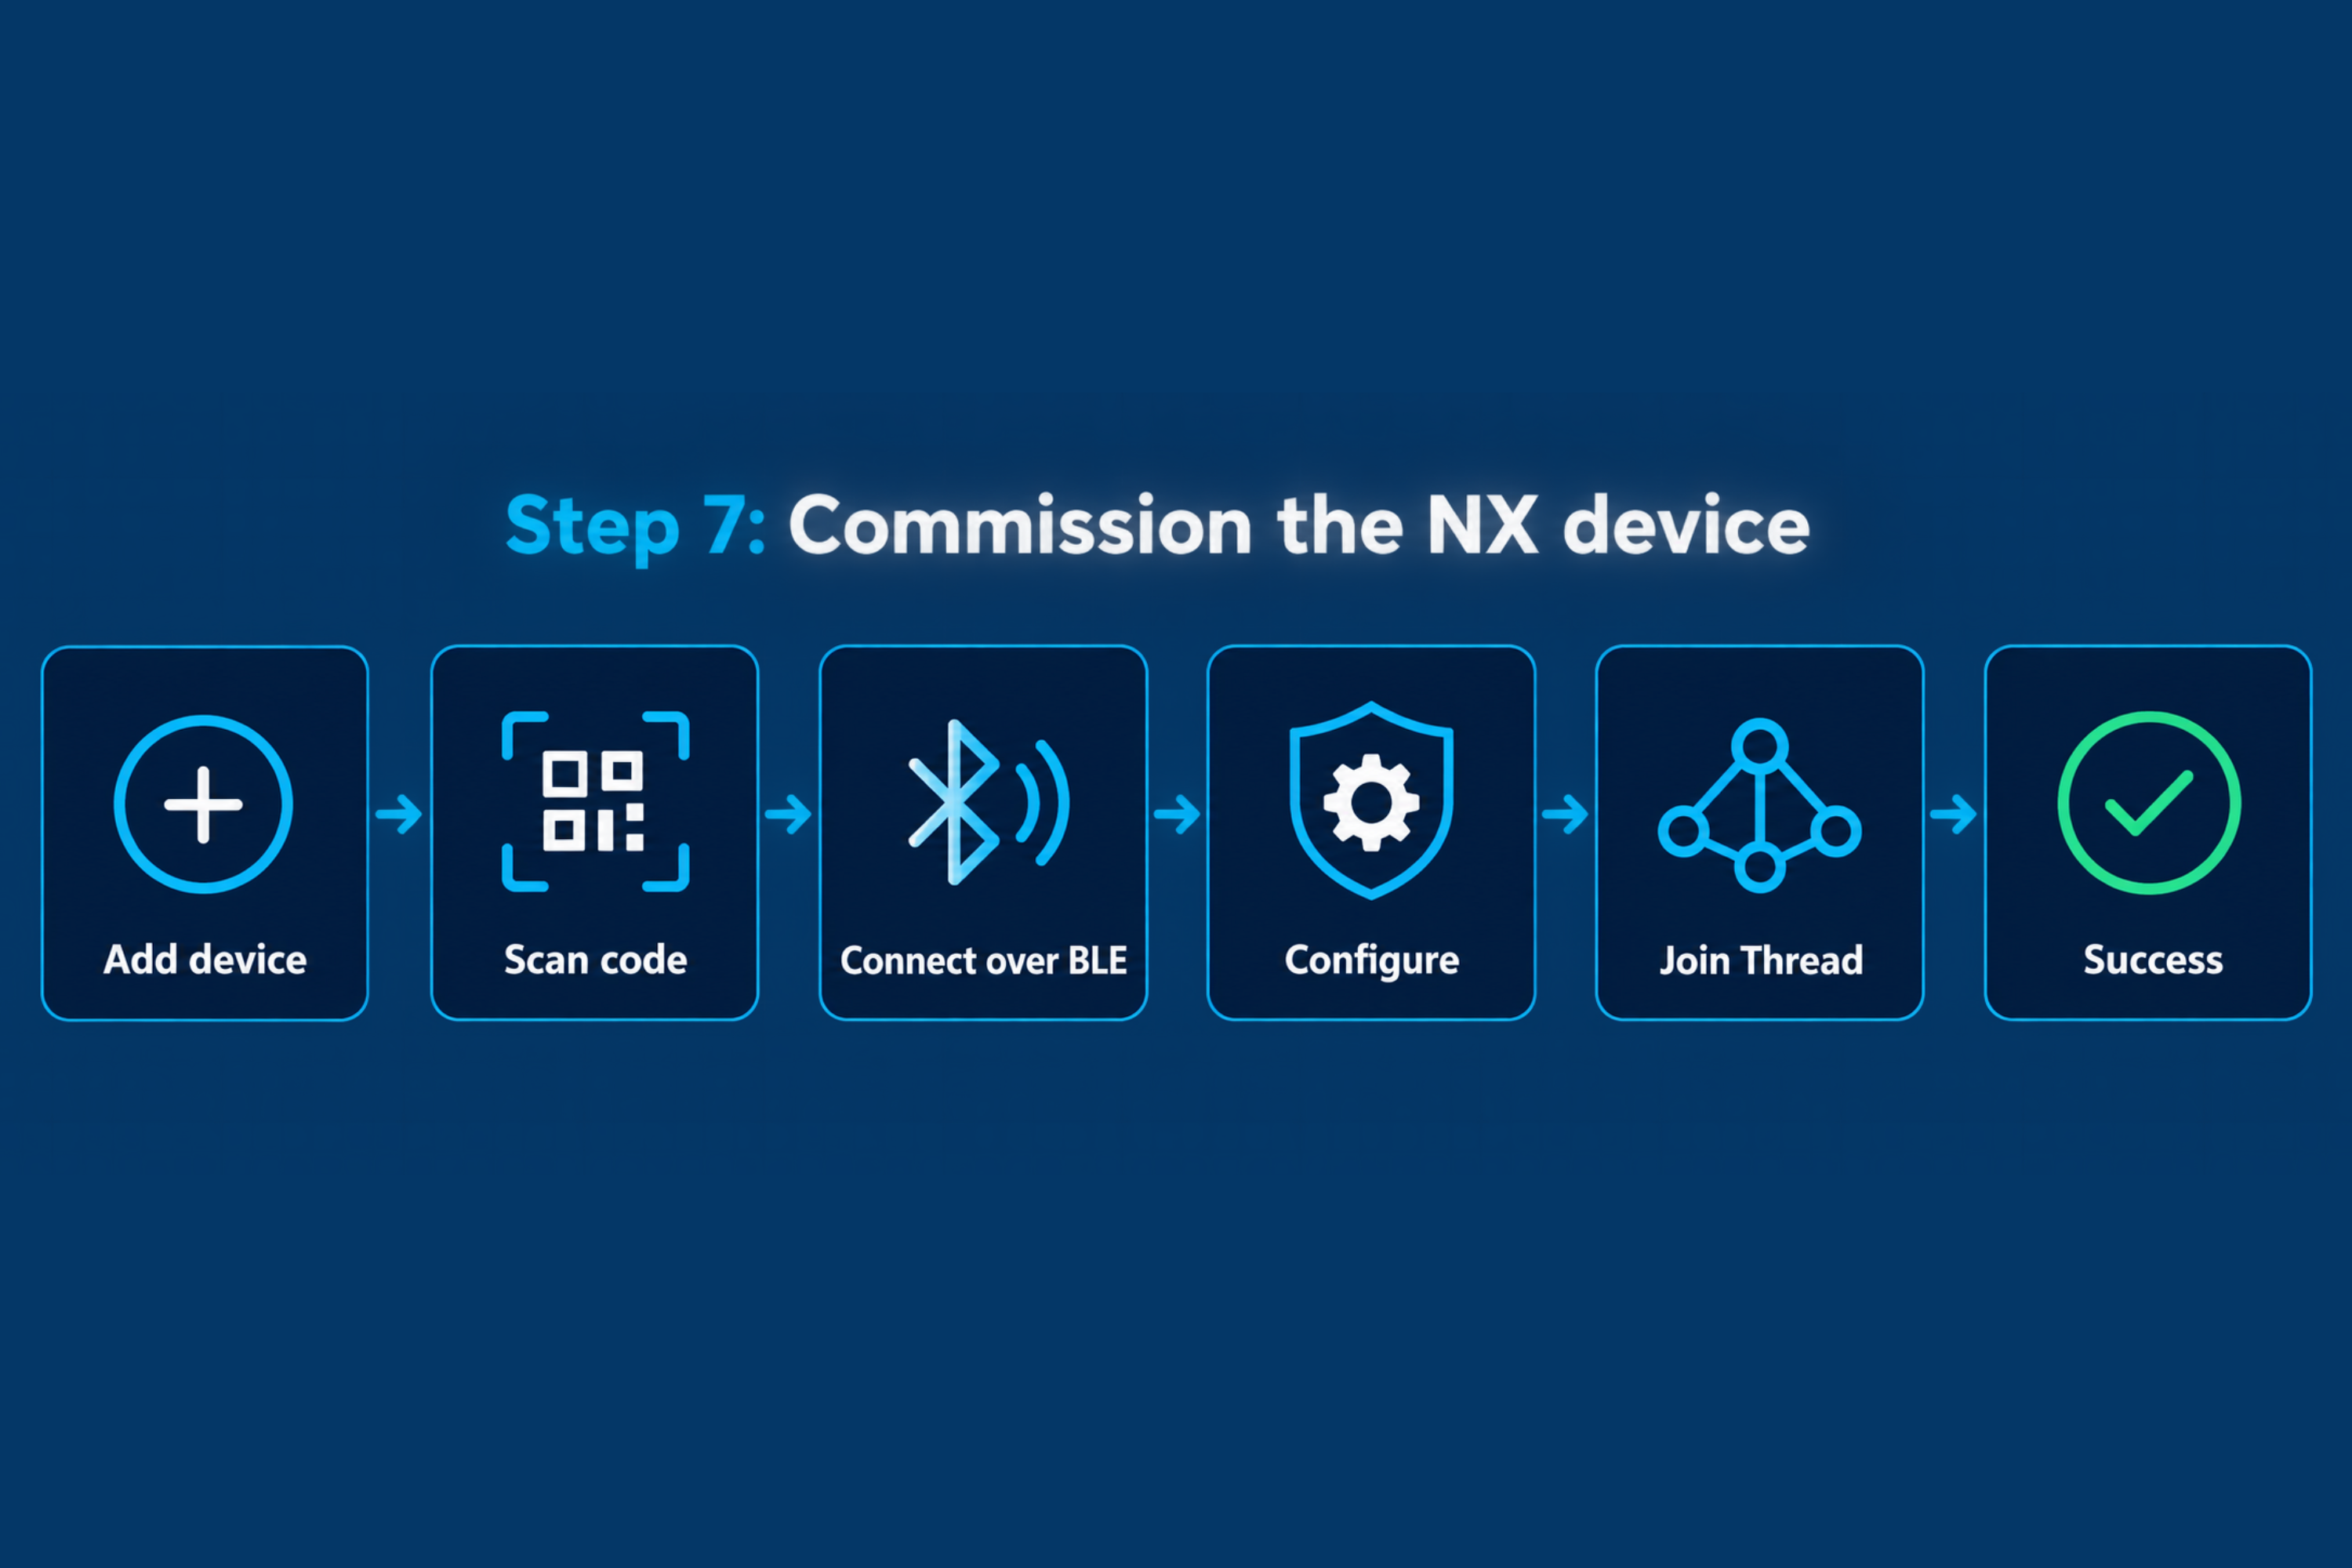
Step 7: Commission the NX device
The exact screens depend on the validated commissioner. The required flow is:
- Open the selected Matter commissioner application.
- Choose Add device or the equivalent command.
- Scan the QR code or enter the manual pairing code.
- Keep the NX device close enough for the Bluetooth Low Energy commissioning connection.
- Select or confirm the target Matter fabric.
- Allow the commissioner to transfer the Thread Operational Dataset.
- Wait until the device joins the Thread network.
- Assign the device name and room if the application requests them.
:::note Bluetooth Low Energy and Thread Bluetooth Low Energy is used to open and complete the commissioning session. After commissioning, normal Matter application commands in this workflow use IPv6 over Thread. :::
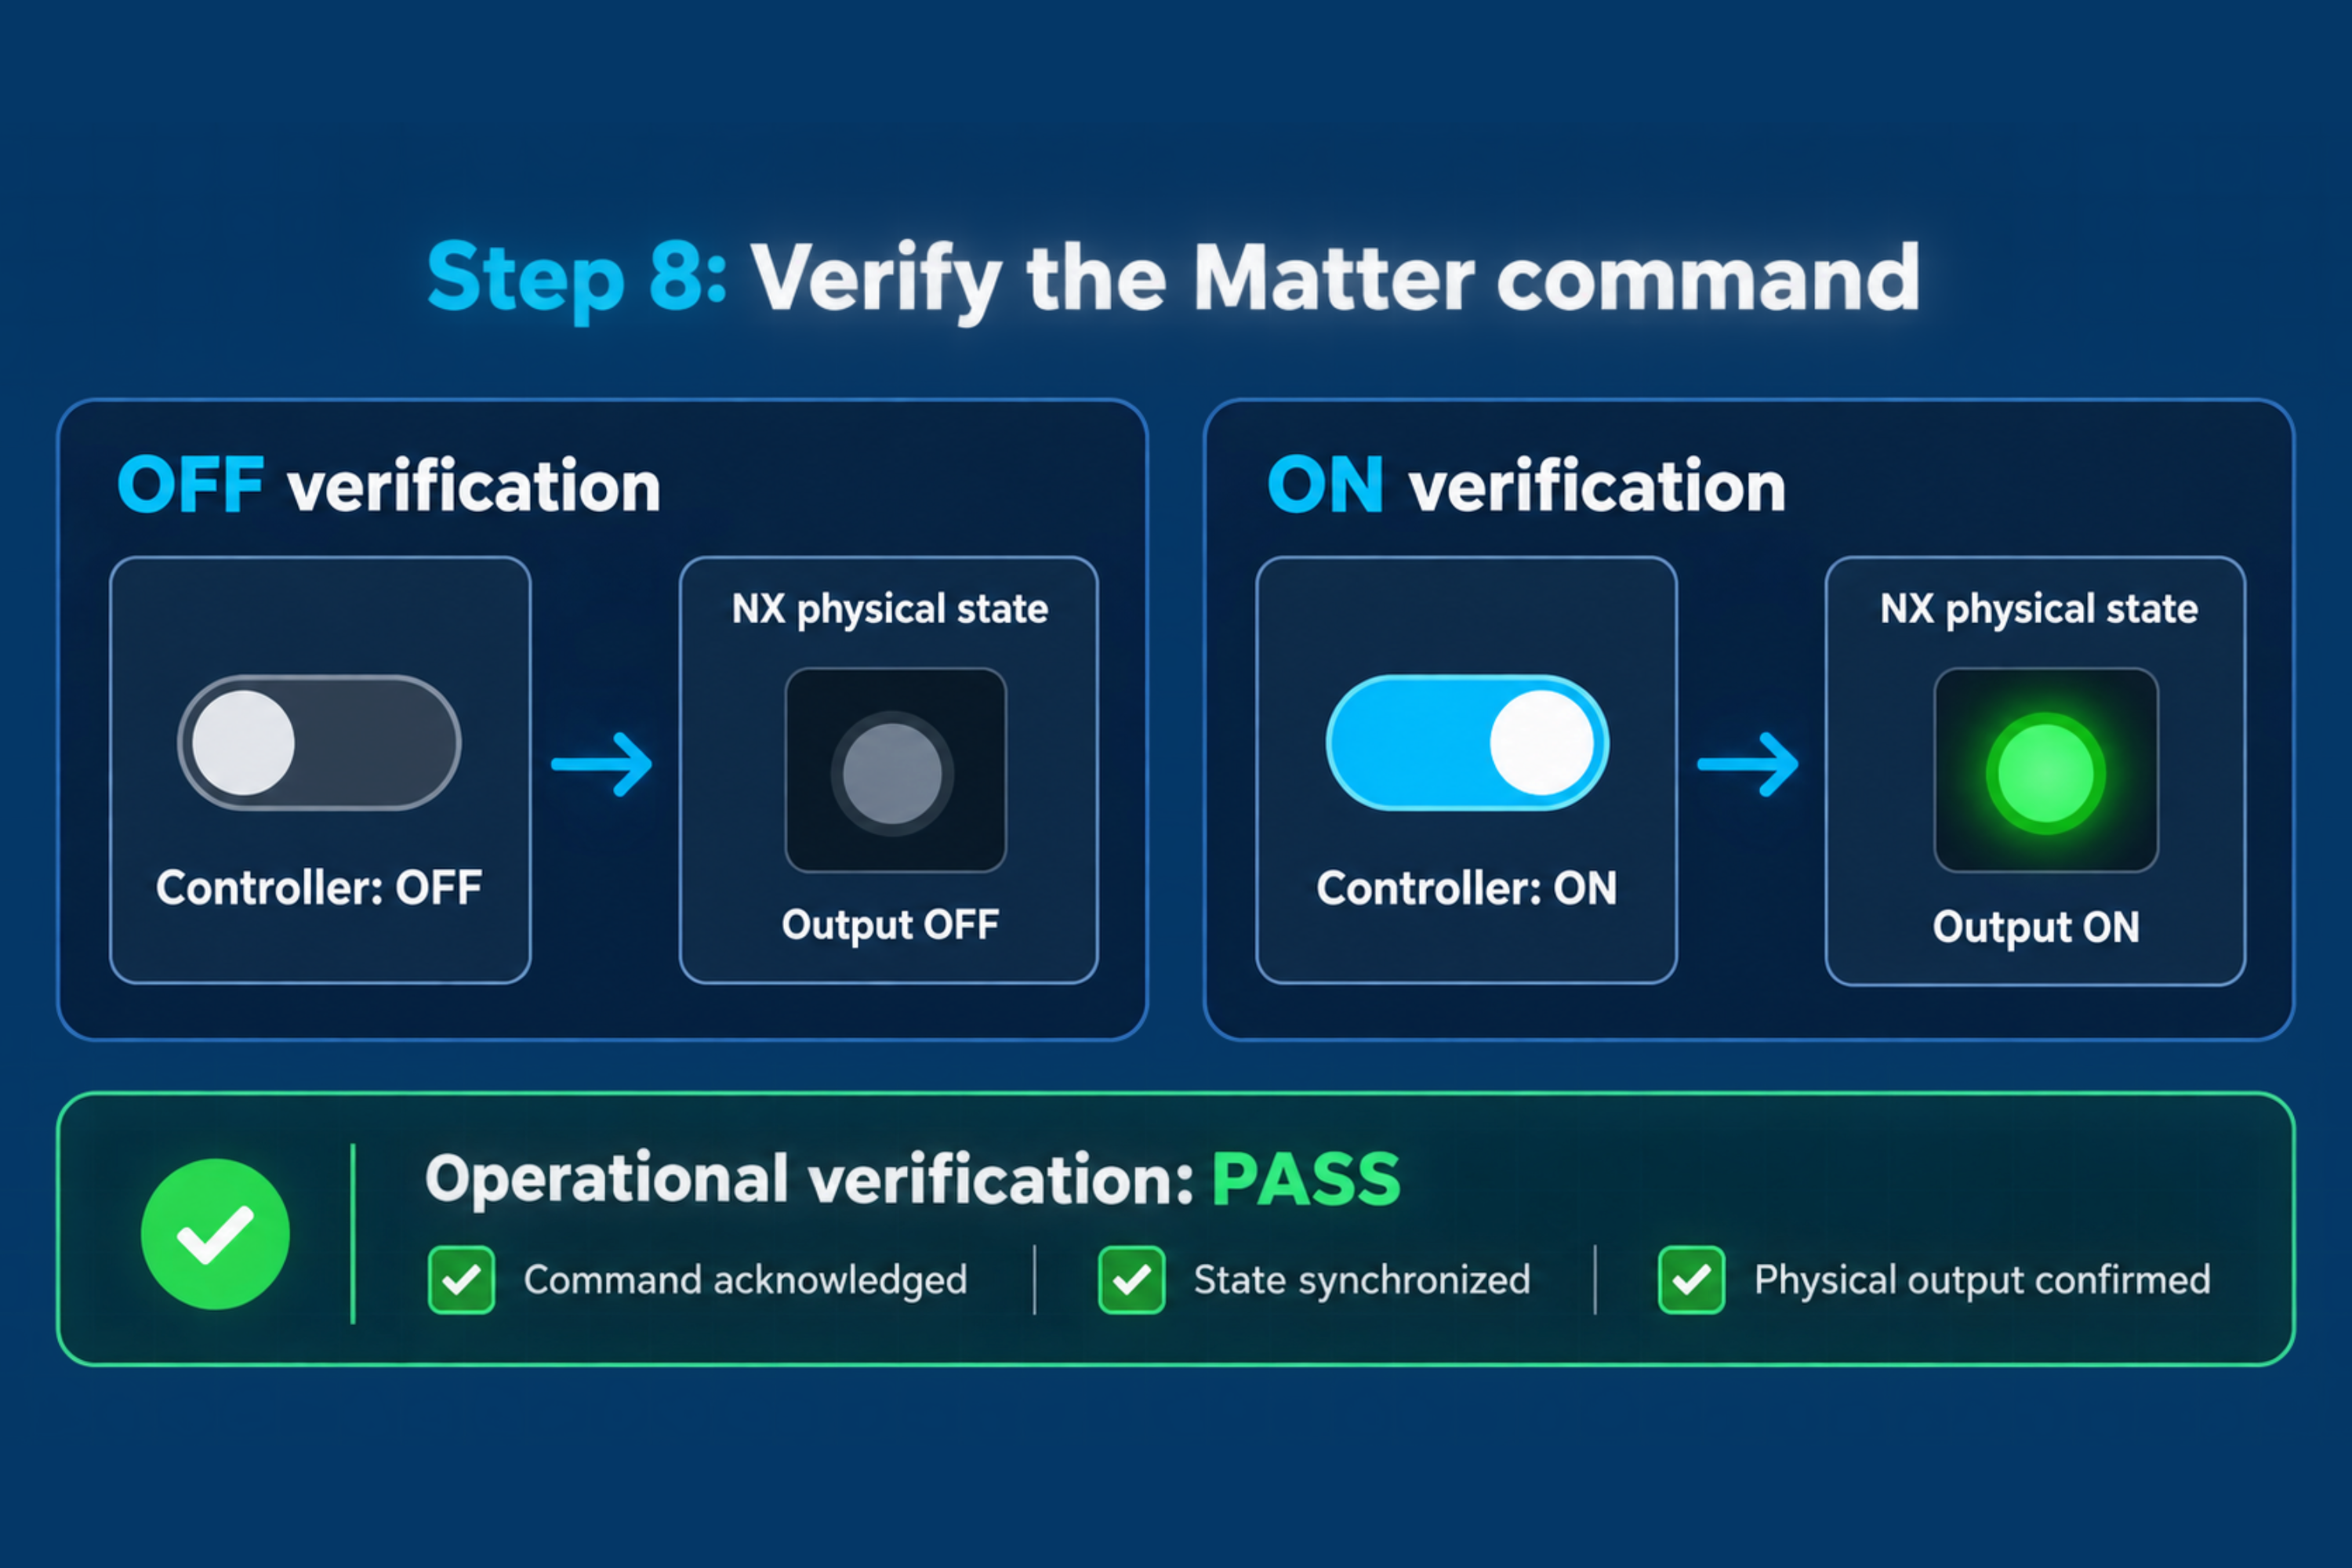
Step 8: Verify the Matter command
Open the commissioned device in the selected controller and perform the function implemented by the sample.
For a light sample:
- Send On.
- Confirm that the assigned LED or load turns on.
- Send Off.
- Confirm that the assigned LED or load turns off.
- Check the serial log for the corresponding application event.
Expected result
The Quick Start is complete when:
- The validated firmware is programmed successfully.
- The device opens a Bluetooth Low Energy commissioning window.
- The commissioner accepts the onboarding code.
- The device joins the selected Thread network.
- The device appears in the Matter controller.
- The sample responds to the expected Matter command.
- The serial log shows the expected commissioned and operational state.
Troubleshooting
| Problem | Action |
|---|---|
| Firmware checksum does not match | Download the package again and confirm that the correct board variant was selected. |
| Programmer cannot detect the board | Check the cable, power, debugger connection, USB permissions, and device selection. |
| No Bluetooth Low Energy advertisement is found | Reset the board or use the validated action to reopen the commissioning window. |
| QR code is rejected | Confirm that the QR code belongs to the exact firmware instance and that the device has been reset to the expected state. |
| Commissioning stops while configuring Thread | Confirm the Thread Border Router, dataset, local network, and controller compatibility. |
| Device was already commissioned | Remove it from the previous fabric or perform the validated factory-reset procedure. |
| Matter command has no physical effect | Confirm the correct device type, endpoint, LED mapping, and sample firmware. |
Developer reference keywords
Matter commissioning windowBluetooth LE advertisingMatter setup payloadmanual pairing codeMatter fabricThread Operational DatasetThread Border RouterMatter controllerdevice attestationfactory reset
Official references
- Nordic Semiconductor - Matter Template sample
- Nordic Semiconductor - Matter in nRF Connect SDK
- Google Home Developers - Commissionable and operational discovery
🎉 You're Ready!
Your First NX Matter Device Is Commissioned
You've flashed a validated sample, commissioned the NX device over Bluetooth Low Energy, and controlled it over Thread.
You are now ready to build the same workflow from source.
Here's what you accomplished:
- ✅ Downloaded and verified the firmware package
- ✅ Connected and programmed the NX development board
- ✅ Confirmed the commissioning window
- ✅ Used a Matter onboarding code
- ✅ Commissioned the device over Bluetooth Low Energy
- ✅ Joined the device to a Thread network
- ✅ Sent and verified a Matter command
What's Next?
Build from Source
Configure, build, flash, commission, and test the Matter sample from its source code.
Framework Overview
Learn where the Matter Node, Endpoint, Clusters, and application callbacks are configured.
Environment Setup
Review the SDK, toolchain, board detection, and serial-terminal setup.
Your NX device can now join a Matter fabric and respond over Thread. Continue by reproducing the result from the validated source release.