
Matter Development Framework Overview for NX Families
This tutorial shows where to look when modifying an NX Matter application.
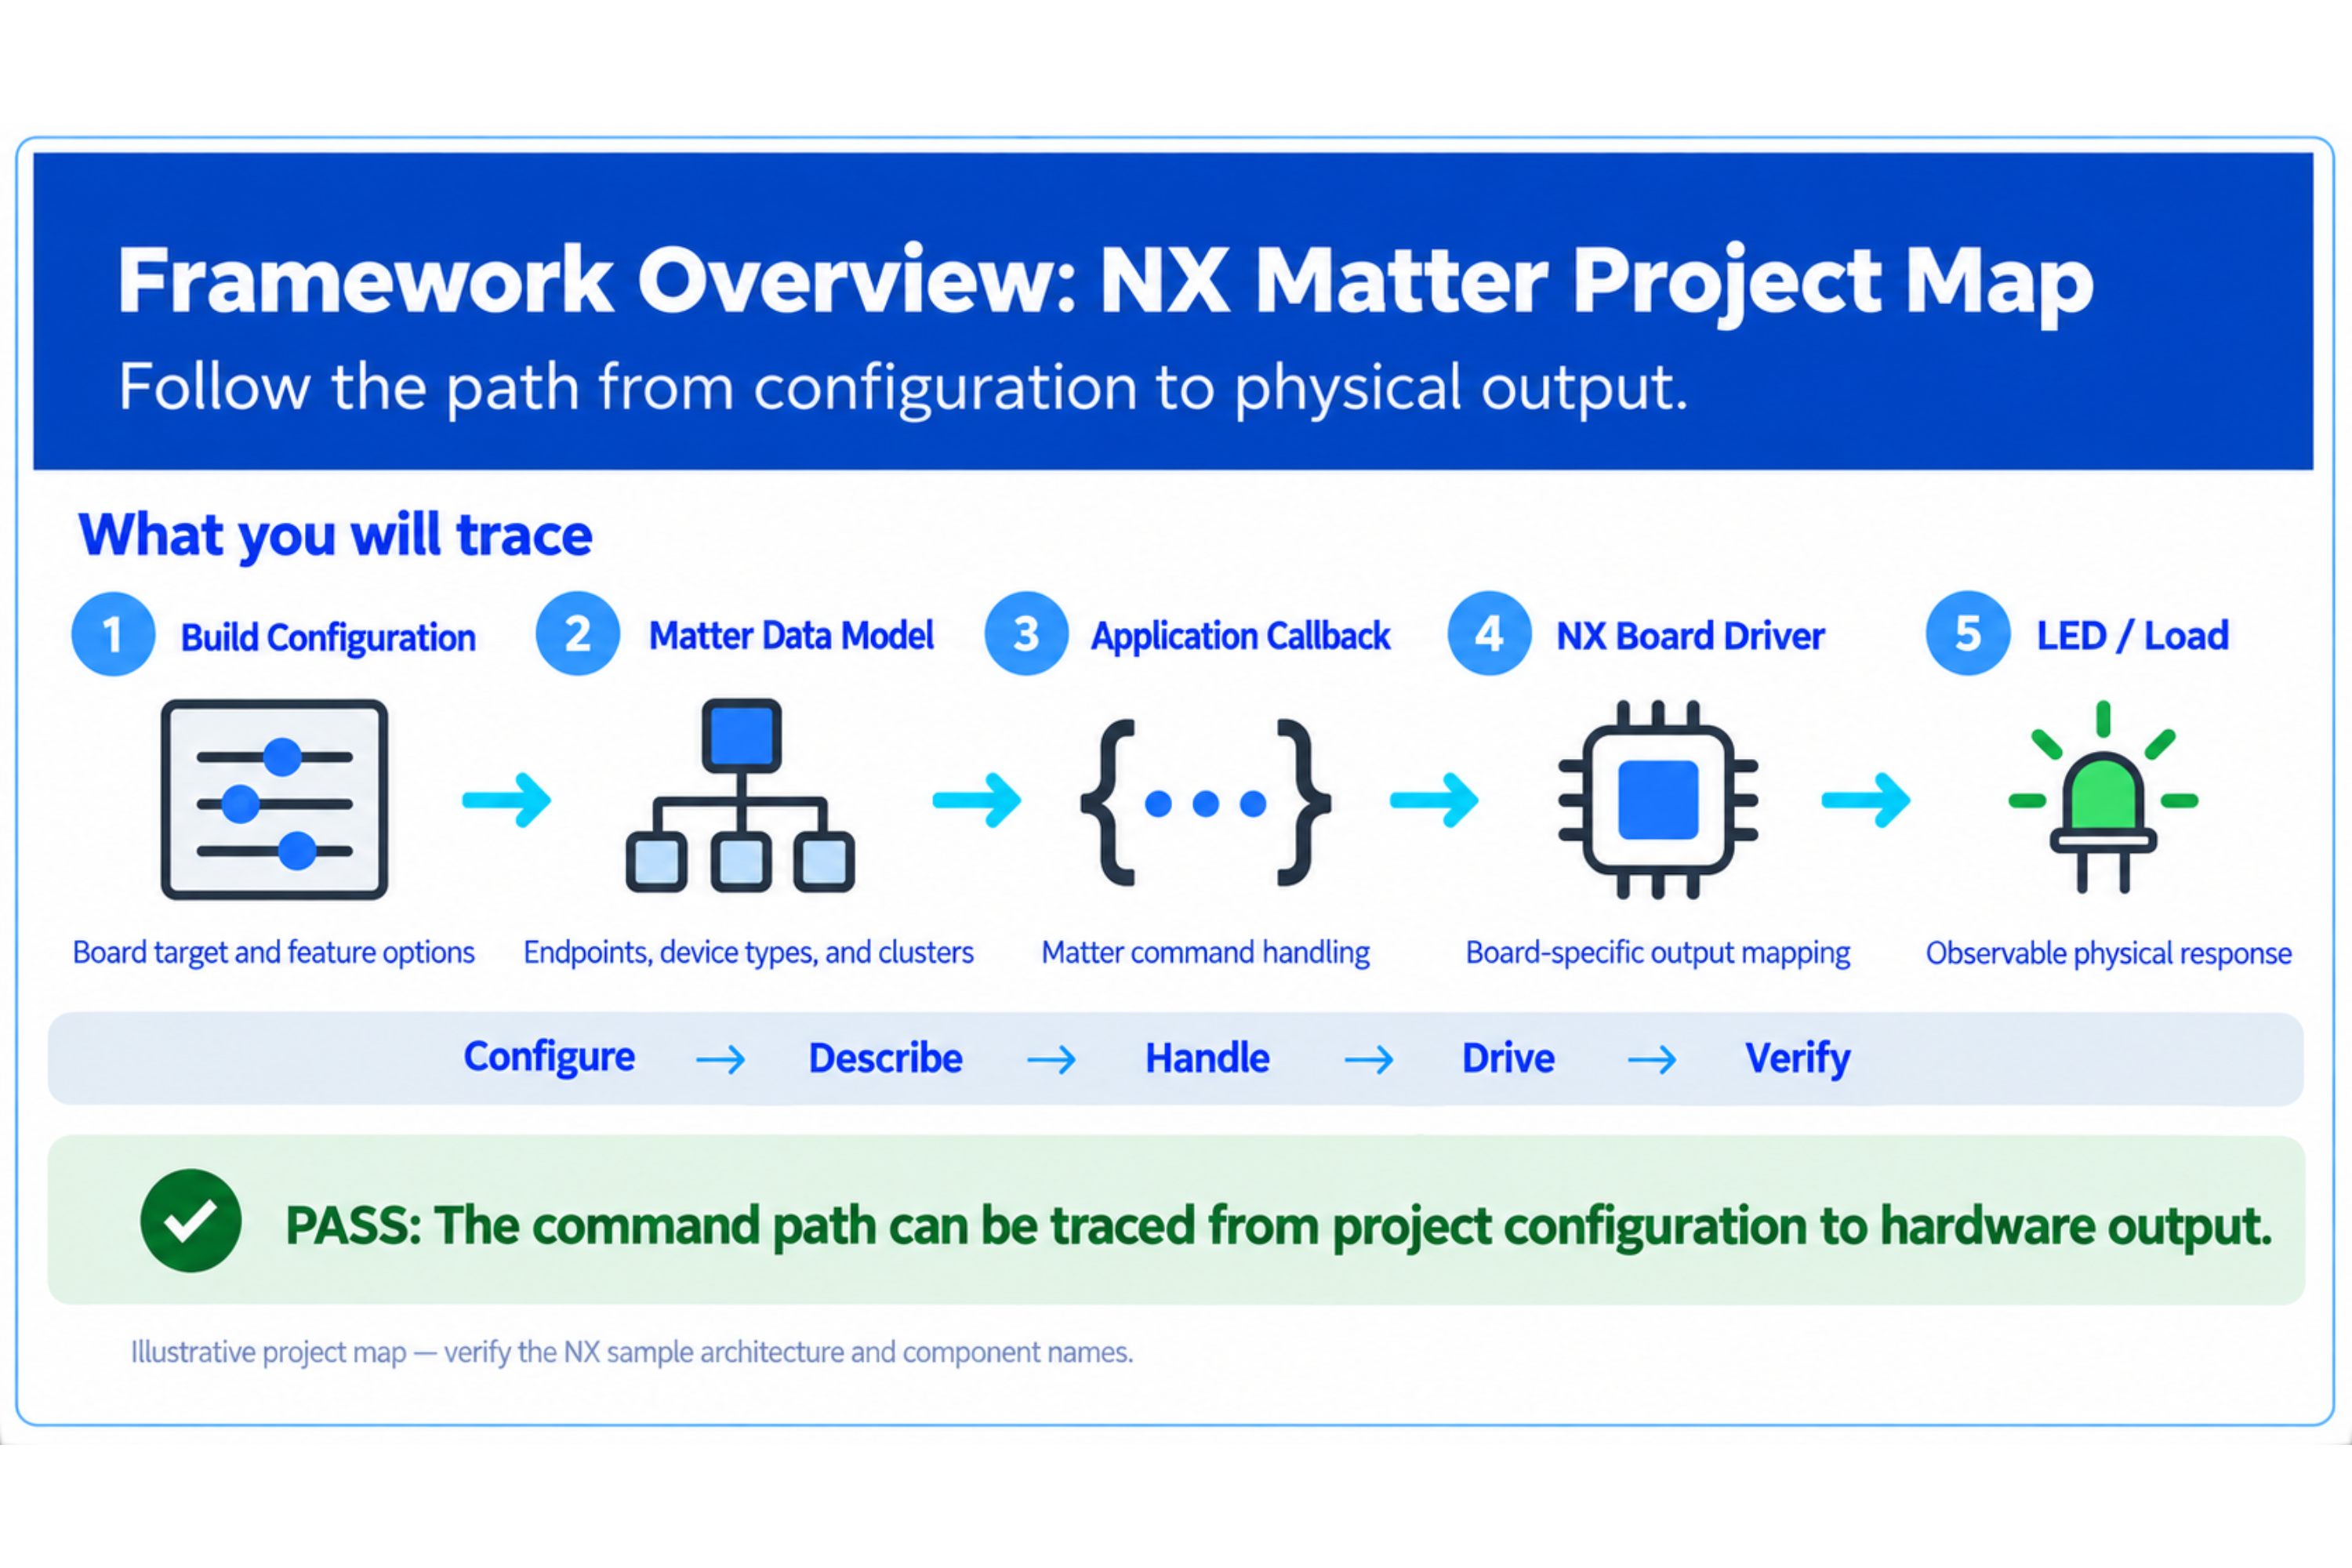
You will map the project structure, locate the Matter data model, trace a command from the Matter stack to the hardware, and verify one controlled application change. The tutorial does not explain every source-code line.
Project-specific content The exact files and APIs depend on the KORLINX source release and the selected nRF Connect SDK or Matter Add-on version. Replace the placeholders only after reviewing the validated NX sample repository.
What you will do
- Open the validated Matter project.
- Identify the build and board configuration files.
- Locate the application entry point.
- Locate the Matter Node and Endpoint configuration.
- Identify the Clusters used by the sample.
- Trace an On/Off command to the hardware callback.
- Make and verify one controlled application change.
Prerequisites
Complete:
Prepare:
- The validated NX Matter source repository
- The approved SDK and toolchain
- The correct NX board target
- A successfully commissioned test device
- CHIP Tool or the validated Matter controller
- A serial terminal
Step 1: Open the validated project
Open the project used in the previous tutorial.
Record the source identity:
Repository: [SOURCE_REPOSITORY]
Release or commit: [SOURCE_VERSION]
SDK release: [SDK_VERSION]
Matter version: [MATTER_VERSION]
Board target: [NX_BOARD_TARGET]
Do not analyze or modify a different branch from the one used in the successful build and commissioning test.
Step 2: Map the project structure
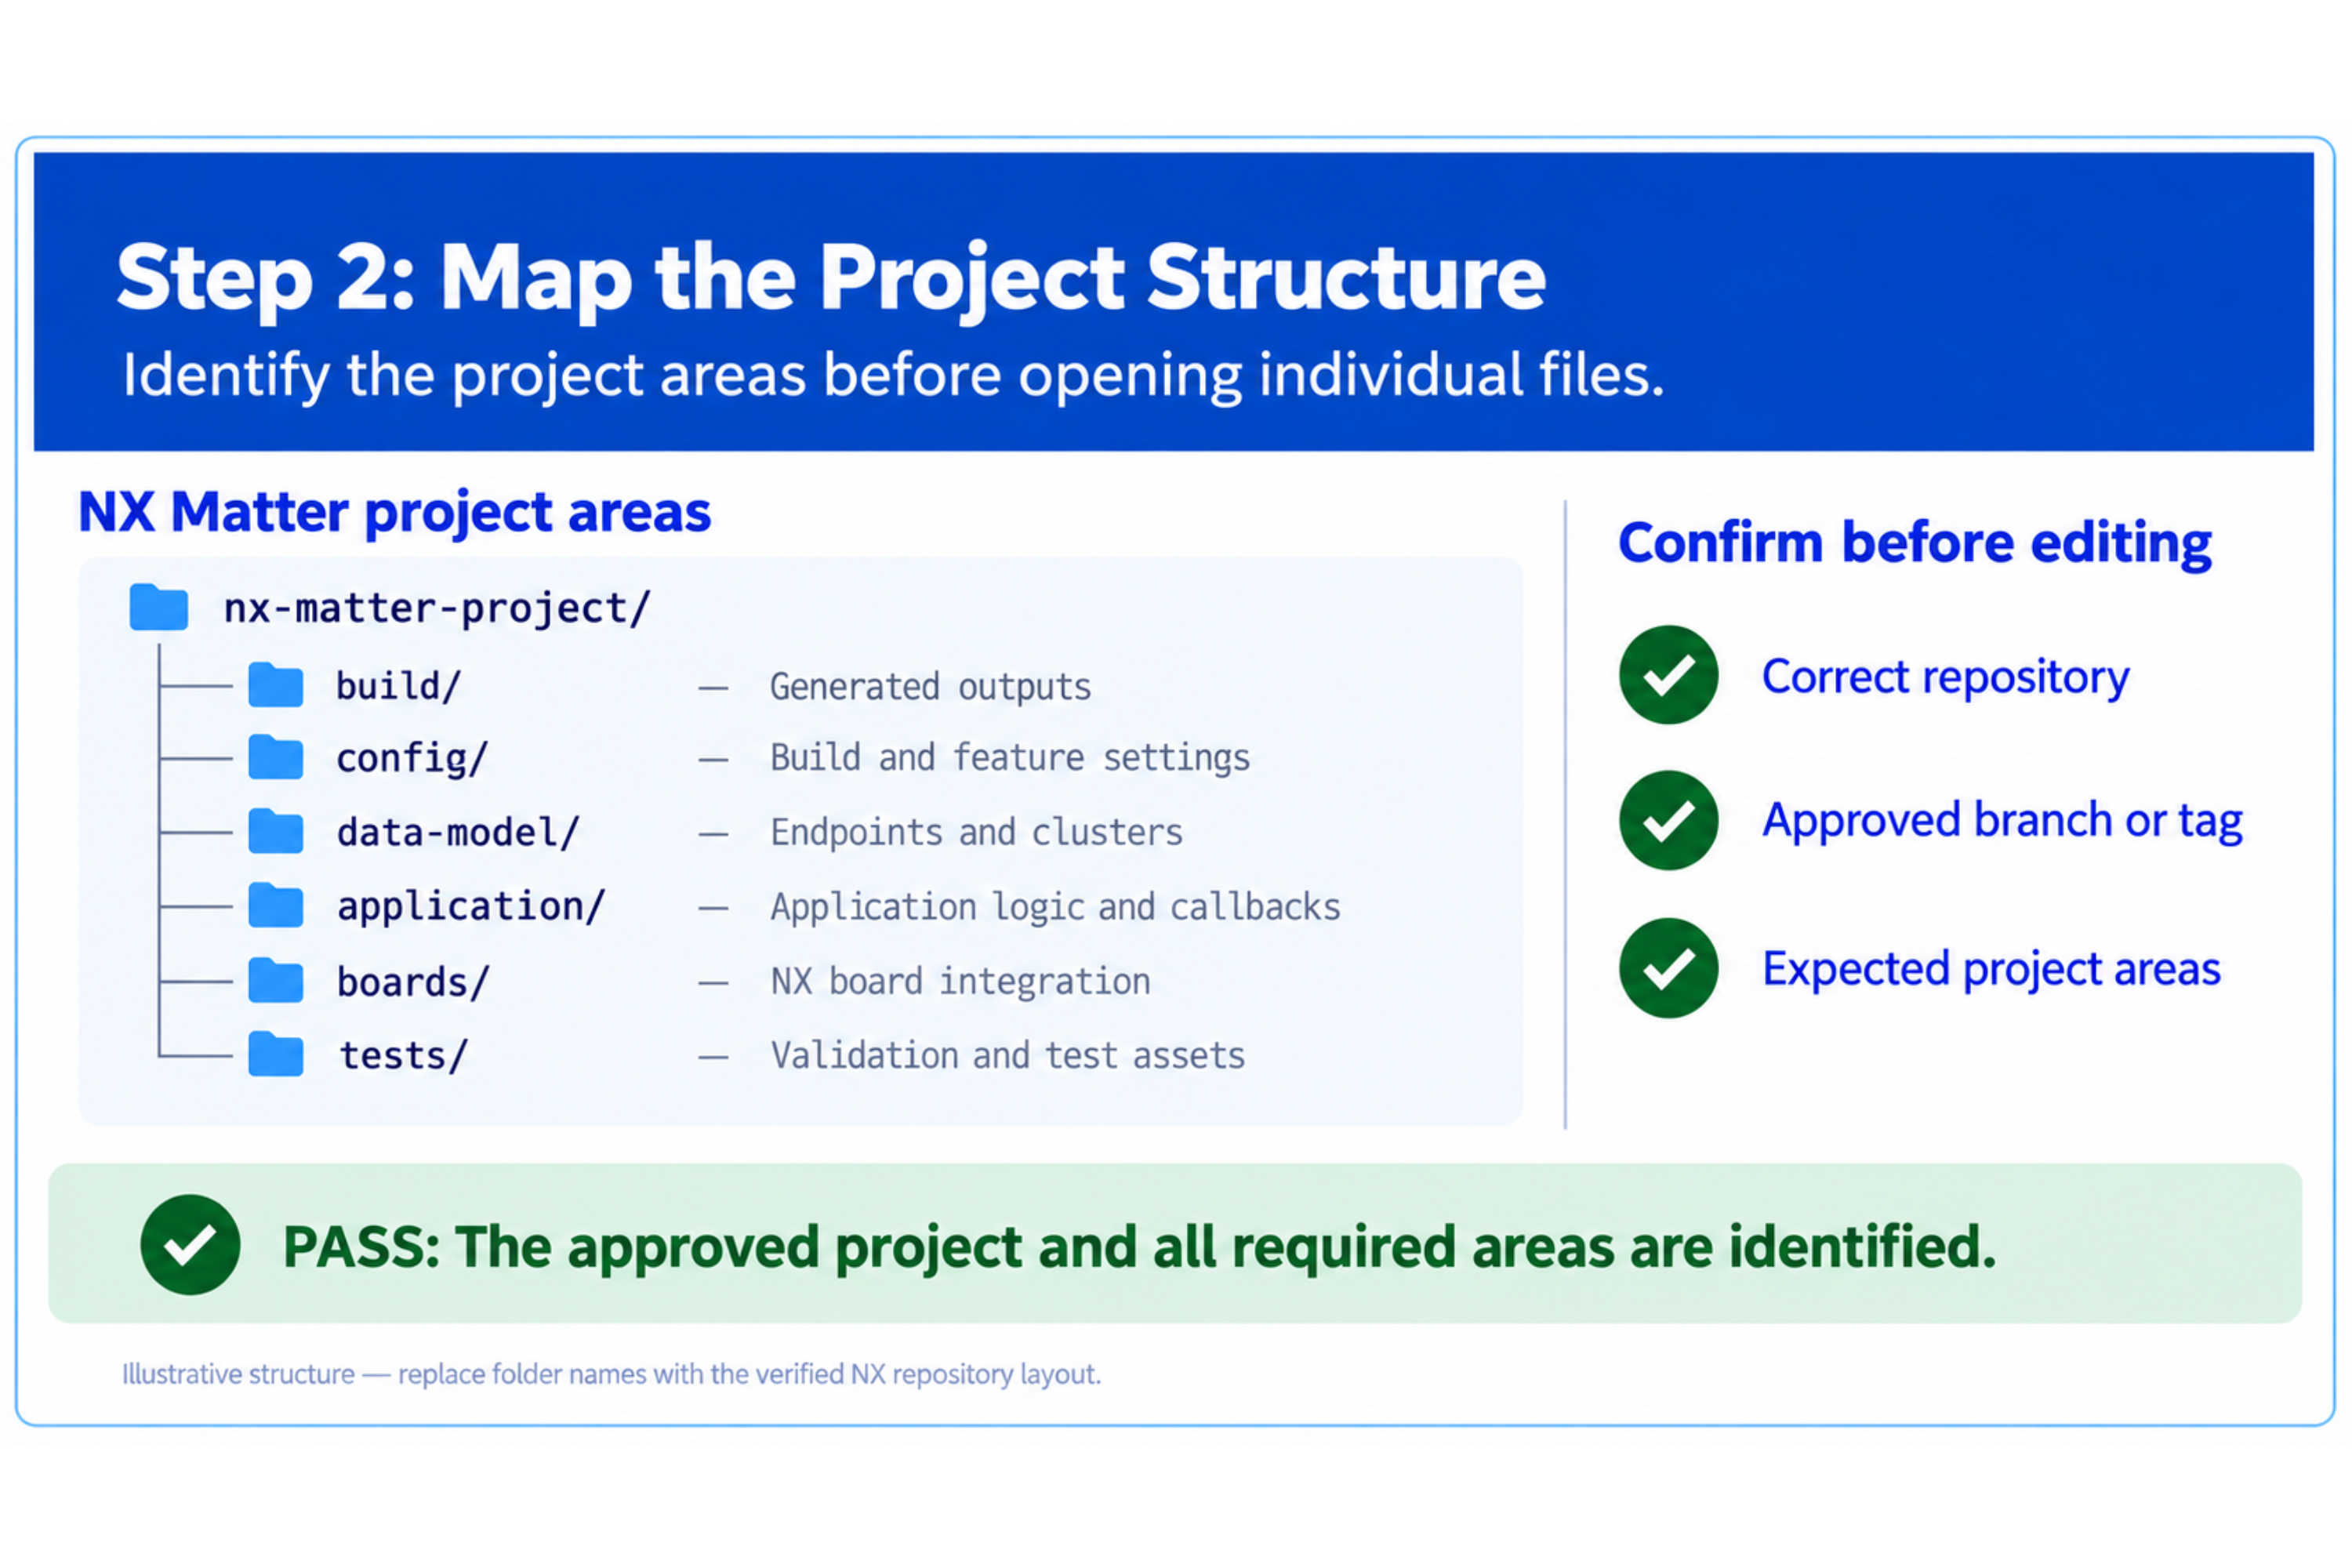
Identify the locations responsible for the following functions.
| Area | What to locate |
|---|---|
| Build | CMakeLists.txt, sample metadata, and build configuration |
| Application configuration | prj.conf and optional configuration fragments |
| Board configuration | Board definition, .conf, Devicetree, and overlay files |
| Application source | Entry point, application task, and callbacks |
| Matter data model | .zap, generated model, endpoint, or cluster configuration |
| Hardware integration | LED, button, sensor, or load drivers |
| Storage | Settings and persistent application-state handling |
| Tests | Unit, integration, commissioning, or hardware test scripts |
Use the project file tree and search tools to locate these areas. Do not assume that every project uses the same filenames.
Example search commands:
find . -maxdepth 3 -type f \( -name 'prj*.conf' -o -name '*.overlay' -o -name '*.zap' -o -name 'CMakeLists.txt' \)
rg -n "endpoint|cluster|attribute|Matter|CHIP" .
Developer reference keywords: Zephyr application structure, Matter ZAP file, generated data model, Kconfig fragment, Devicetree overlay
Step 3: Locate the application entry point
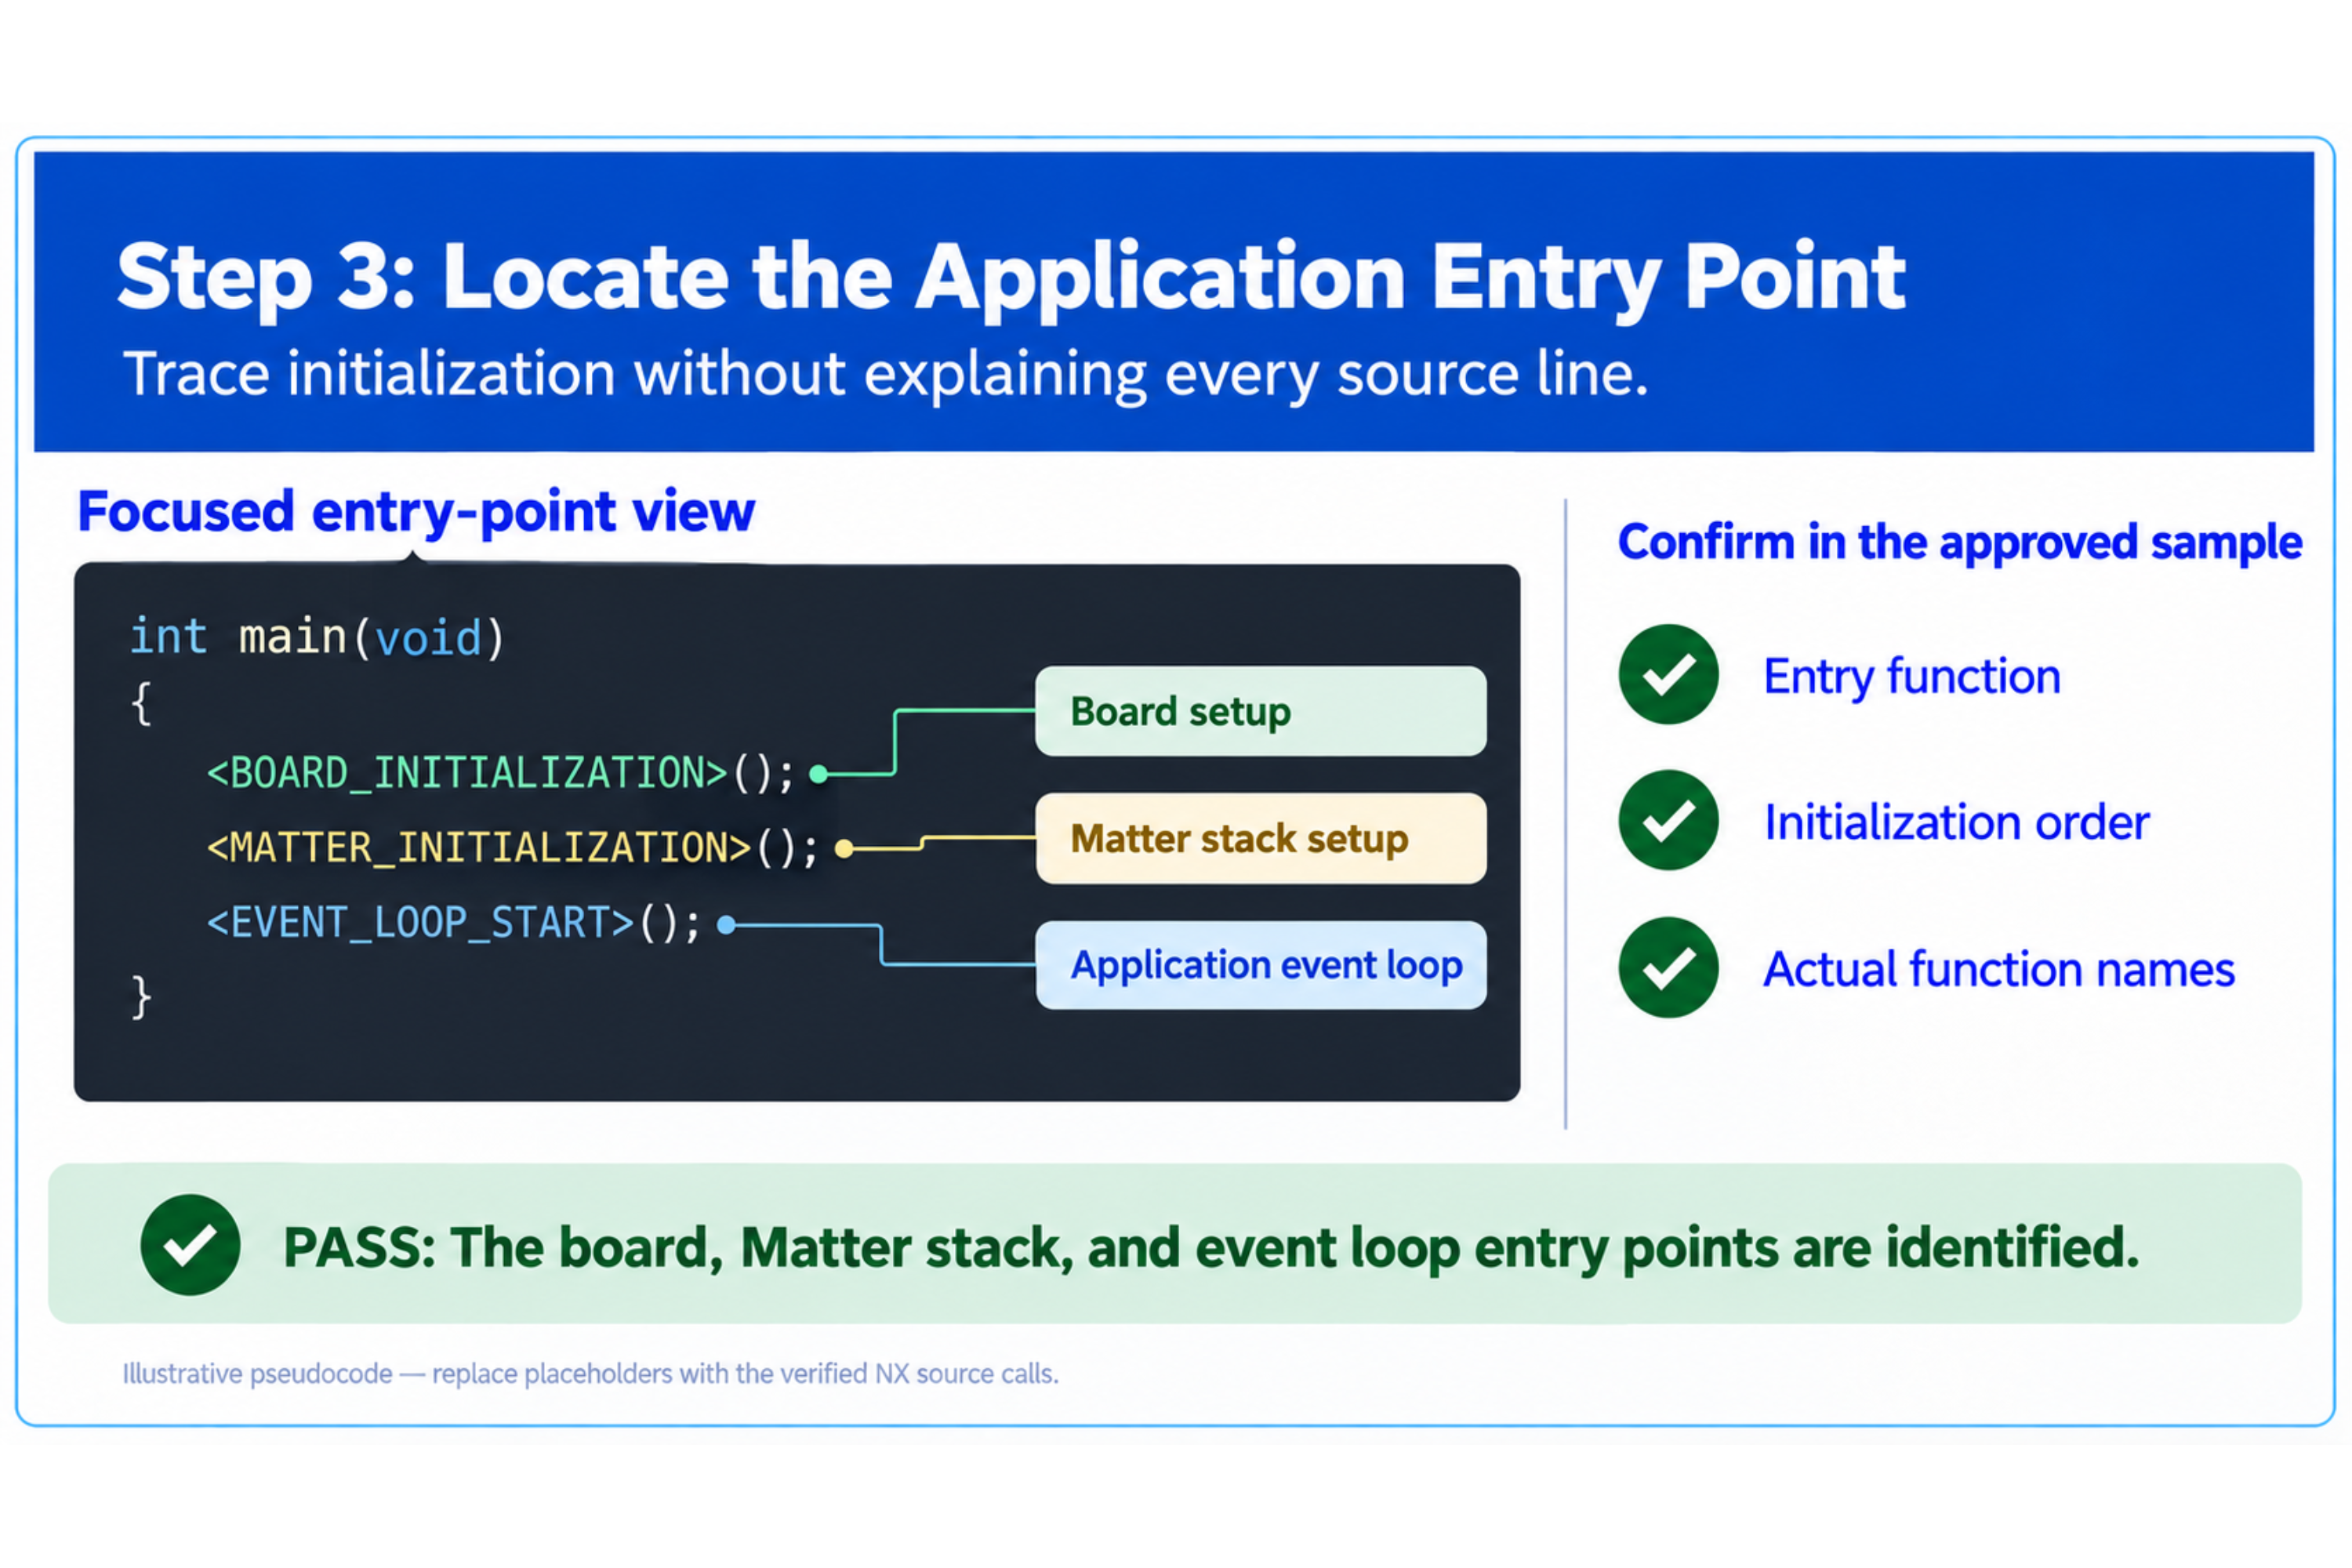
Find the function or application task that performs the initial startup.
Identify where the project:
- Initializes the board interface
- Initializes the Matter stack
- Registers application callbacks
- Starts the application event loop
- Reports startup errors
Use source search rather than reading every file from the top.
rg -n "main\(|AppTask|Init|Matter|StartApp" src
Record the confirmed entry point:
Application entry file: [CONFIRM]
Initialization function: [CONFIRM]
Application task or event loop: [CONFIRM]
Step 4: Locate the Matter data model
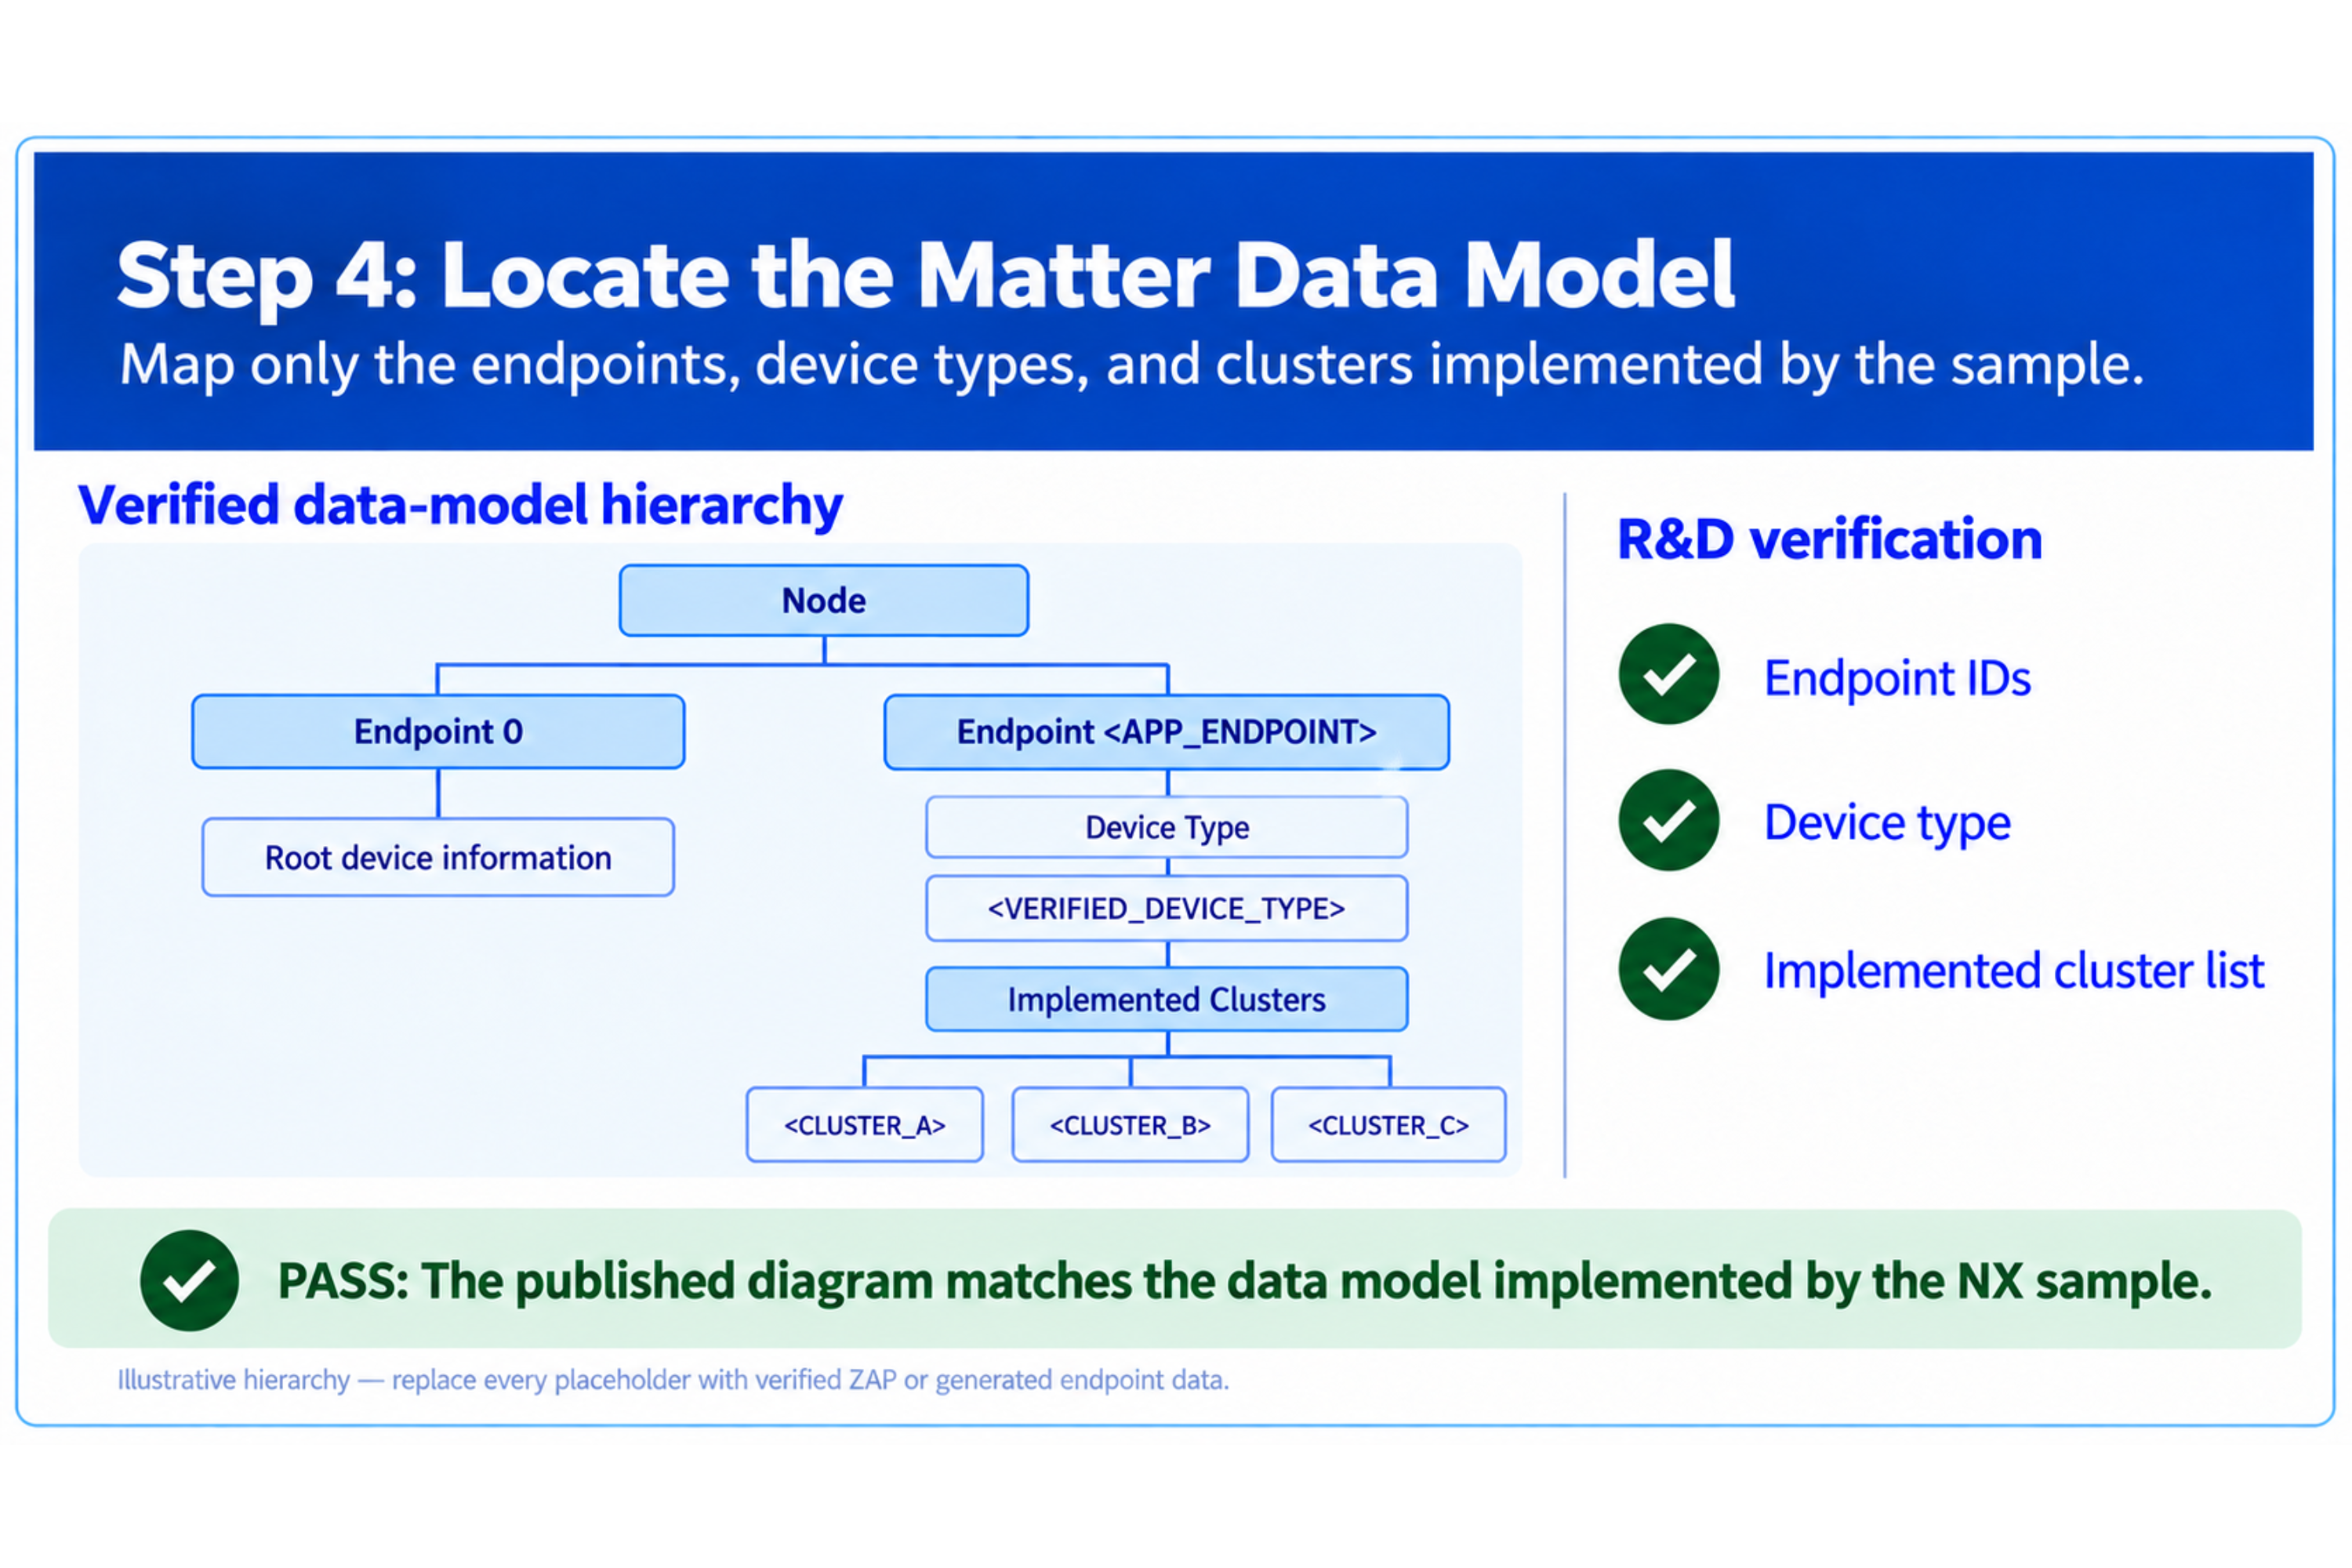
Identify how the application defines or loads its Matter data model.
For the selected sample, record:
Node creation location: [CONFIRM]
Application endpoint: [CONFIRM]
Device Type: [CONFIRM]
Server Clusters: [CONFIRM]
Client Clusters: [CONFIRM_OR_NONE]
Data-model source: [ZAP_OR_CODE_OR_GENERATED_CONFIGURATION]
For a basic light sample, the application normally exposes a lighting Device Type and an On/Off Cluster. Publish only the exact model reported by the validated build.
Developer reference keywords: Matter Node, Endpoint 0, application endpoint, Device Type, server cluster, client cluster, generated data model
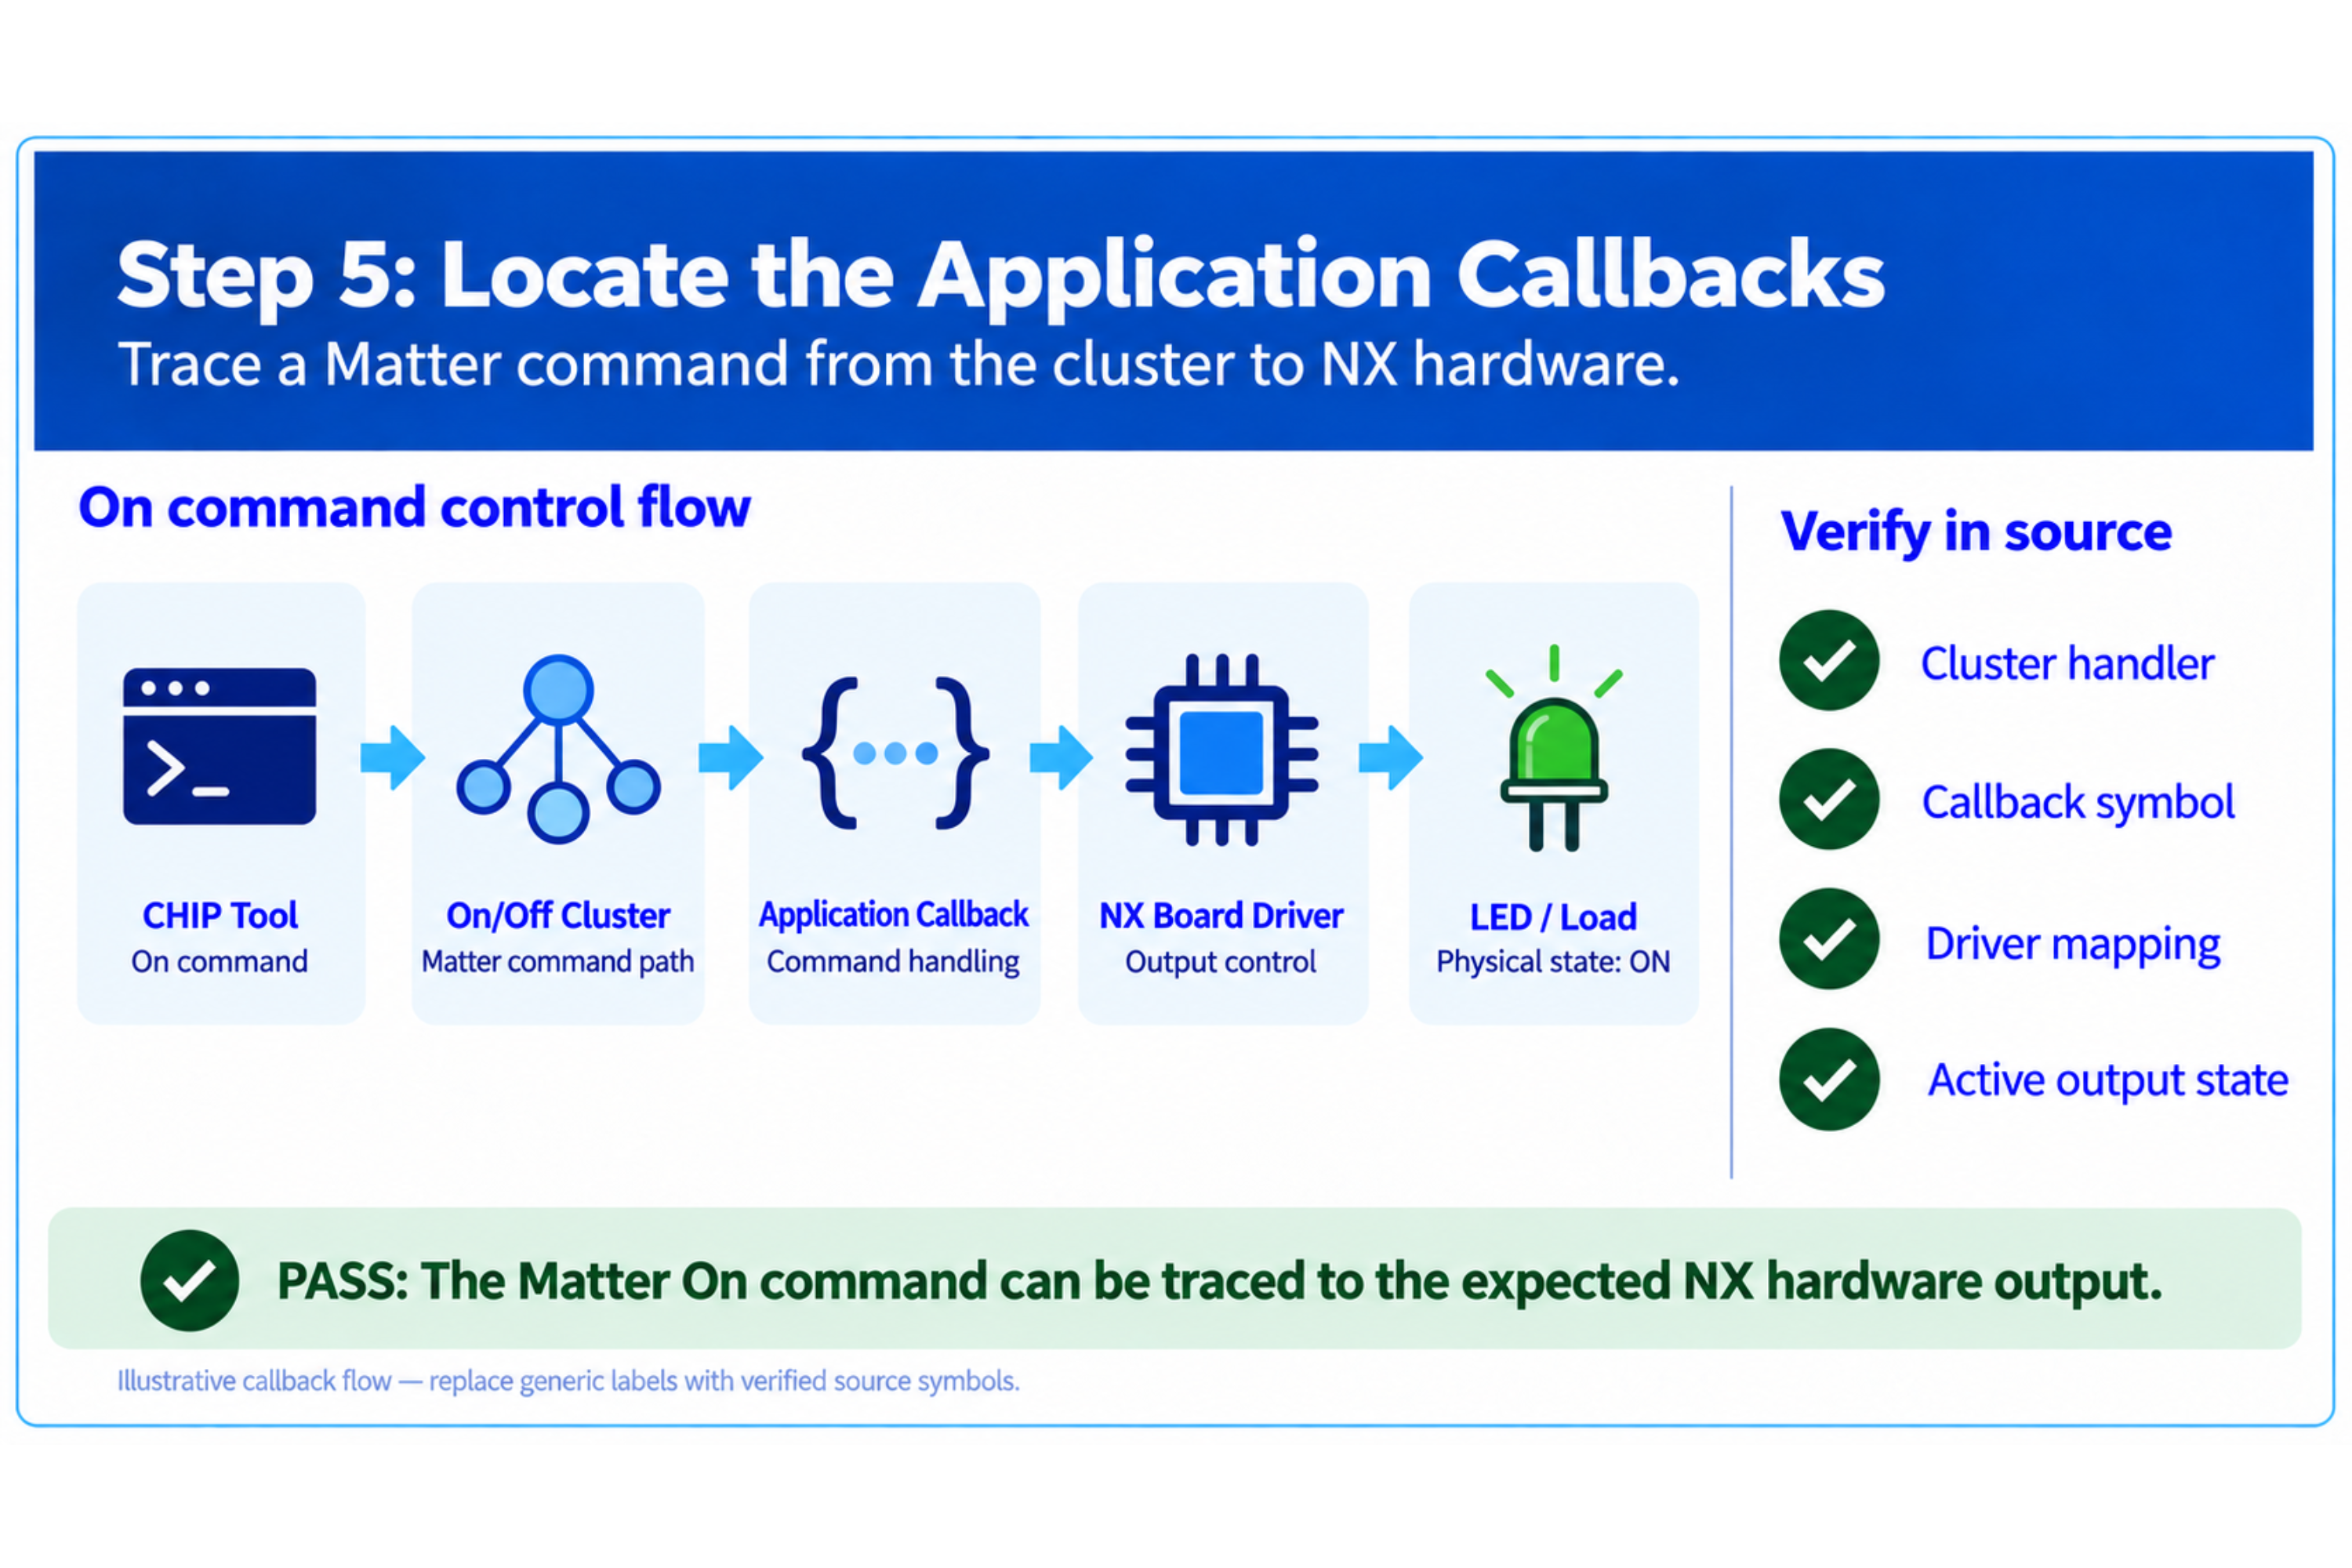
Step 5: Locate the application callbacks
Find the code that receives a Matter state change and applies it to the hardware.
Search for the validated cluster or attribute names:
rg -n "OnOff|Attribute|Update|Callback|Identify" src
Identify the complete control path:
Matter command
-> target Endpoint and Cluster
-> attribute or command callback
-> application event
-> board driver
-> physical LED or load
Record the confirmed files and functions:
Matter callback: [CONFIRM]
Application handler: [CONFIRM]
Board driver function: [CONFIRM]
Physical output: [CONFIRM]
Do not describe callbacks that are not used by the selected sample.
Step 6: Locate board-specific integration
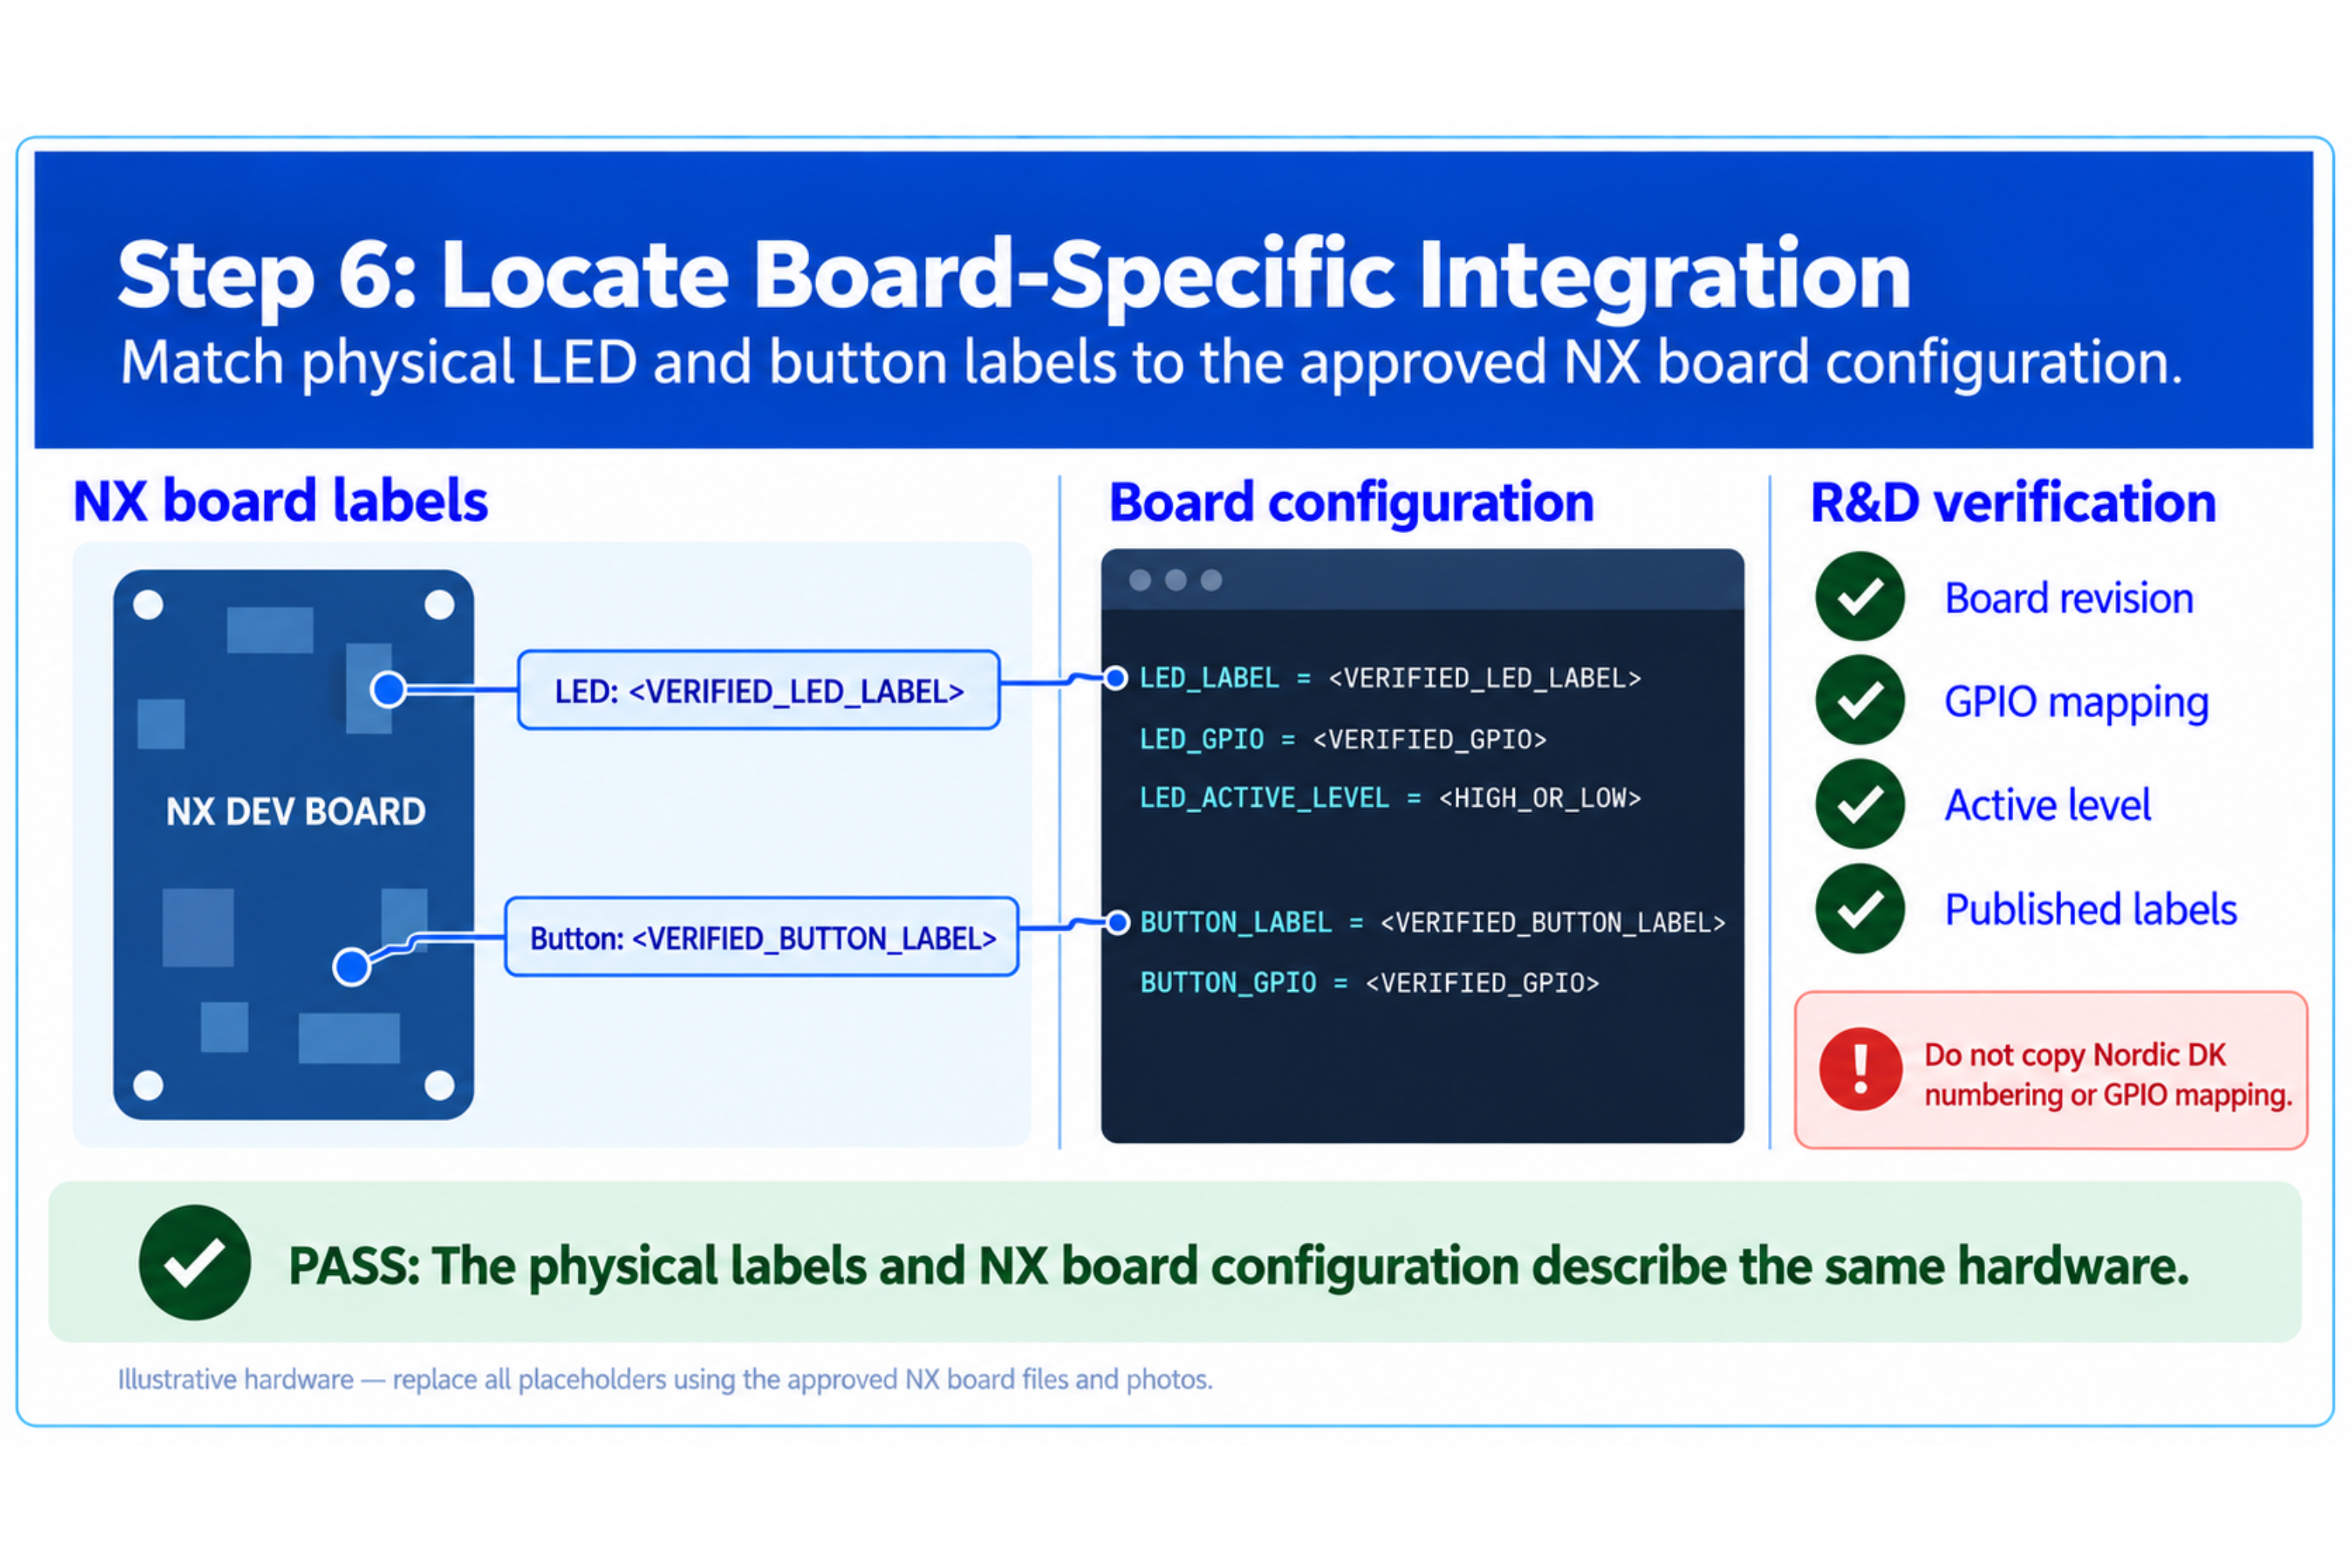
Identify where the project maps generic application actions to NX hardware.
Check:
- LED aliases and GPIO assignments
- Button aliases and input behavior
- Reset and commissioning-window action
- Debug or serial interface
- External flash or storage definition, when used
- Board-specific configuration fragments
Useful searches:
rg -n "led|button|gpio|alias|chosen|flash" boards src
After a successful build, inspect the generated Devicetree output:
rg -n "led|button|gpio|alias|chosen|flash" build/zephyr/zephyr.dts
Use the generated Devicetree only to confirm the effective build configuration.
Developer reference keywords: Devicetree alias, GPIO phandle, chosen node, partition manager, board.cpp, hardware abstraction
Step 7: Inspect build-time configuration
Open the validated prj.conf and related configuration files.
Identify only the settings relevant to:
- Matter support
- Thread networking
- Bluetooth Low Energy commissioning
- Logging
- Persistent storage
- Shell or diagnostic features used by the tutorial
- Bootloader or sysbuild requirements
Check the effective configuration after building:
rg -n "CONFIG_CHIP|CONFIG_OPENTHREAD|CONFIG_BT|CONFIG_SETTINGS" build/zephyr/.config
Do not treat one configuration file as the complete build state. Kconfig defaults, board definitions, sysbuild, and configuration fragments can contribute to the final result.
Developer reference keywords: Kconfig merge, effective configuration, build/zephyr/.config, Matter Kconfig, OpenThread Kconfig
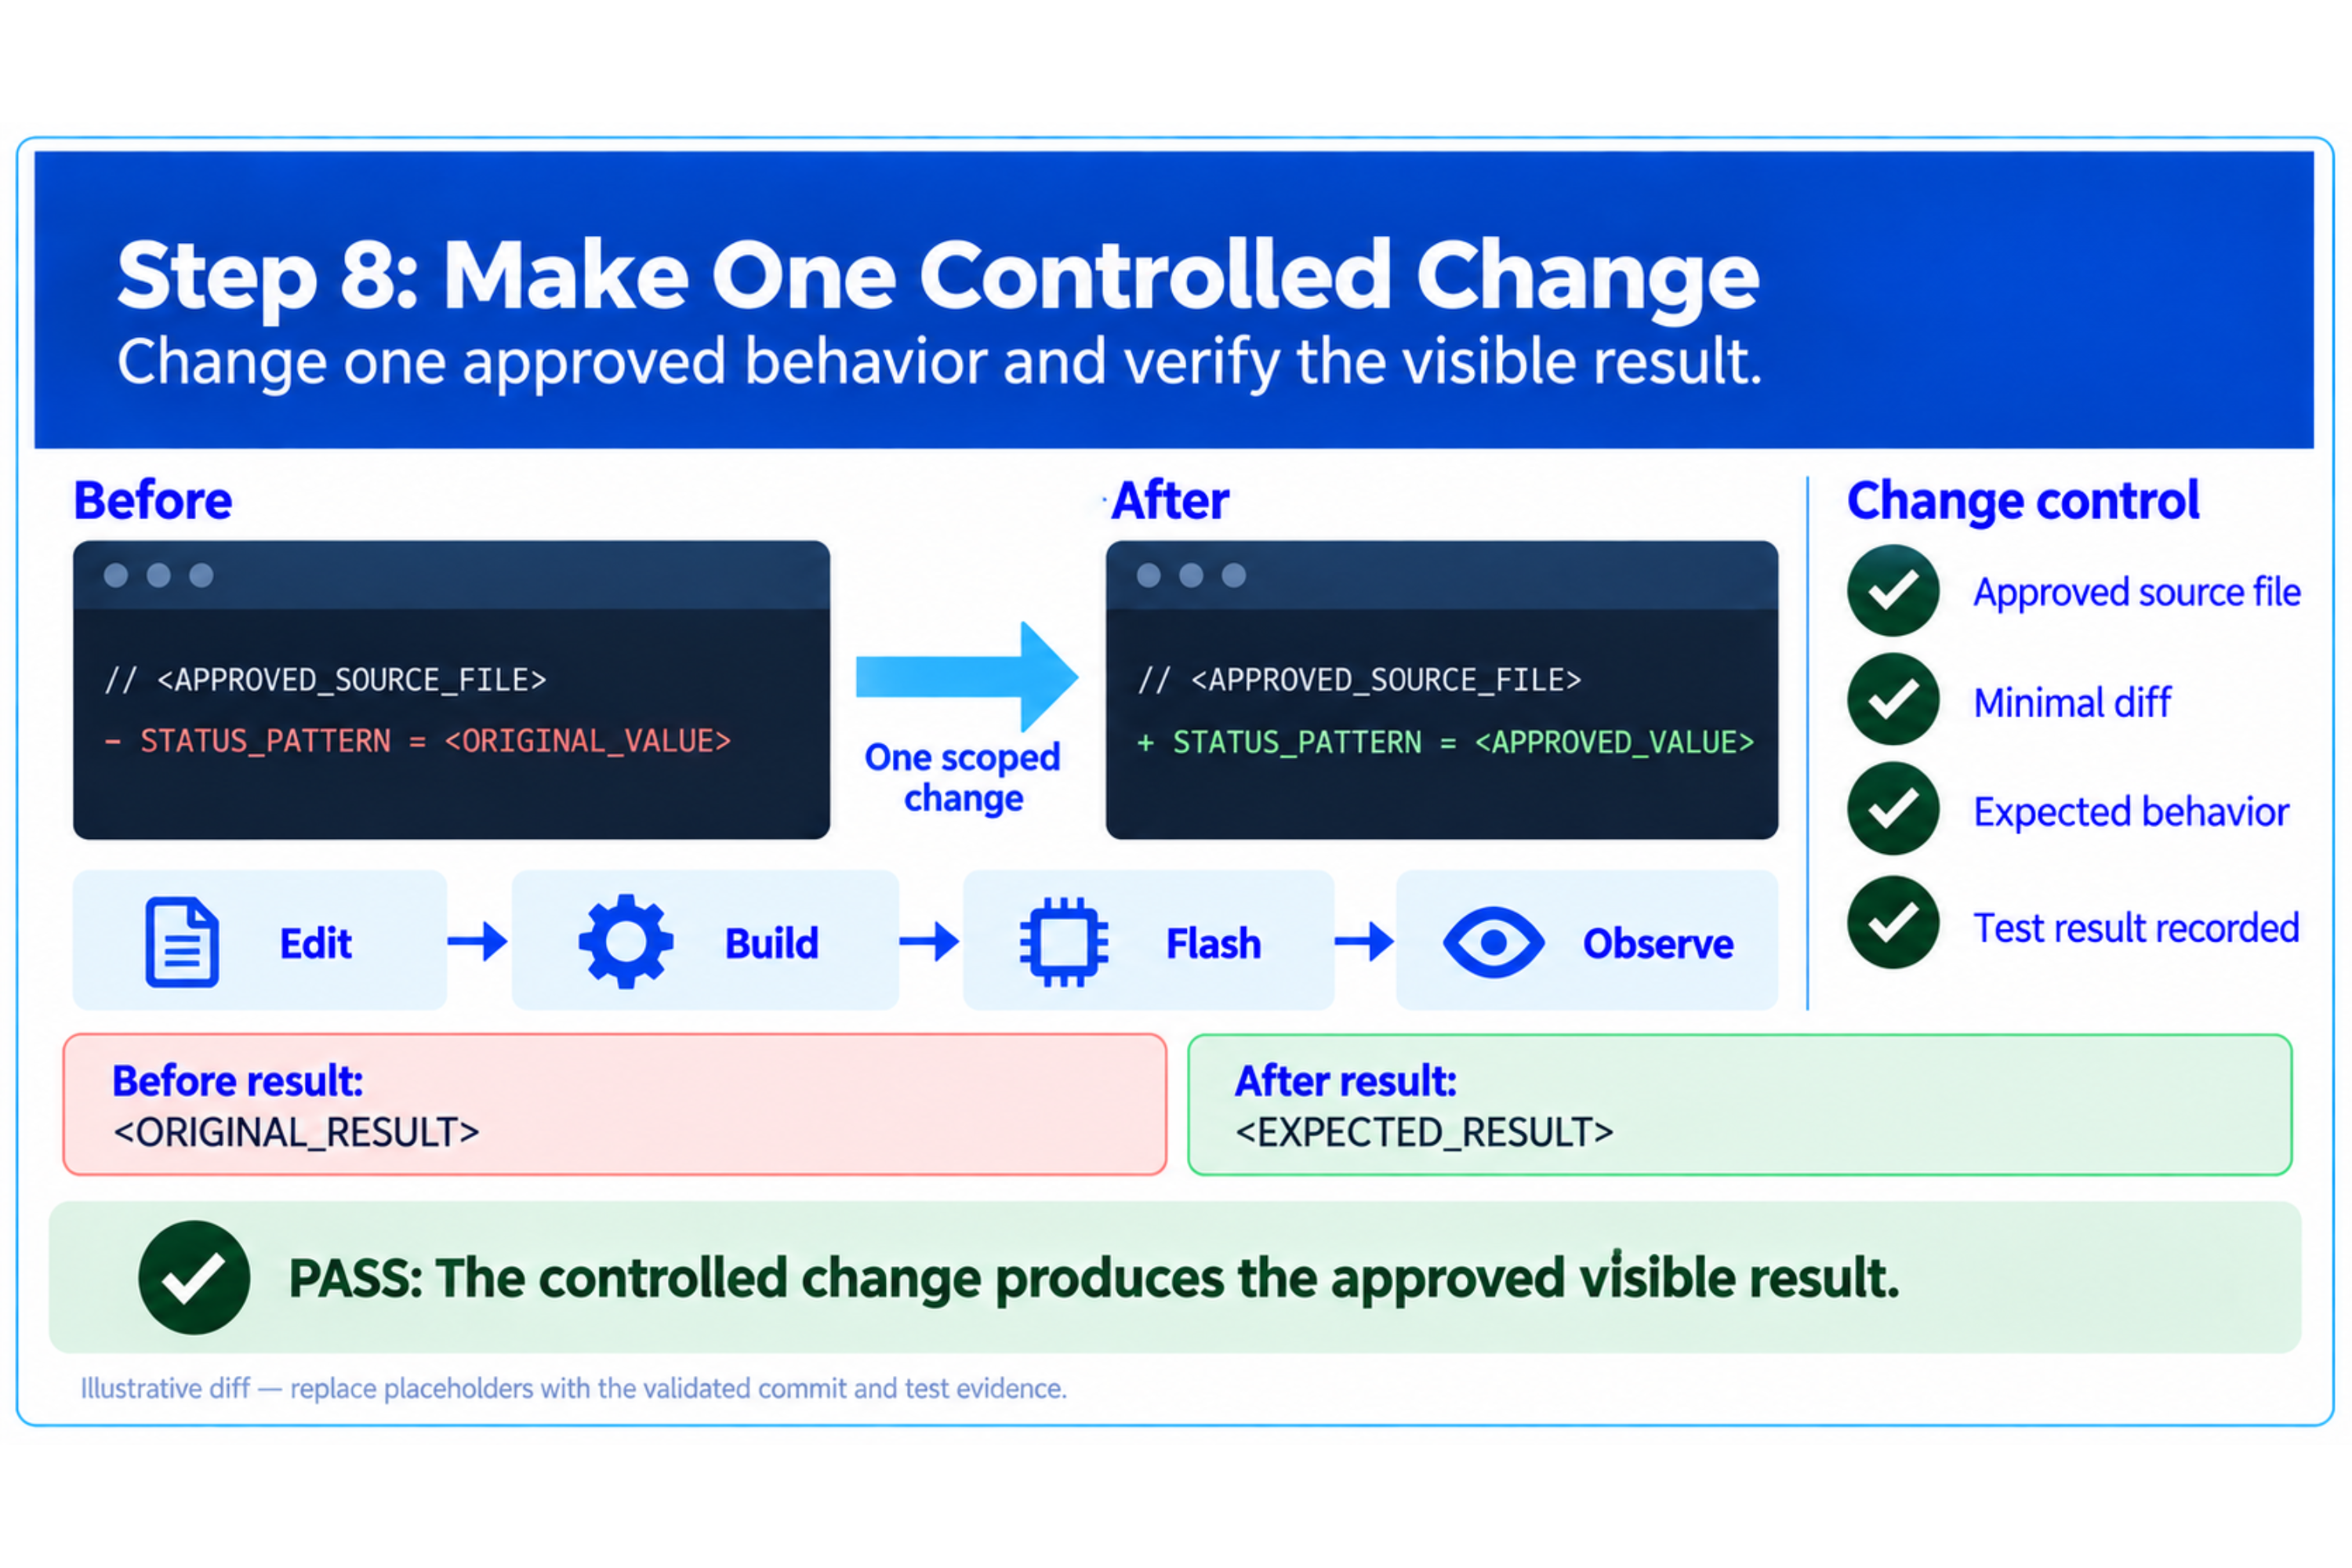
Step 8: Make one controlled change
Choose one application-level change approved for the tutorial, for example:
- Change a log message used for identification
- Change an initial non-security application value
- Change the physical output used by the sample, if a validated alternative exists
- Add a visible application event that does not modify the Matter data model
Do not change:
- Vendor ID or Product ID
- Device attestation credentials
- Setup passcodes
- Matter certificates
- Device Type or Cluster definitions
- Partition layout
- Bootloader configuration
unless the tutorial explicitly requires and validates that change.
Record the selected modification:
File: [CONFIRM]
Original behavior: [CONFIRM]
Modified behavior: [CONFIRM]
Verification method: [CONFIRM]
Step 9: Build, flash, and verify
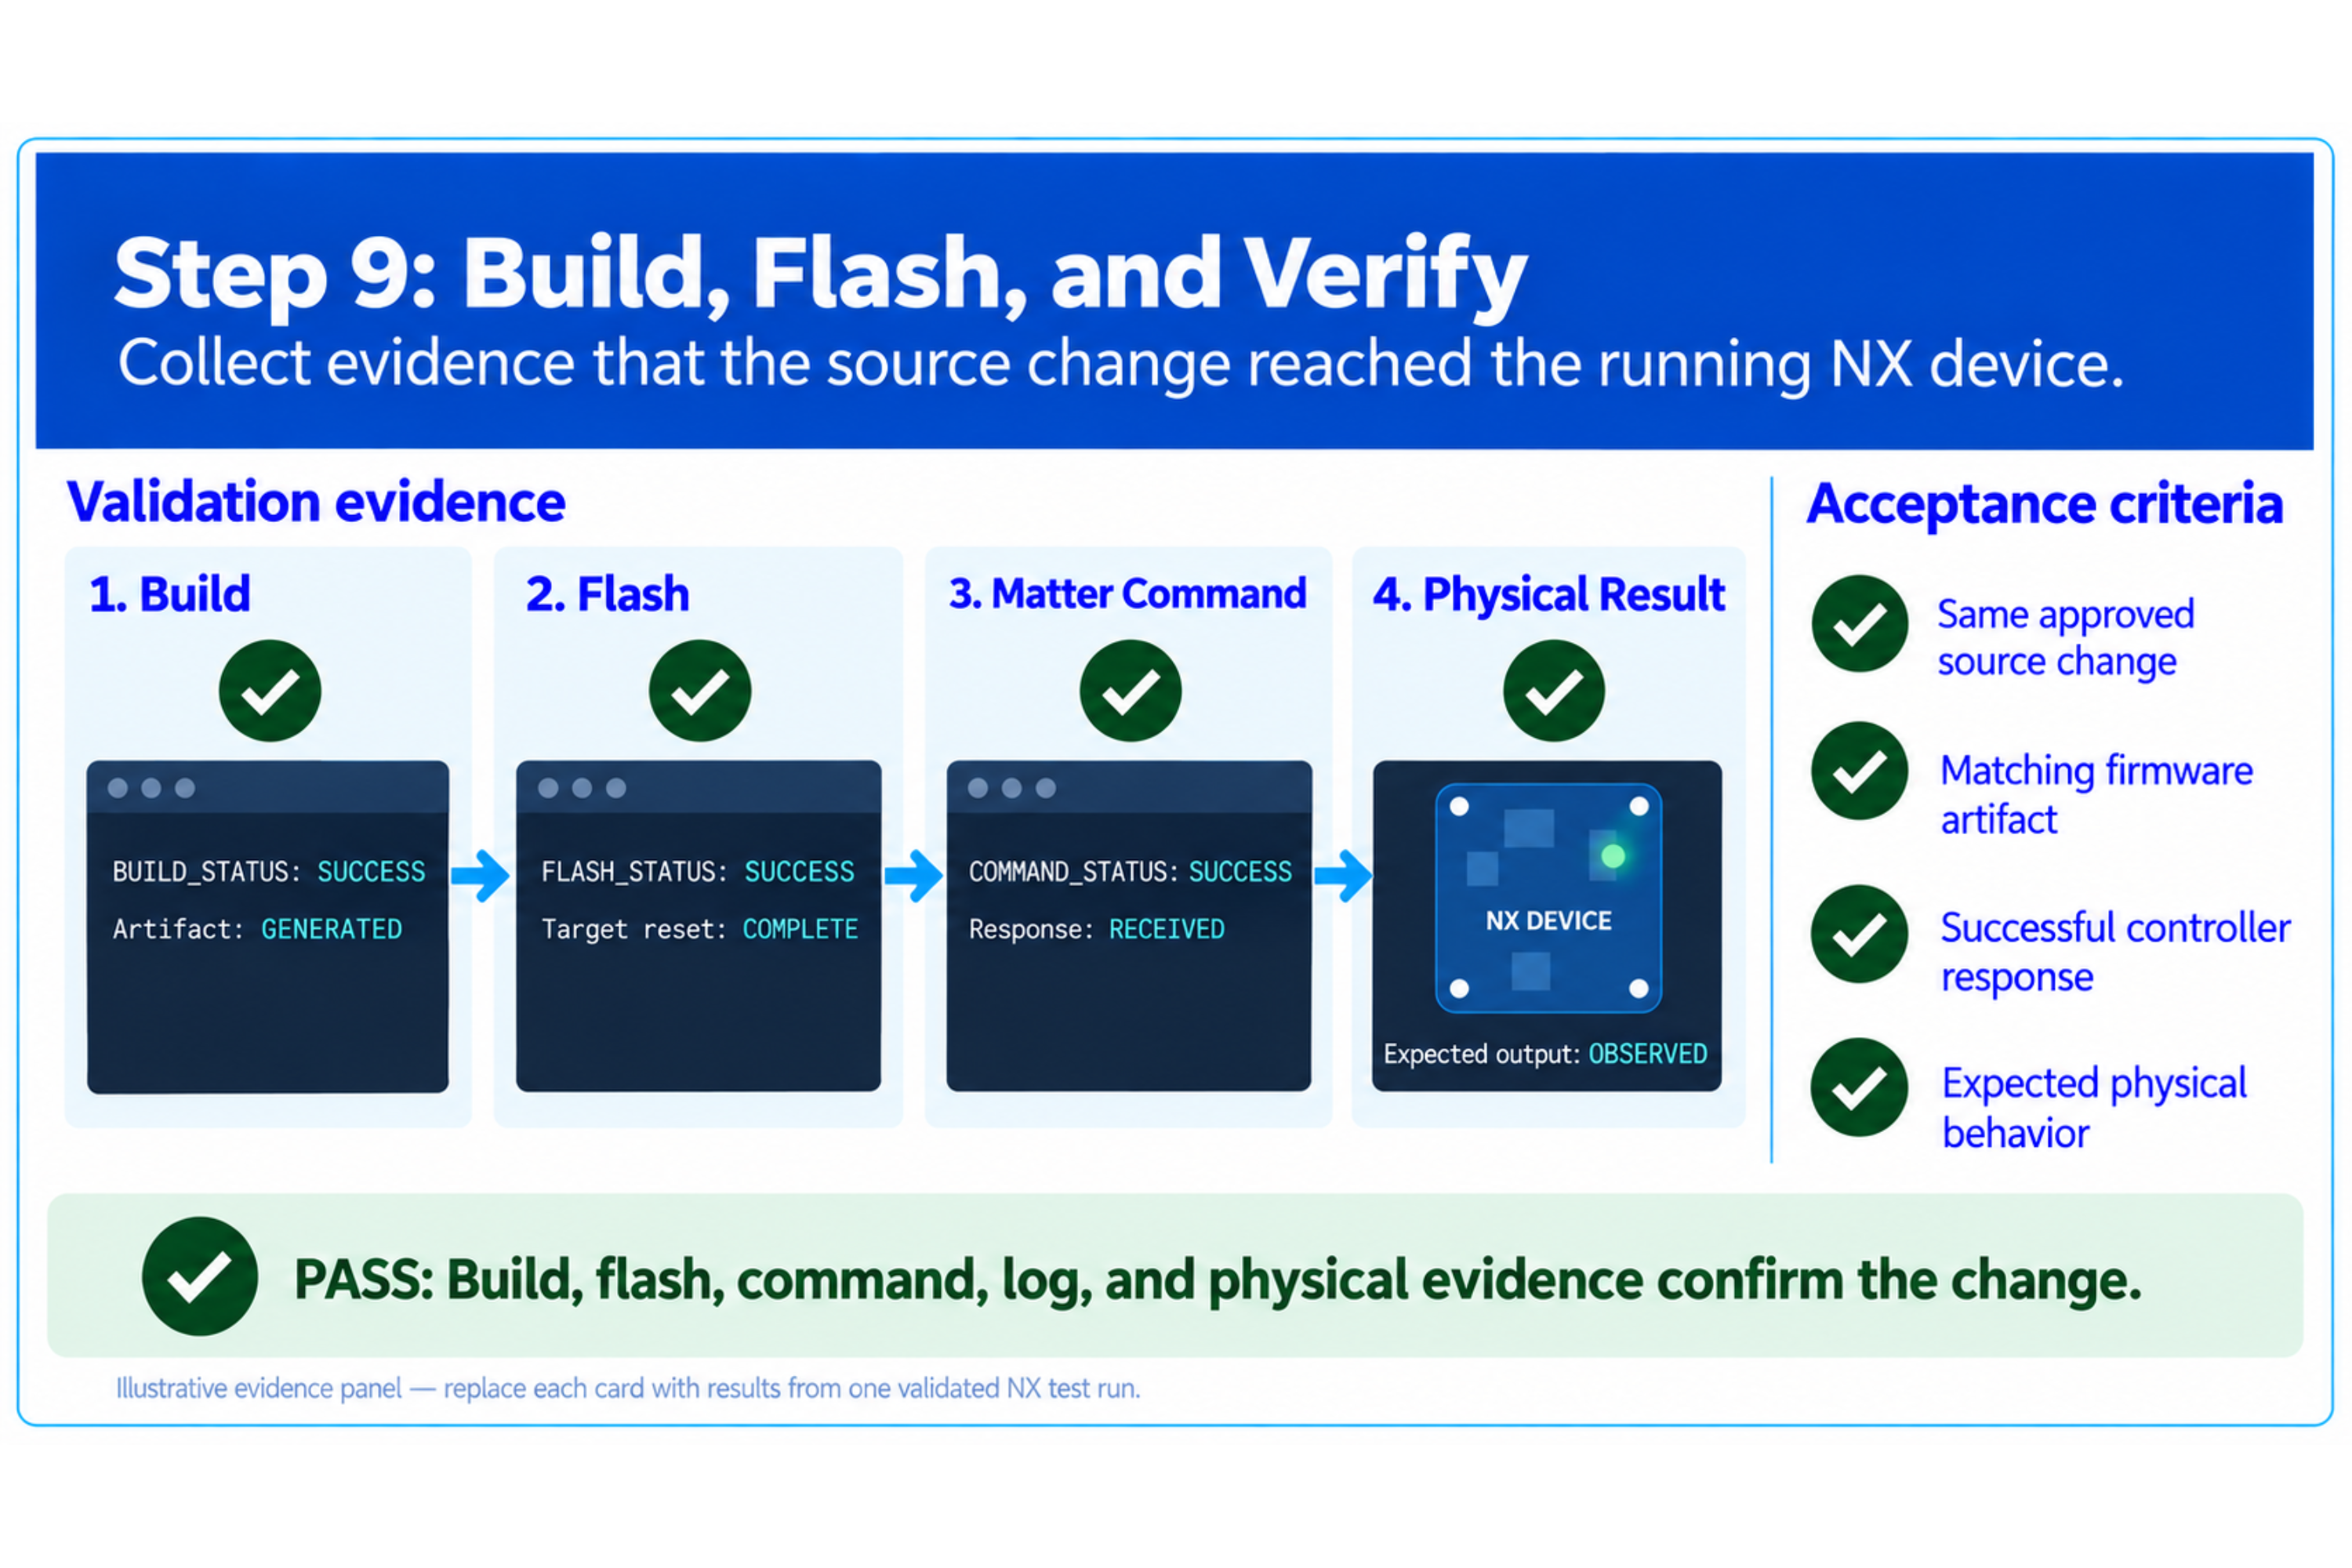
Rebuild and flash using the validated commands:
west build -p always -b [NX_BOARD_TARGET] [MATTER_SAMPLE_PATH]
west flash
If the device state must be cleared for the test, perform the validated factory-reset procedure.
Commission the device if required, repeat the relevant Matter command, and confirm the controlled change.
Capture:
- Build result
- Flash result
- Serial log
- Matter command result
- Physical device state
Expected result
The framework walkthrough is complete when you can:
- Locate the build and board configuration.
- Identify the application entry point.
- Identify the Matter data-model source.
- Record the implemented Endpoint, Device Type, and Clusters.
- Trace an On/Off command to the board driver.
- Locate the NX-specific LED and button mapping.
- Identify the effective Matter, Thread, BLE, logging, and storage configuration.
- Make, build, flash, and verify one controlled application change.
Troubleshooting
| Problem | Action |
|---|---|
| A referenced file does not exist | Confirm the repository release and search for the function or configuration keyword instead of copying a path from another SDK version. |
| Endpoint or Cluster values differ | Use the generated data model or runtime report from the validated build. |
| Source changes do not affect the device | Confirm that the correct application and board target were rebuilt and flashed. |
| LED behavior differs between NX15 and NX40 | Check the board-specific Devicetree aliases and driver implementation. |
| Configuration value appears disabled | Inspect the effective build/zephyr/.config and the complete Kconfig merge. |
| Commissioning data is lost after a rebuild | Confirm whether the flash or erase procedure cleared persistent storage. |
| A Matter command succeeds but no callback runs | Confirm the target node, endpoint, cluster, attribute, access control, and callback registration. |
Official references
- Nordic Semiconductor - Matter in nRF Connect SDK
- Nordic Semiconductor - Matter Template sample
- Google Home Developers - Matter data model
🎉 You're Ready!
You Can Navigate an NX Matter Application
You've mapped the project, located the Matter data model and board integration, traced a command to the hardware, and verified one controlled change.
You can now continue with the validated NX examples and application-specific development resources.
Here's what you accomplished:
- ✅ Mapped the Matter project structure
- ✅ Located the application entry point
- ✅ Identified the Matter data-model source
- ✅ Recorded the Endpoint, Device Type, and Clusters
- ✅ Traced a Matter command to the board driver
- ✅ Located NX-specific hardware configuration
- ✅ Inspected the effective build configuration
- ✅ Built and verified a controlled application change
What's Next?
Developer Resources
Continue with KORLINX board support, released examples, SDK references, and source repositories.
Resource link: Pending confirmation of the public developer-resource URL.
NX Product Documentation
Review the approved hardware interfaces, pin mappings, electrical limits, and integration guidance.
Repeat the Build Workflow
Return to the complete build, flash, commissioning, and CHIP Tool procedure.
Troubleshooting
Use the Wiki support flow when your build, flashing, commissioning, or command result differs from the validated example.
Support link: Pending confirmation of the public support URL.
You can now identify the main integration points in an NX Matter application and continue with a validated product use case.