
Set Up the Matter Development Environment for NX Families
This tutorial prepares the tools required to build, flash, debug, and test a Matter application on an NX development platform.
By the end of this tutorial, the selected SDK and matching toolchain will be installed, SEGGER J-Link will be ready, and the host computer will be prepared to connect to the NX development board through its approved SWD and serial interfaces.
Use the validated release This draft uses nRF Connect SDK v3.4.0 as the working baseline from the supplied Nordic training material. KORLINX R&D must confirm the final SDK version, Matter source location, board target, J-Link configuration, and supported host operating systems before publication.
What you will prepare
- nRF Connect for Desktop
- Visual Studio Code
- nRF Connect for VS Code Extension Pack
- The KORLINX-approved nRF Connect SDK release
- A matching toolchain
- SEGGER J-Link Software and Documentation Pack
- A KORLINX-approved SEGGER J-Link probe
- The approved SWD cable or adapter for the selected NX development board
- A data-capable USB cable
- A serial terminal for logs
Supported NX platforms
| Platform | SoC family | Tutorial status |
|---|---|---|
| NX15 development platform | Nordic nRF54L15 | Pending board-target, J-Link target-name, and hardware-revision confirmation |
| NX40 development platform | Nordic nRF52840 | Pending board-target, J-Link target-name, and hardware-revision confirmation |
Host requirements
Use a host operating system supported by the approved nRF Connect SDK release, SEGGER J-Link software, and selected Matter testing tools.
| Item | Requirement |
|---|---|
| Host OS | [CONFIRM: Ubuntu / Windows / macOS support matrix] |
| Free storage | At least 5 GB recommended for the SDK and toolchain installation |
| Network access | Required to download the SDK, toolchain, extensions, J-Link software, and dependencies |
| Debug probe | KORLINX-approved SEGGER J-Link model |
| Target connection | Approved SWD connection for the selected NX development-board revision |
| USB access | Data-capable USB cable and permission to access the J-Link and serial devices |
Step 1: Install nRF Connect for Desktop
- Download nRF Connect for Desktop.
- Install the application for your operating system.
- Open nRF Connect for Desktop.
- Install or open the following applications when required:
- Programmer
- Serial Terminal
- Quick Start, if KORLINX confirms support for the selected NX platform
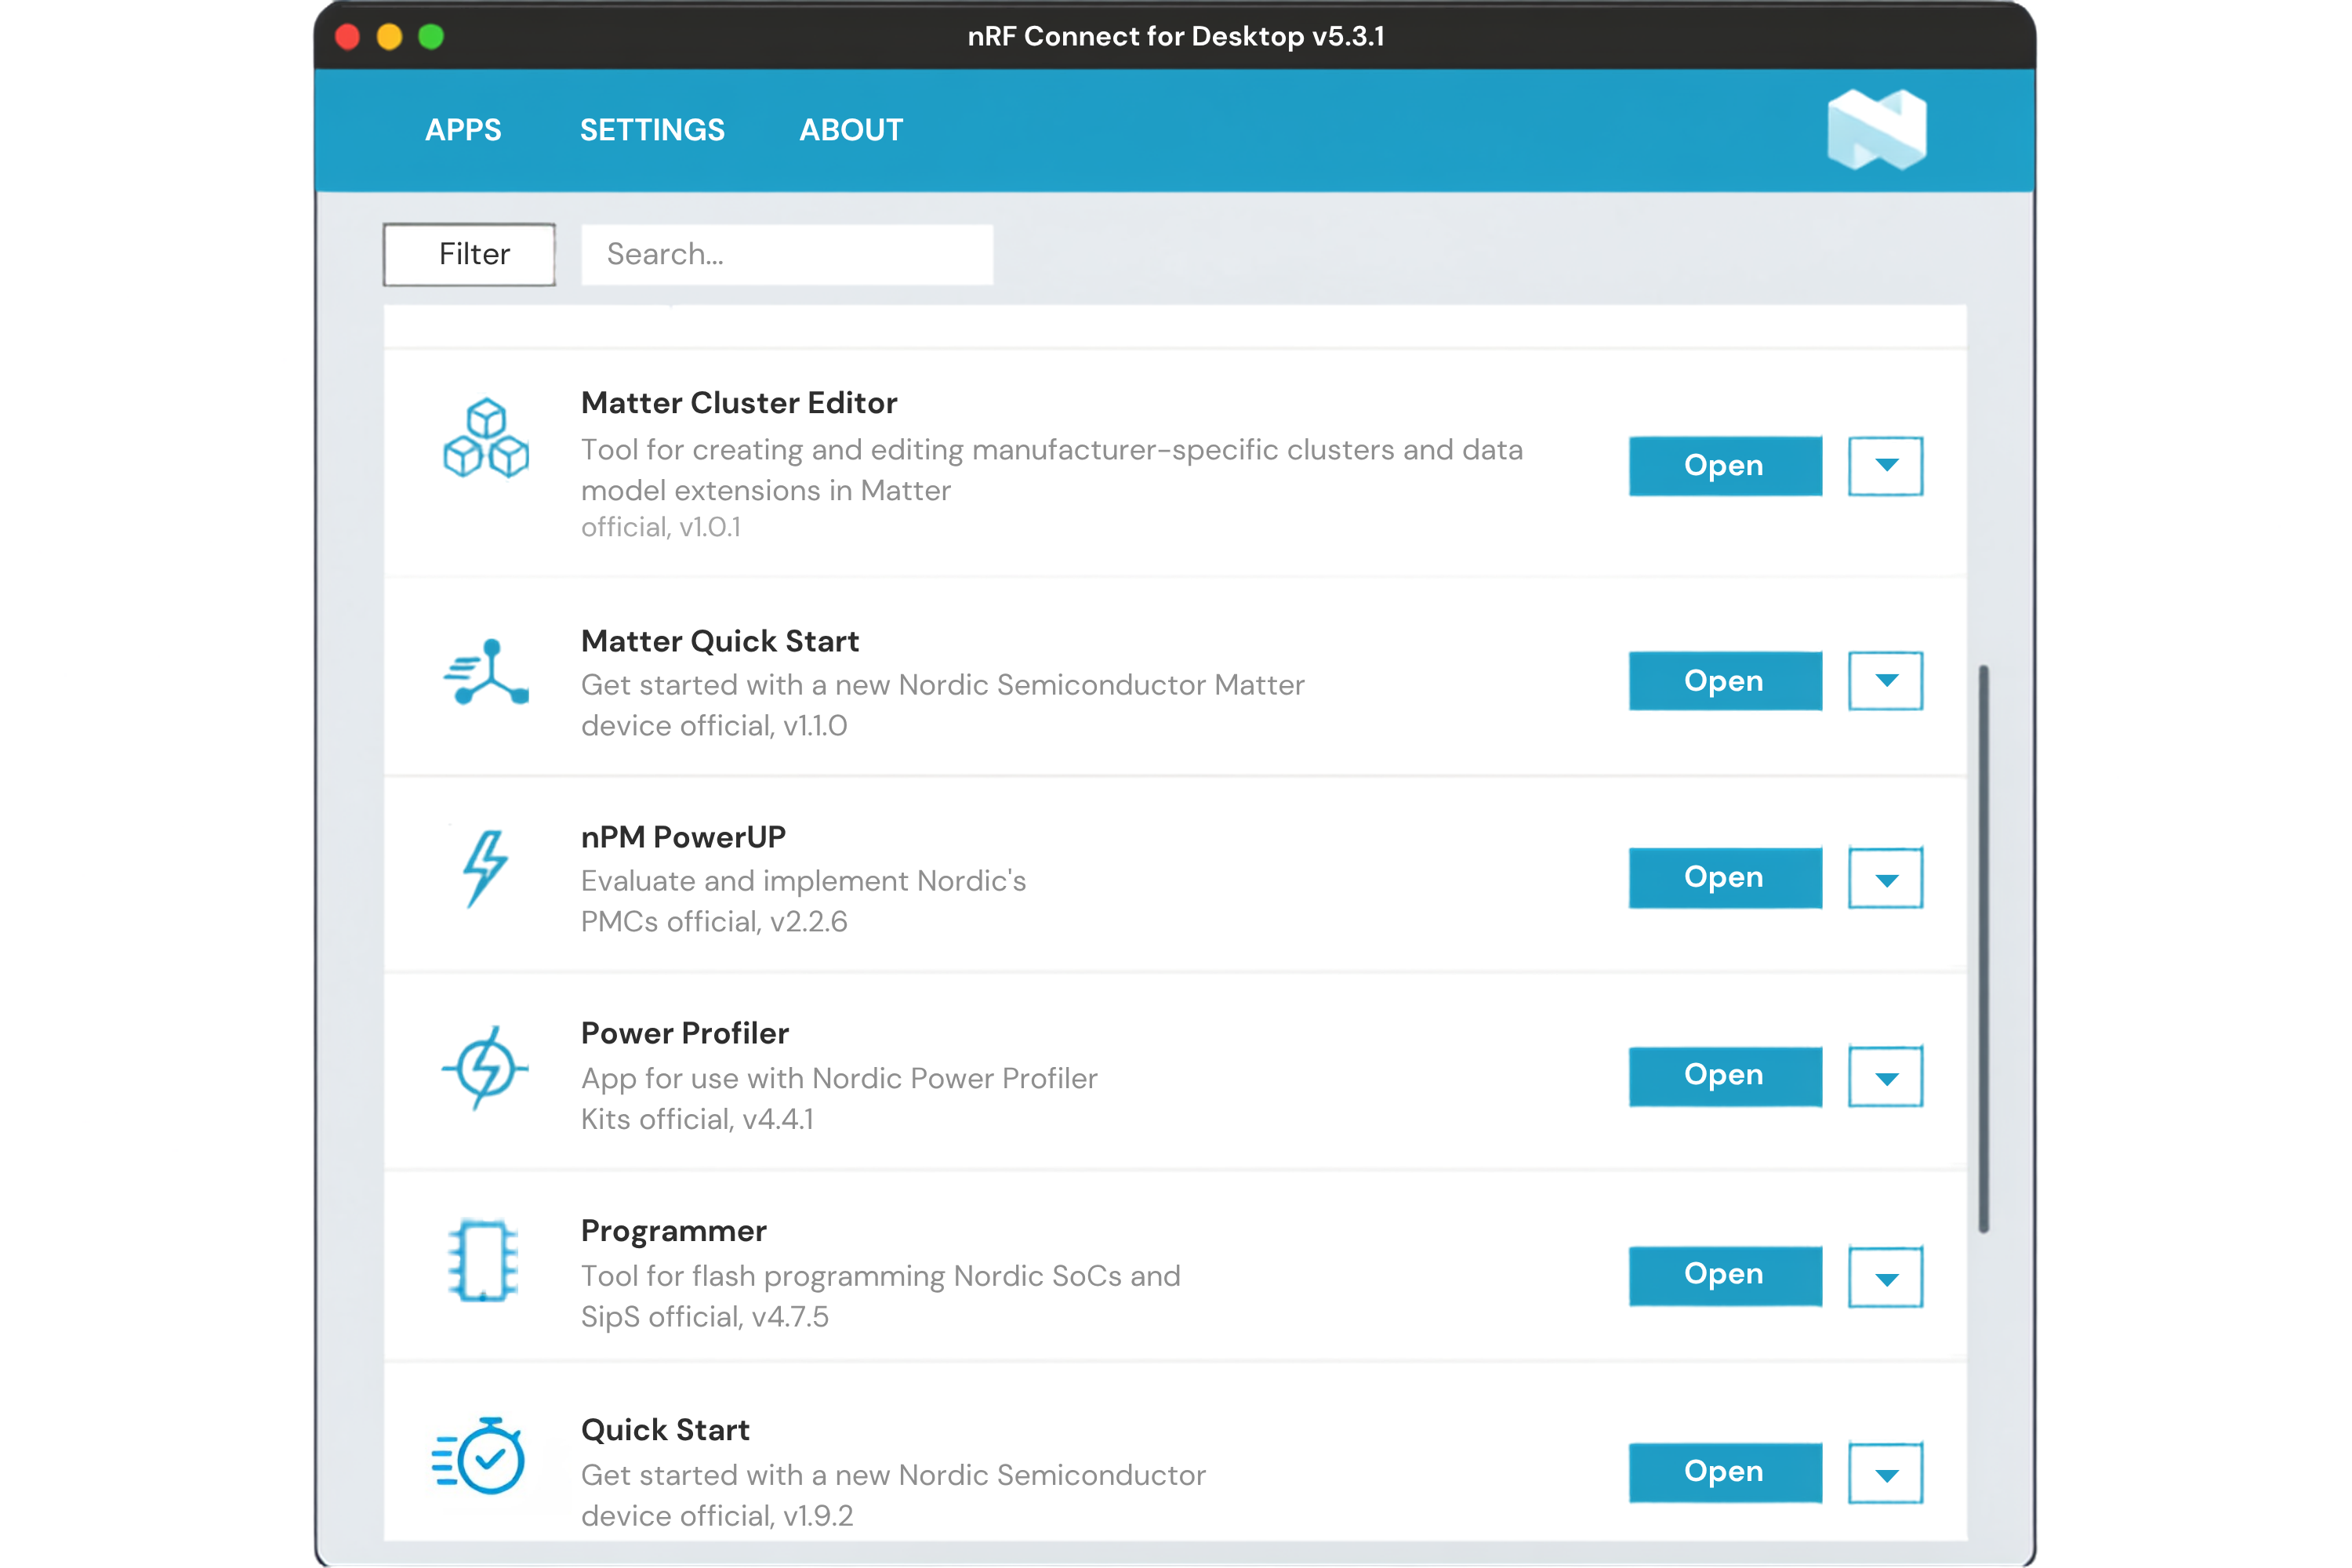
Quick Start availability The supplied Nordic training material demonstrates Quick Start with an nRF54LM20 DK. It does not confirm that Quick Start provides a package for NX15 or NX40. The Quick Start application must remain optional until KORLINX validates the board and firmware package.
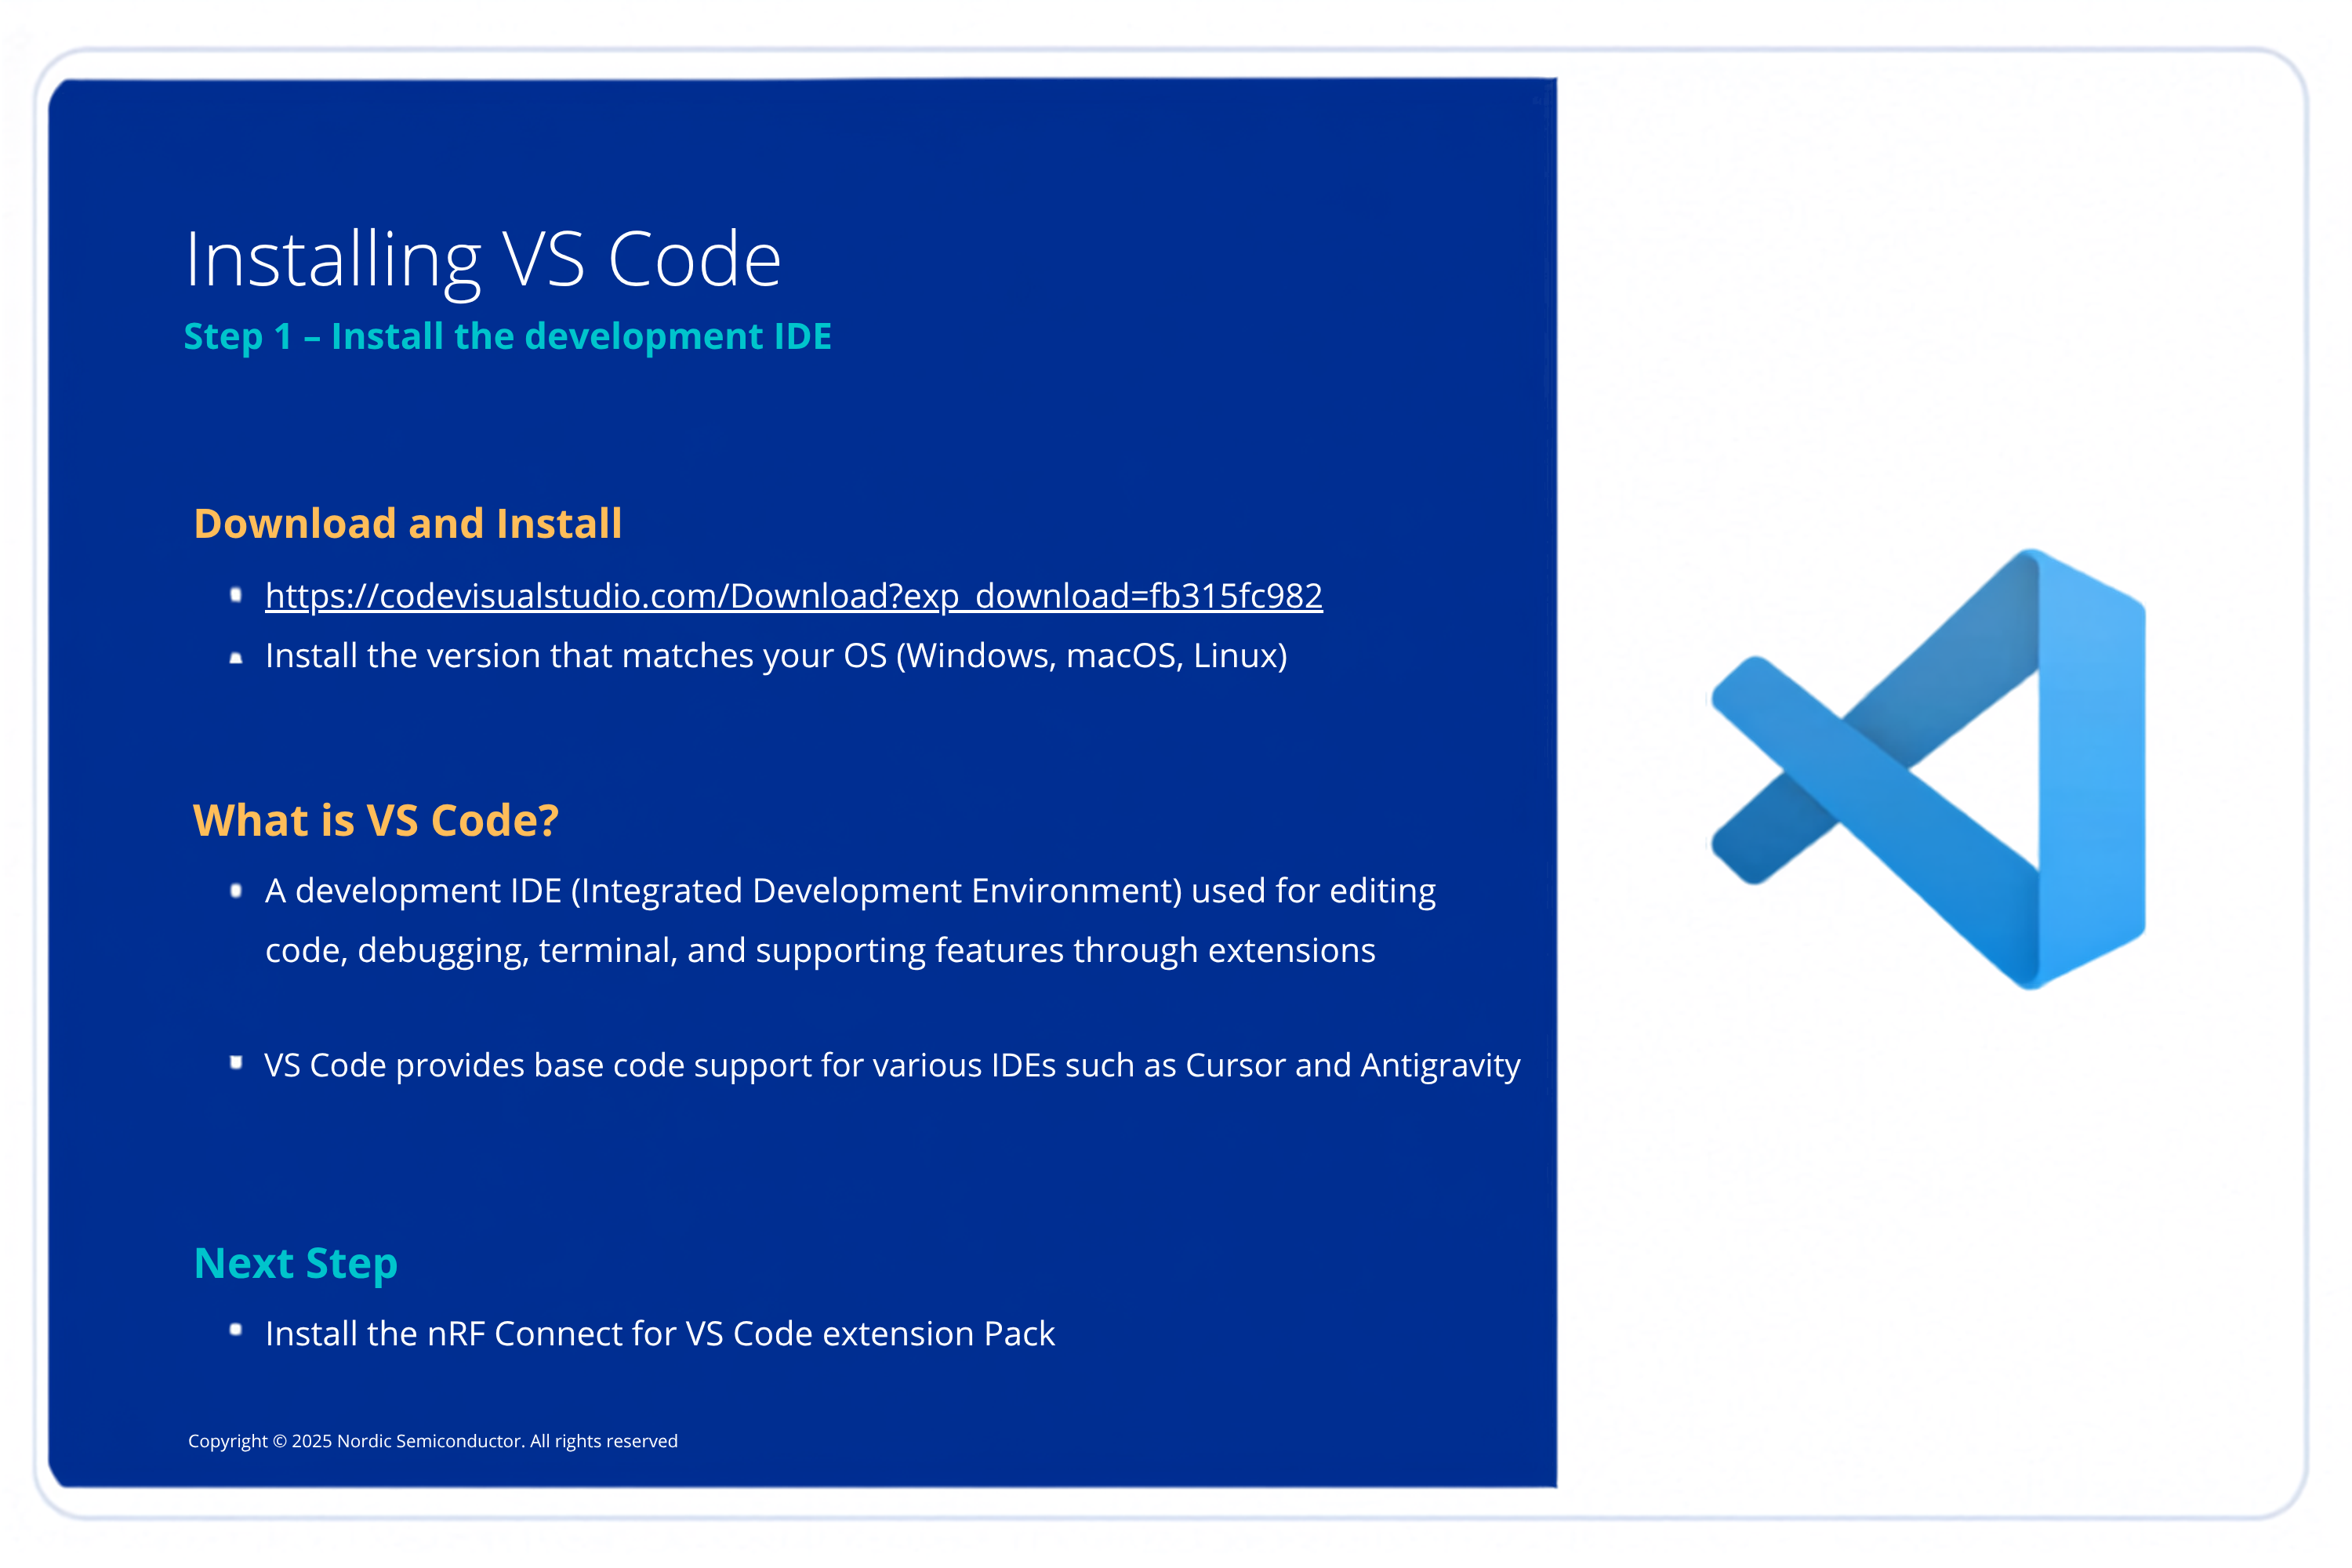
Step 2: Install Visual Studio Code
- Download Visual Studio Code.
- Install and open the application.
- Open the Extensions view.
Step 3: Install the nRF Connect Extension Pack
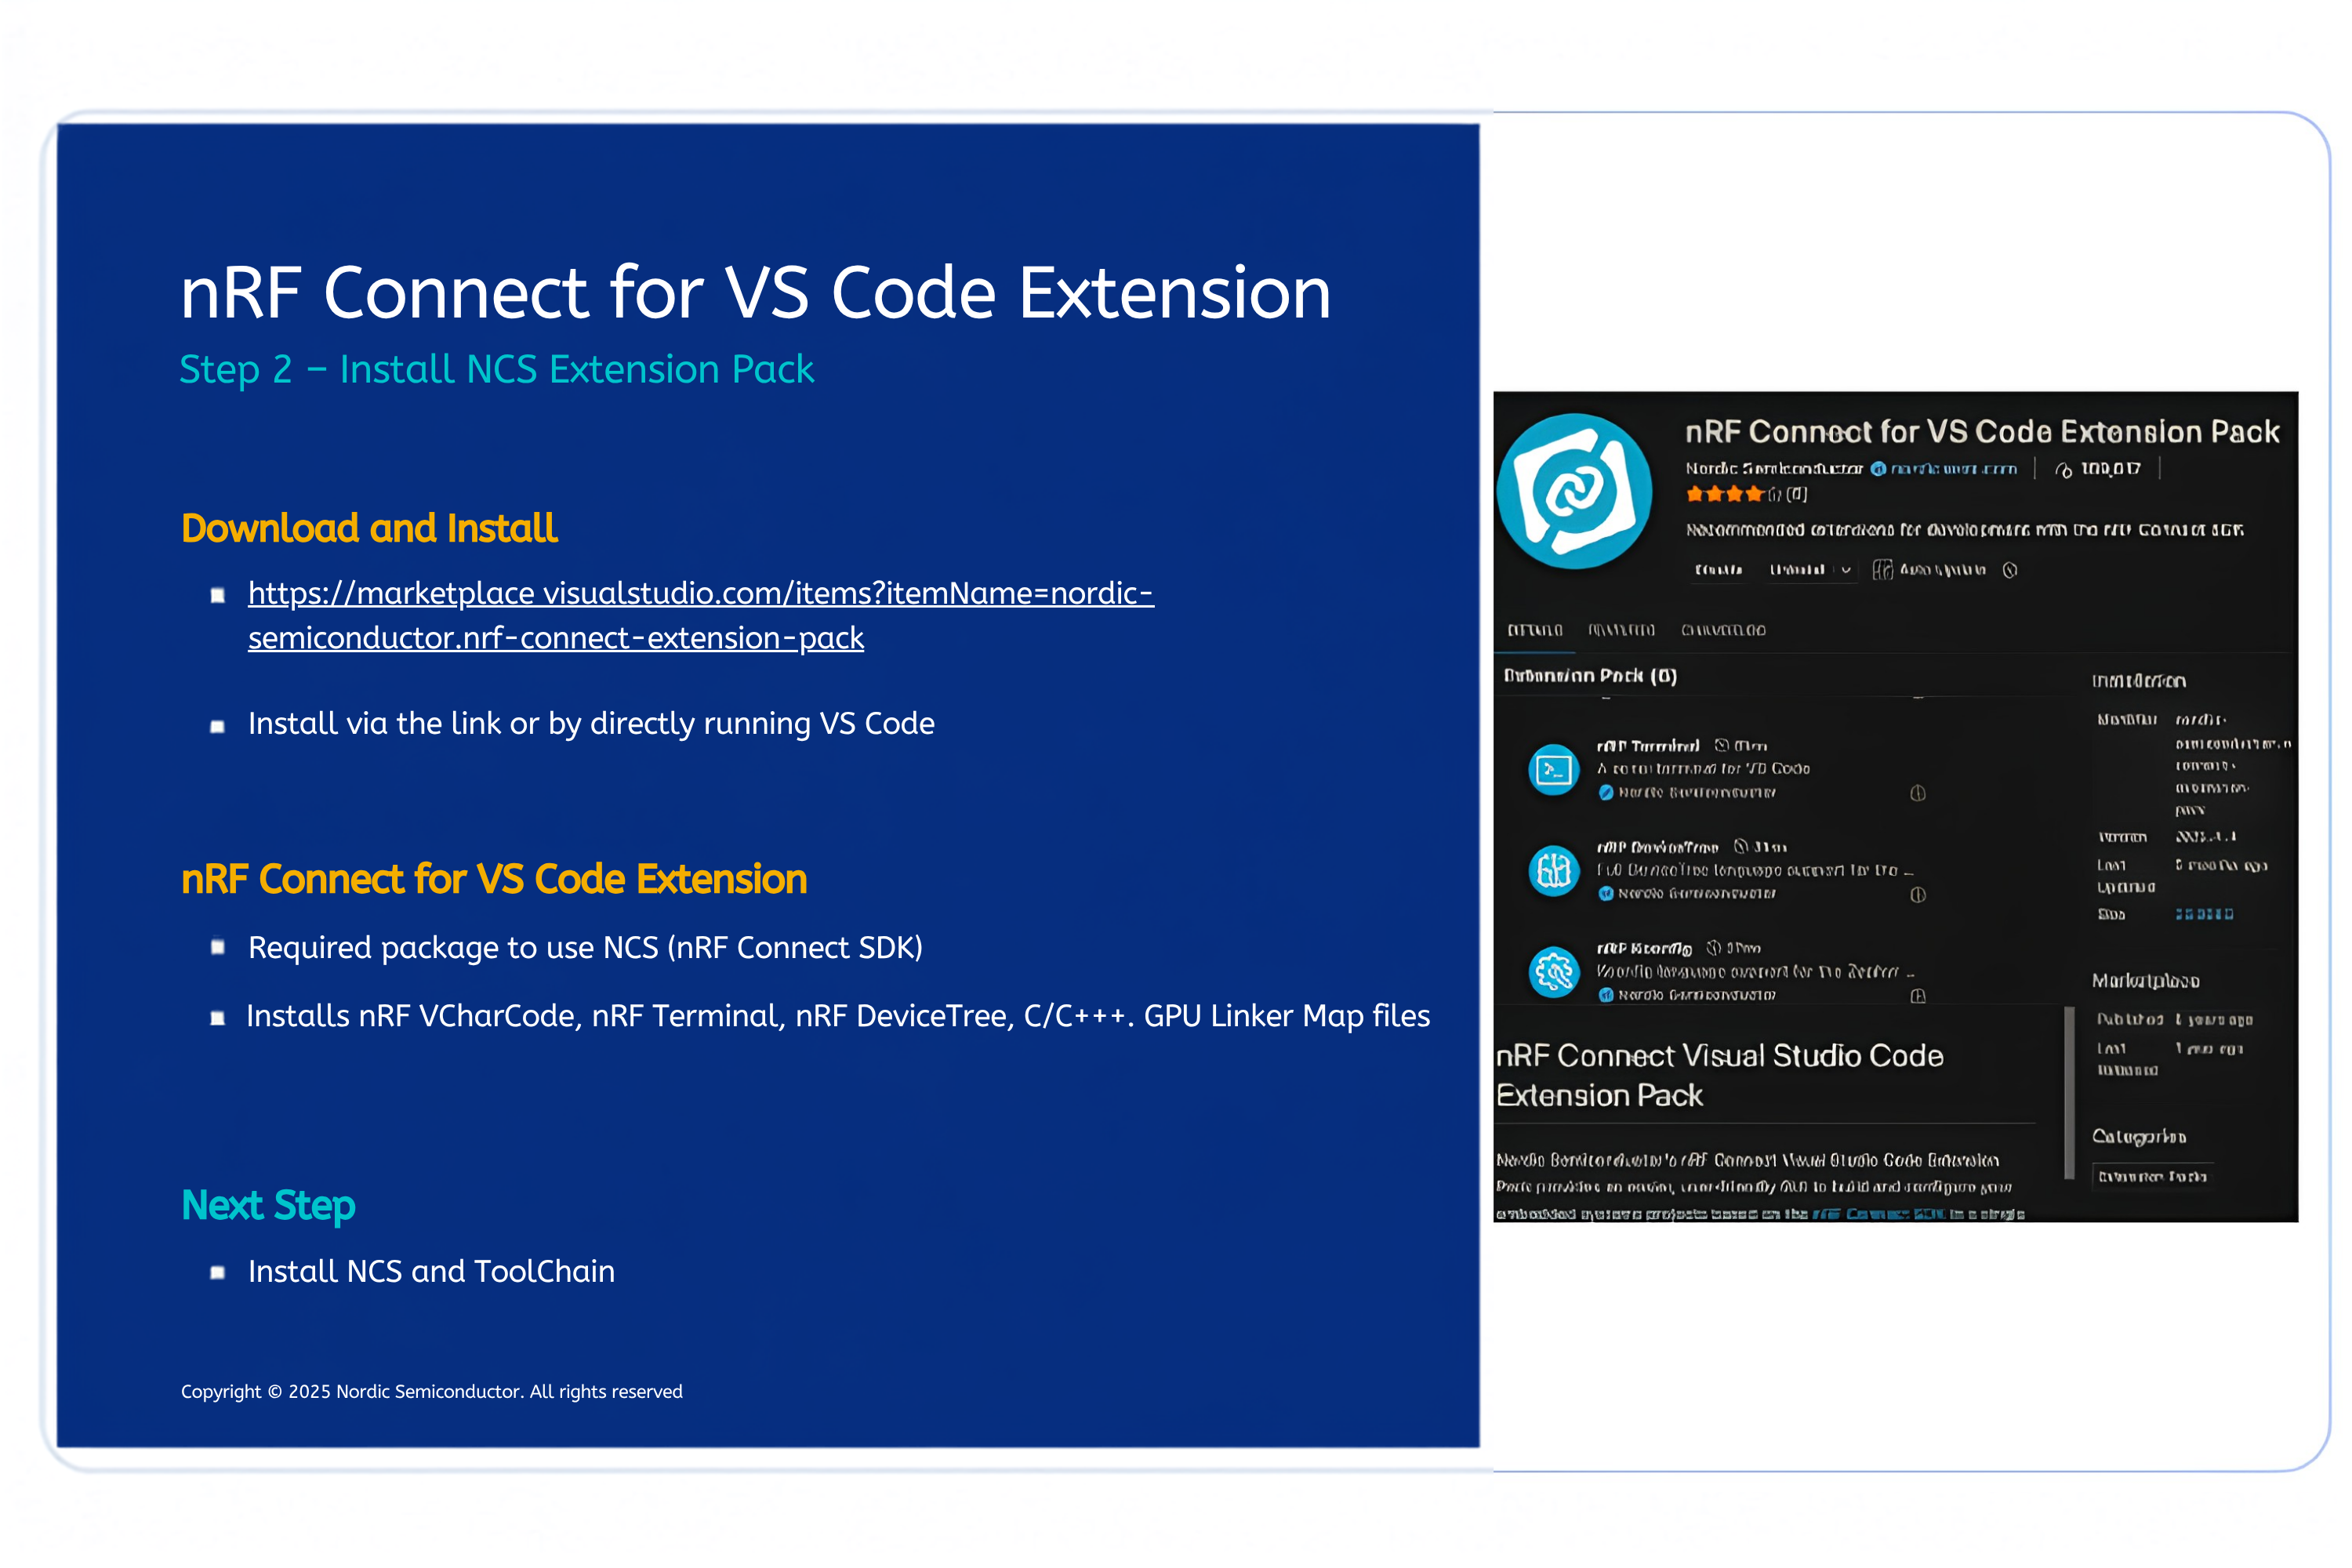
- Search for nRF Connect for VS Code Extension Pack in the VS Code Marketplace.
- Confirm that the publisher is Nordic Semiconductor.
- Select Install.
- Restart VS Code if requested.
- Confirm that the nRF Connect view is available in the Activity Bar.
The extension pack installs the tools required to manage SDKs, toolchains, applications, build configurations, connected devices, and serial terminals.
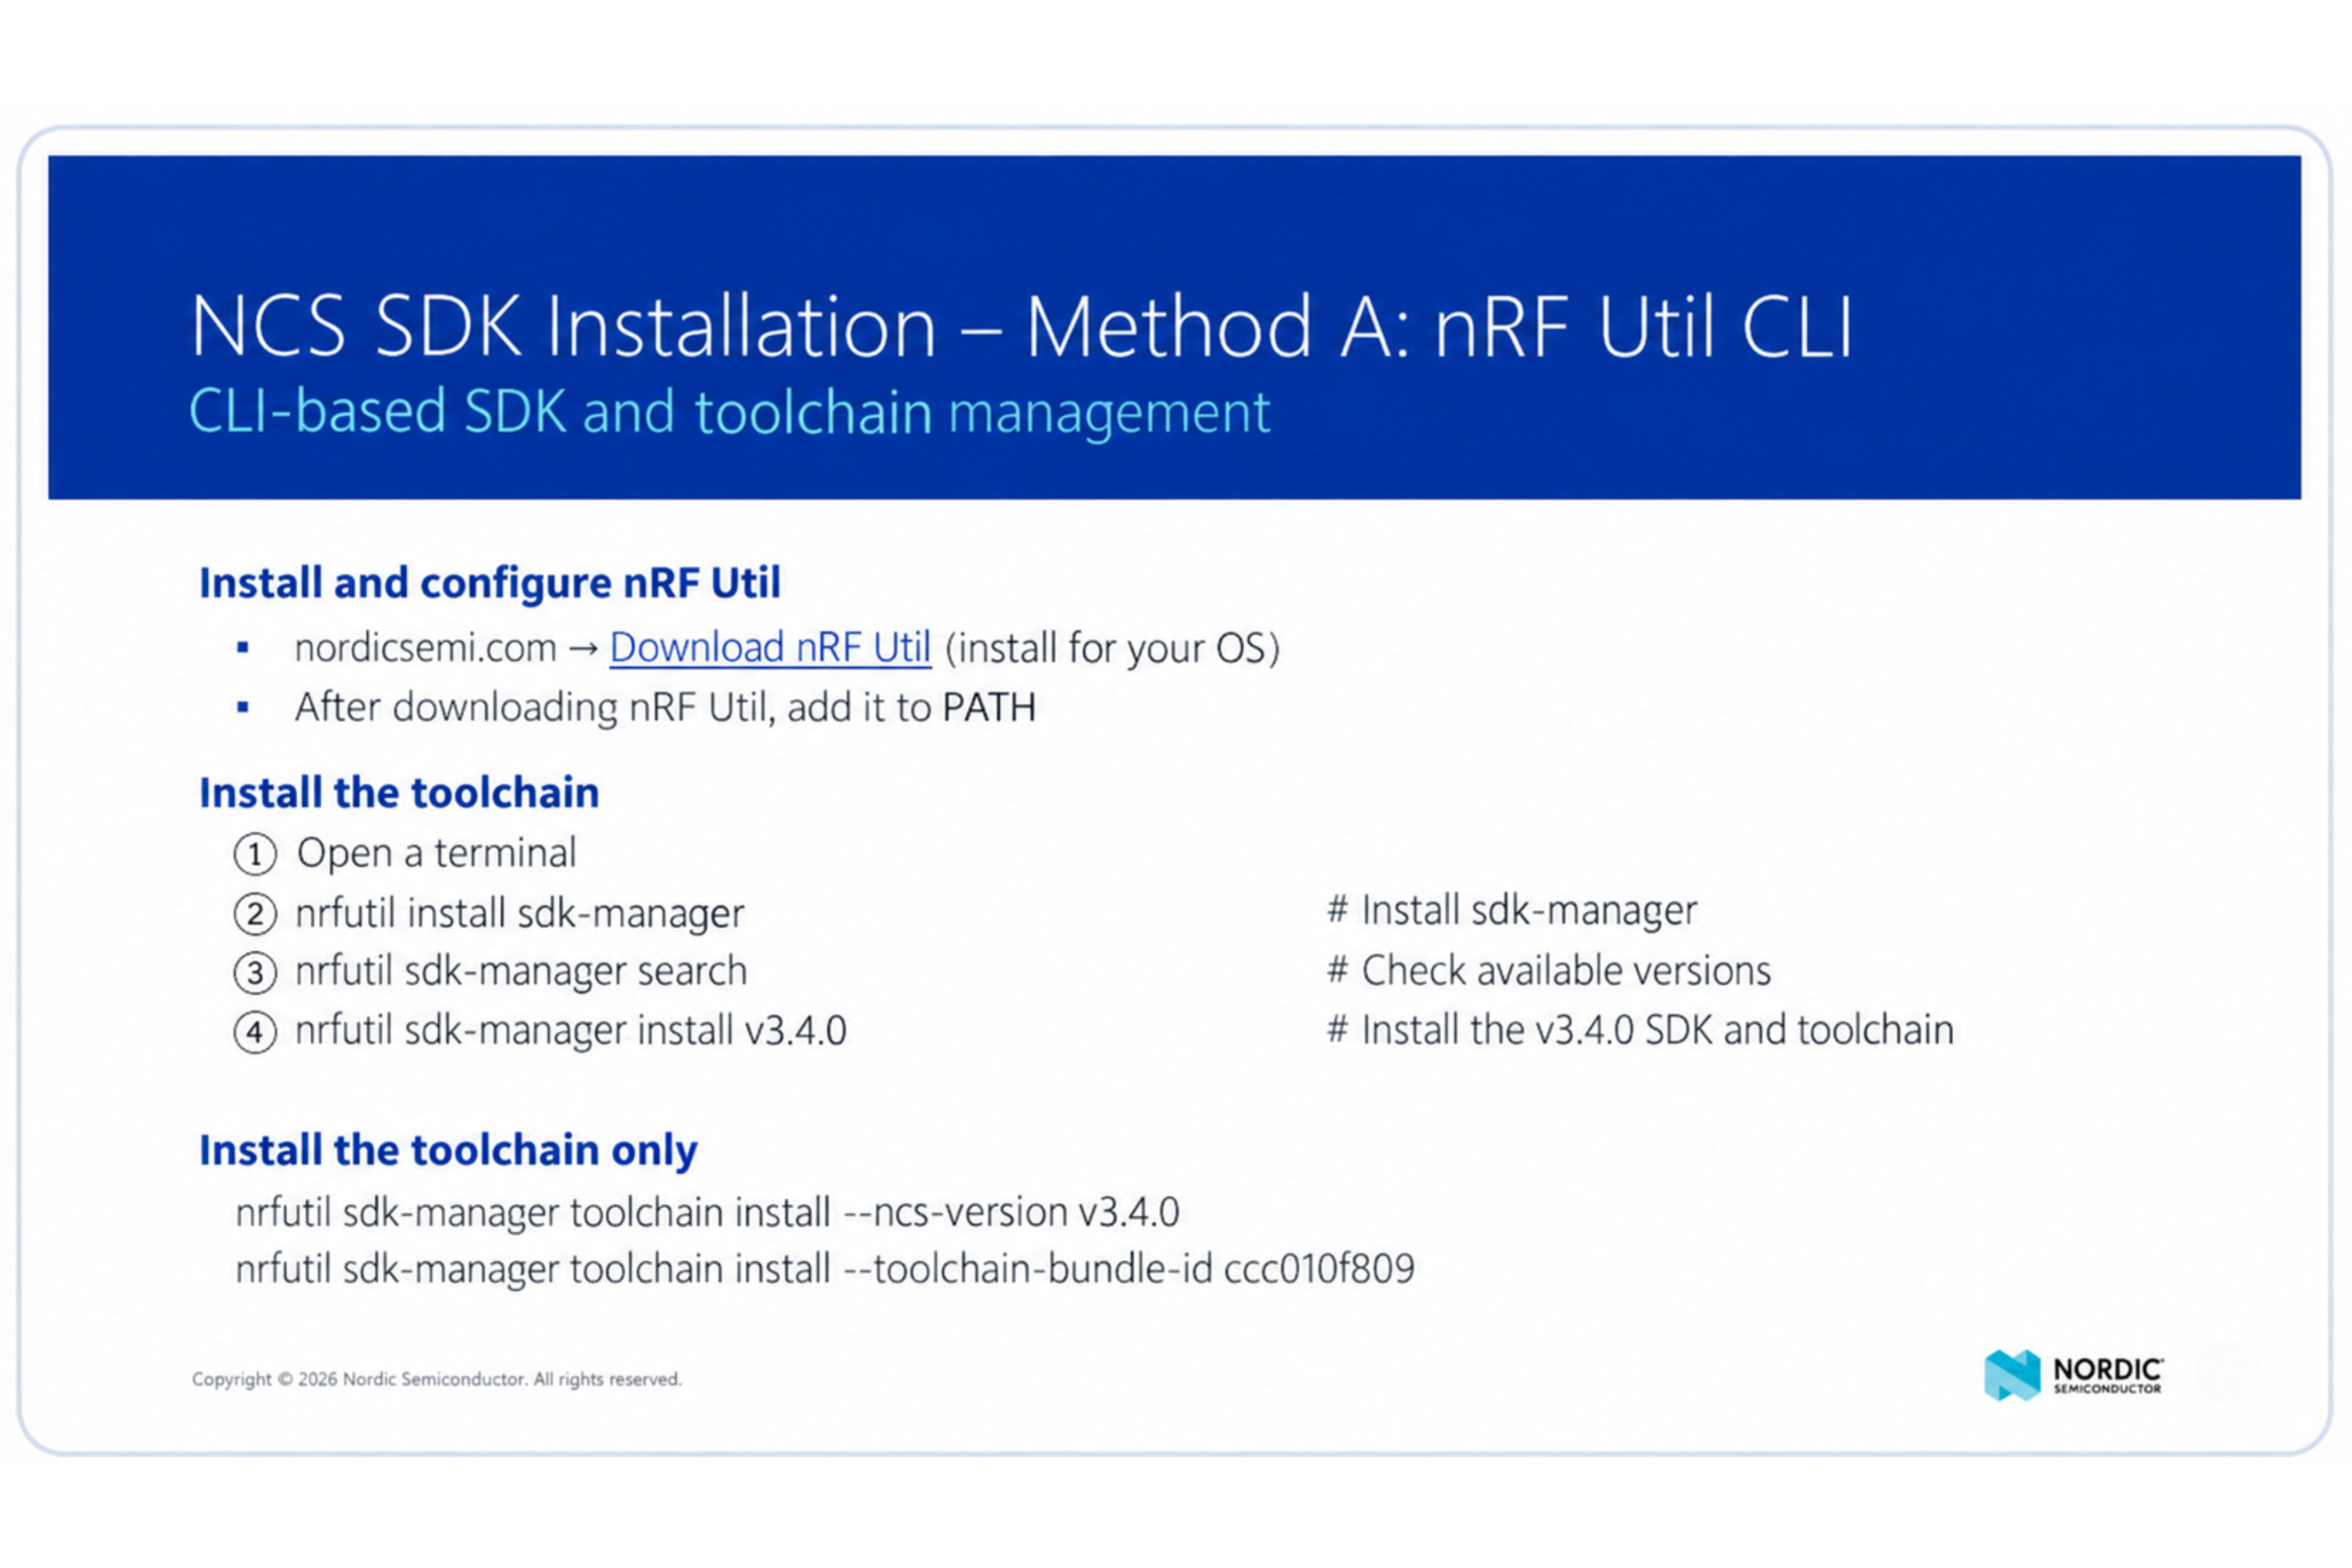
Step 4: Install the approved nRF Connect SDK
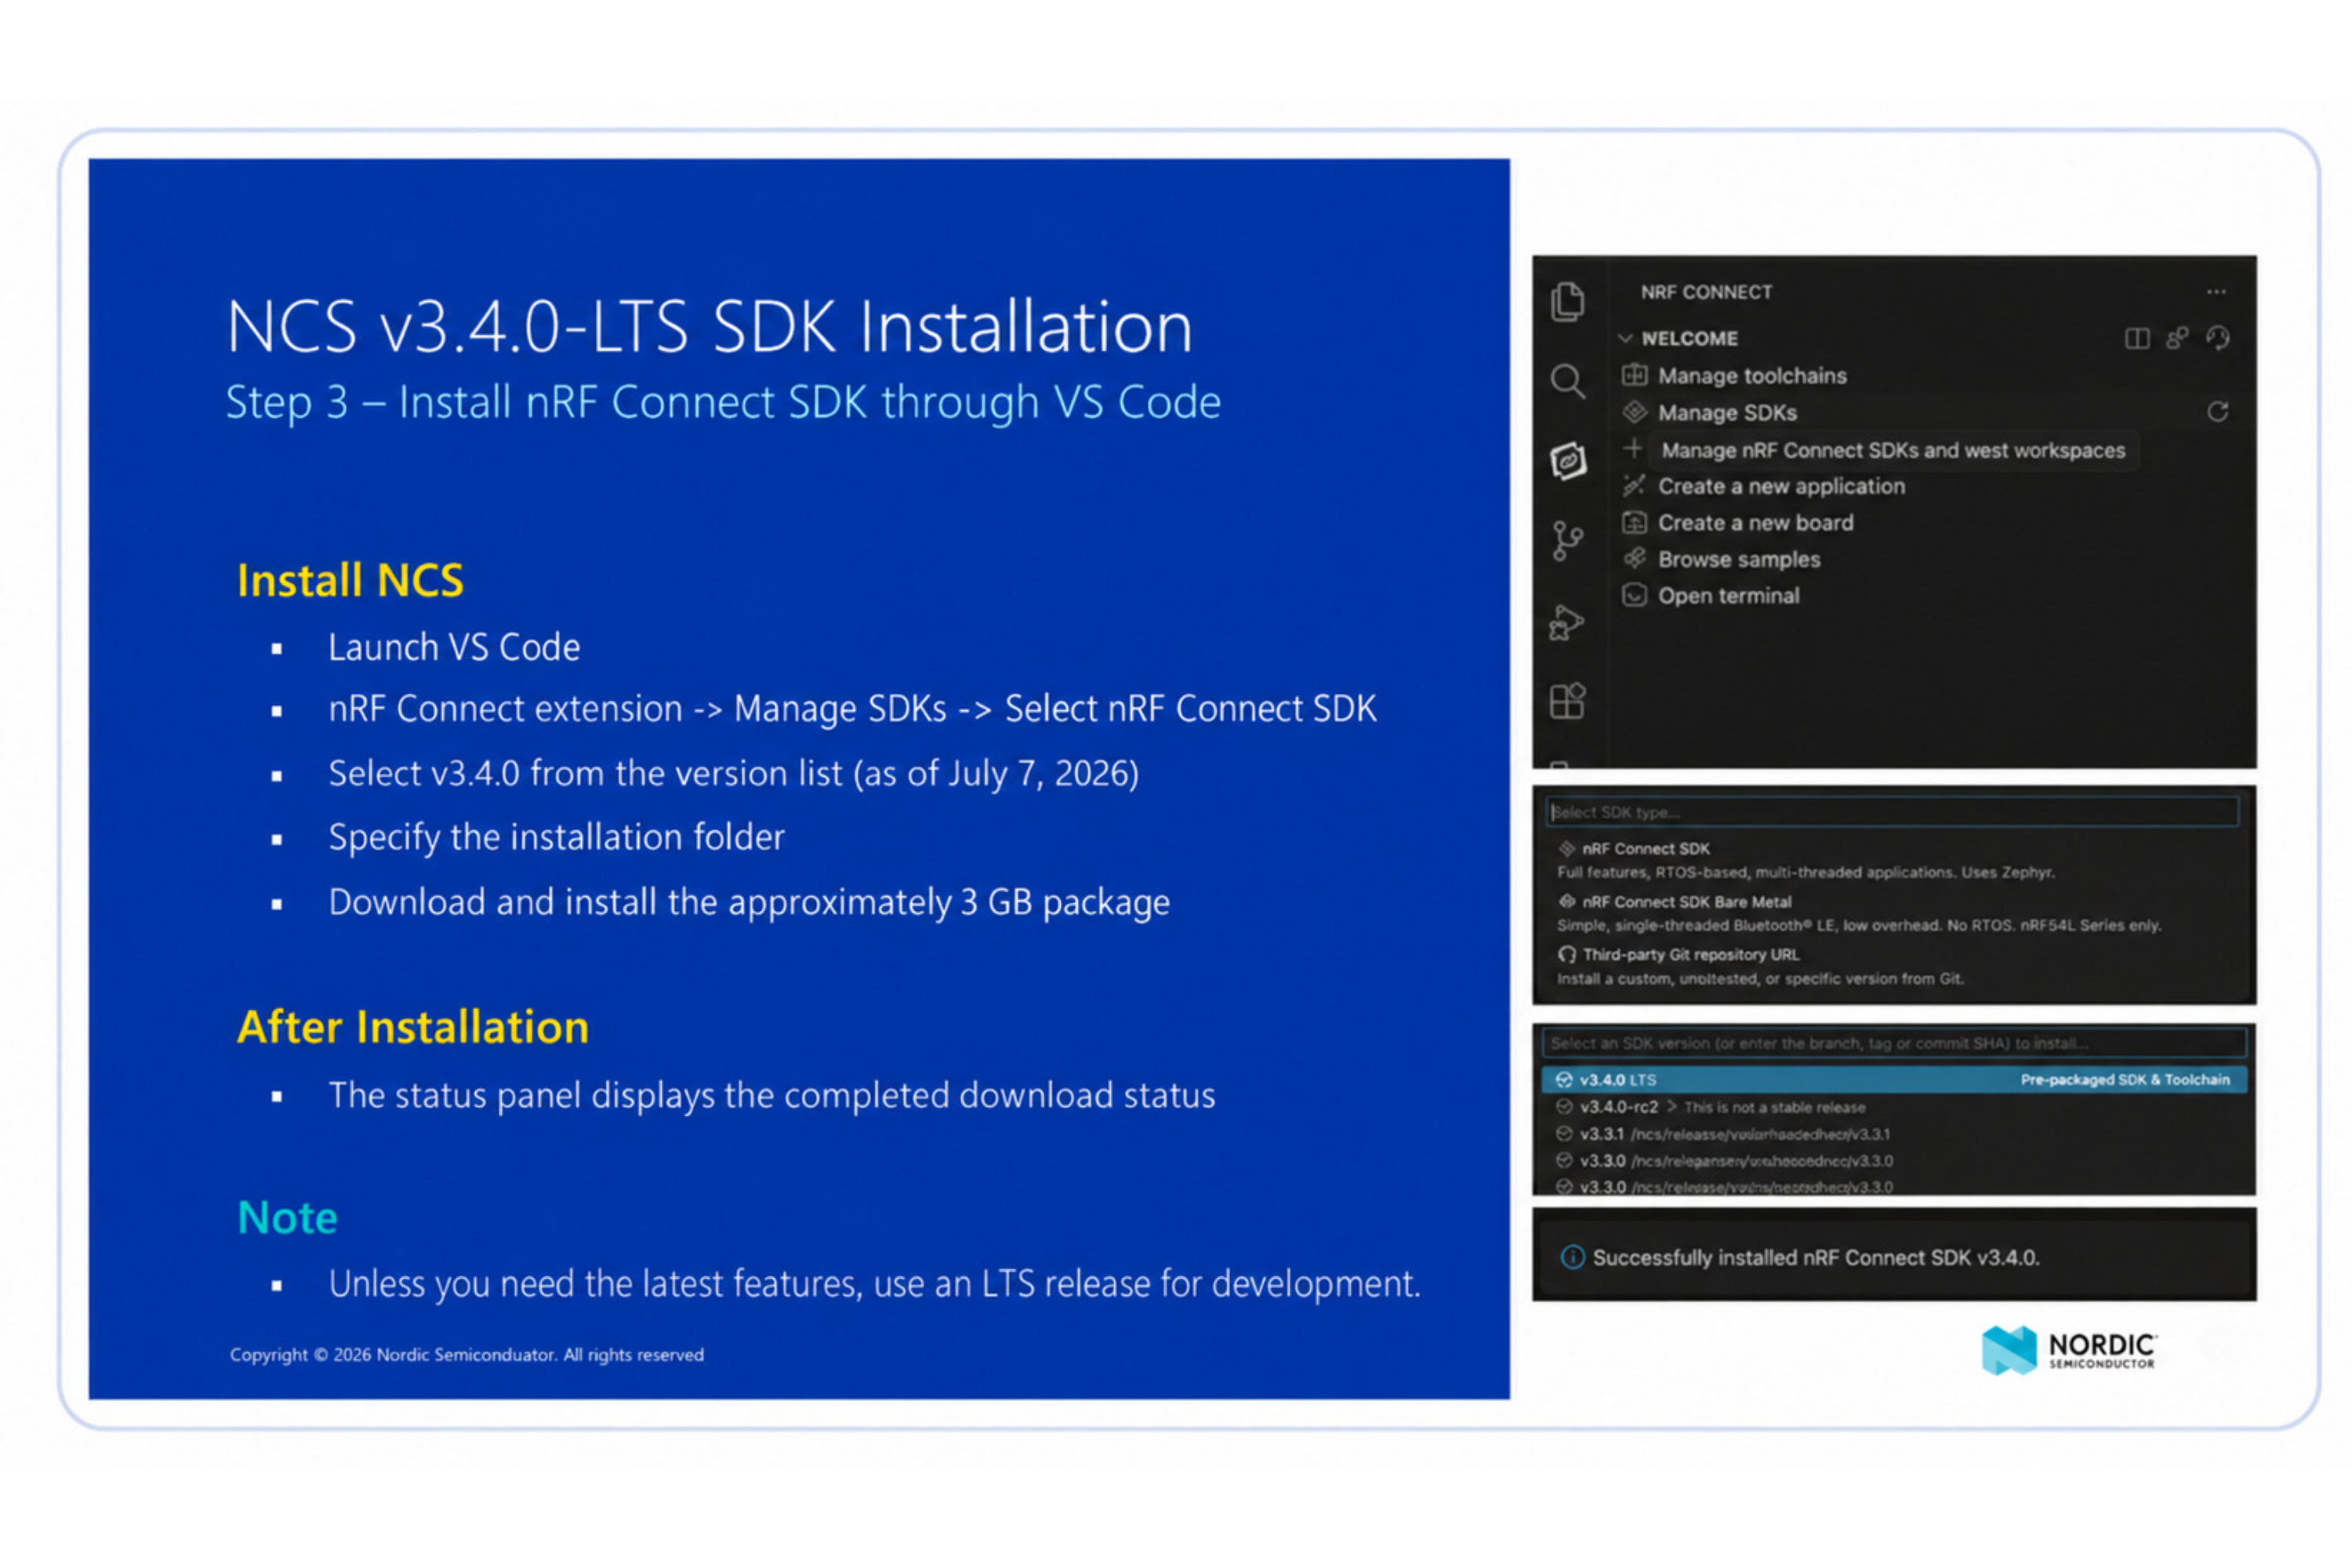
- Open the nRF Connect view in VS Code.
- Select Manage SDKs.
- Select Install SDK.
- Choose the KORLINX-approved version.
- Select an installation directory with sufficient free space.
- Wait until the SDK installation completes successfully.
Use the following working value only during internal review:
nRF Connect SDK: v3.4.0
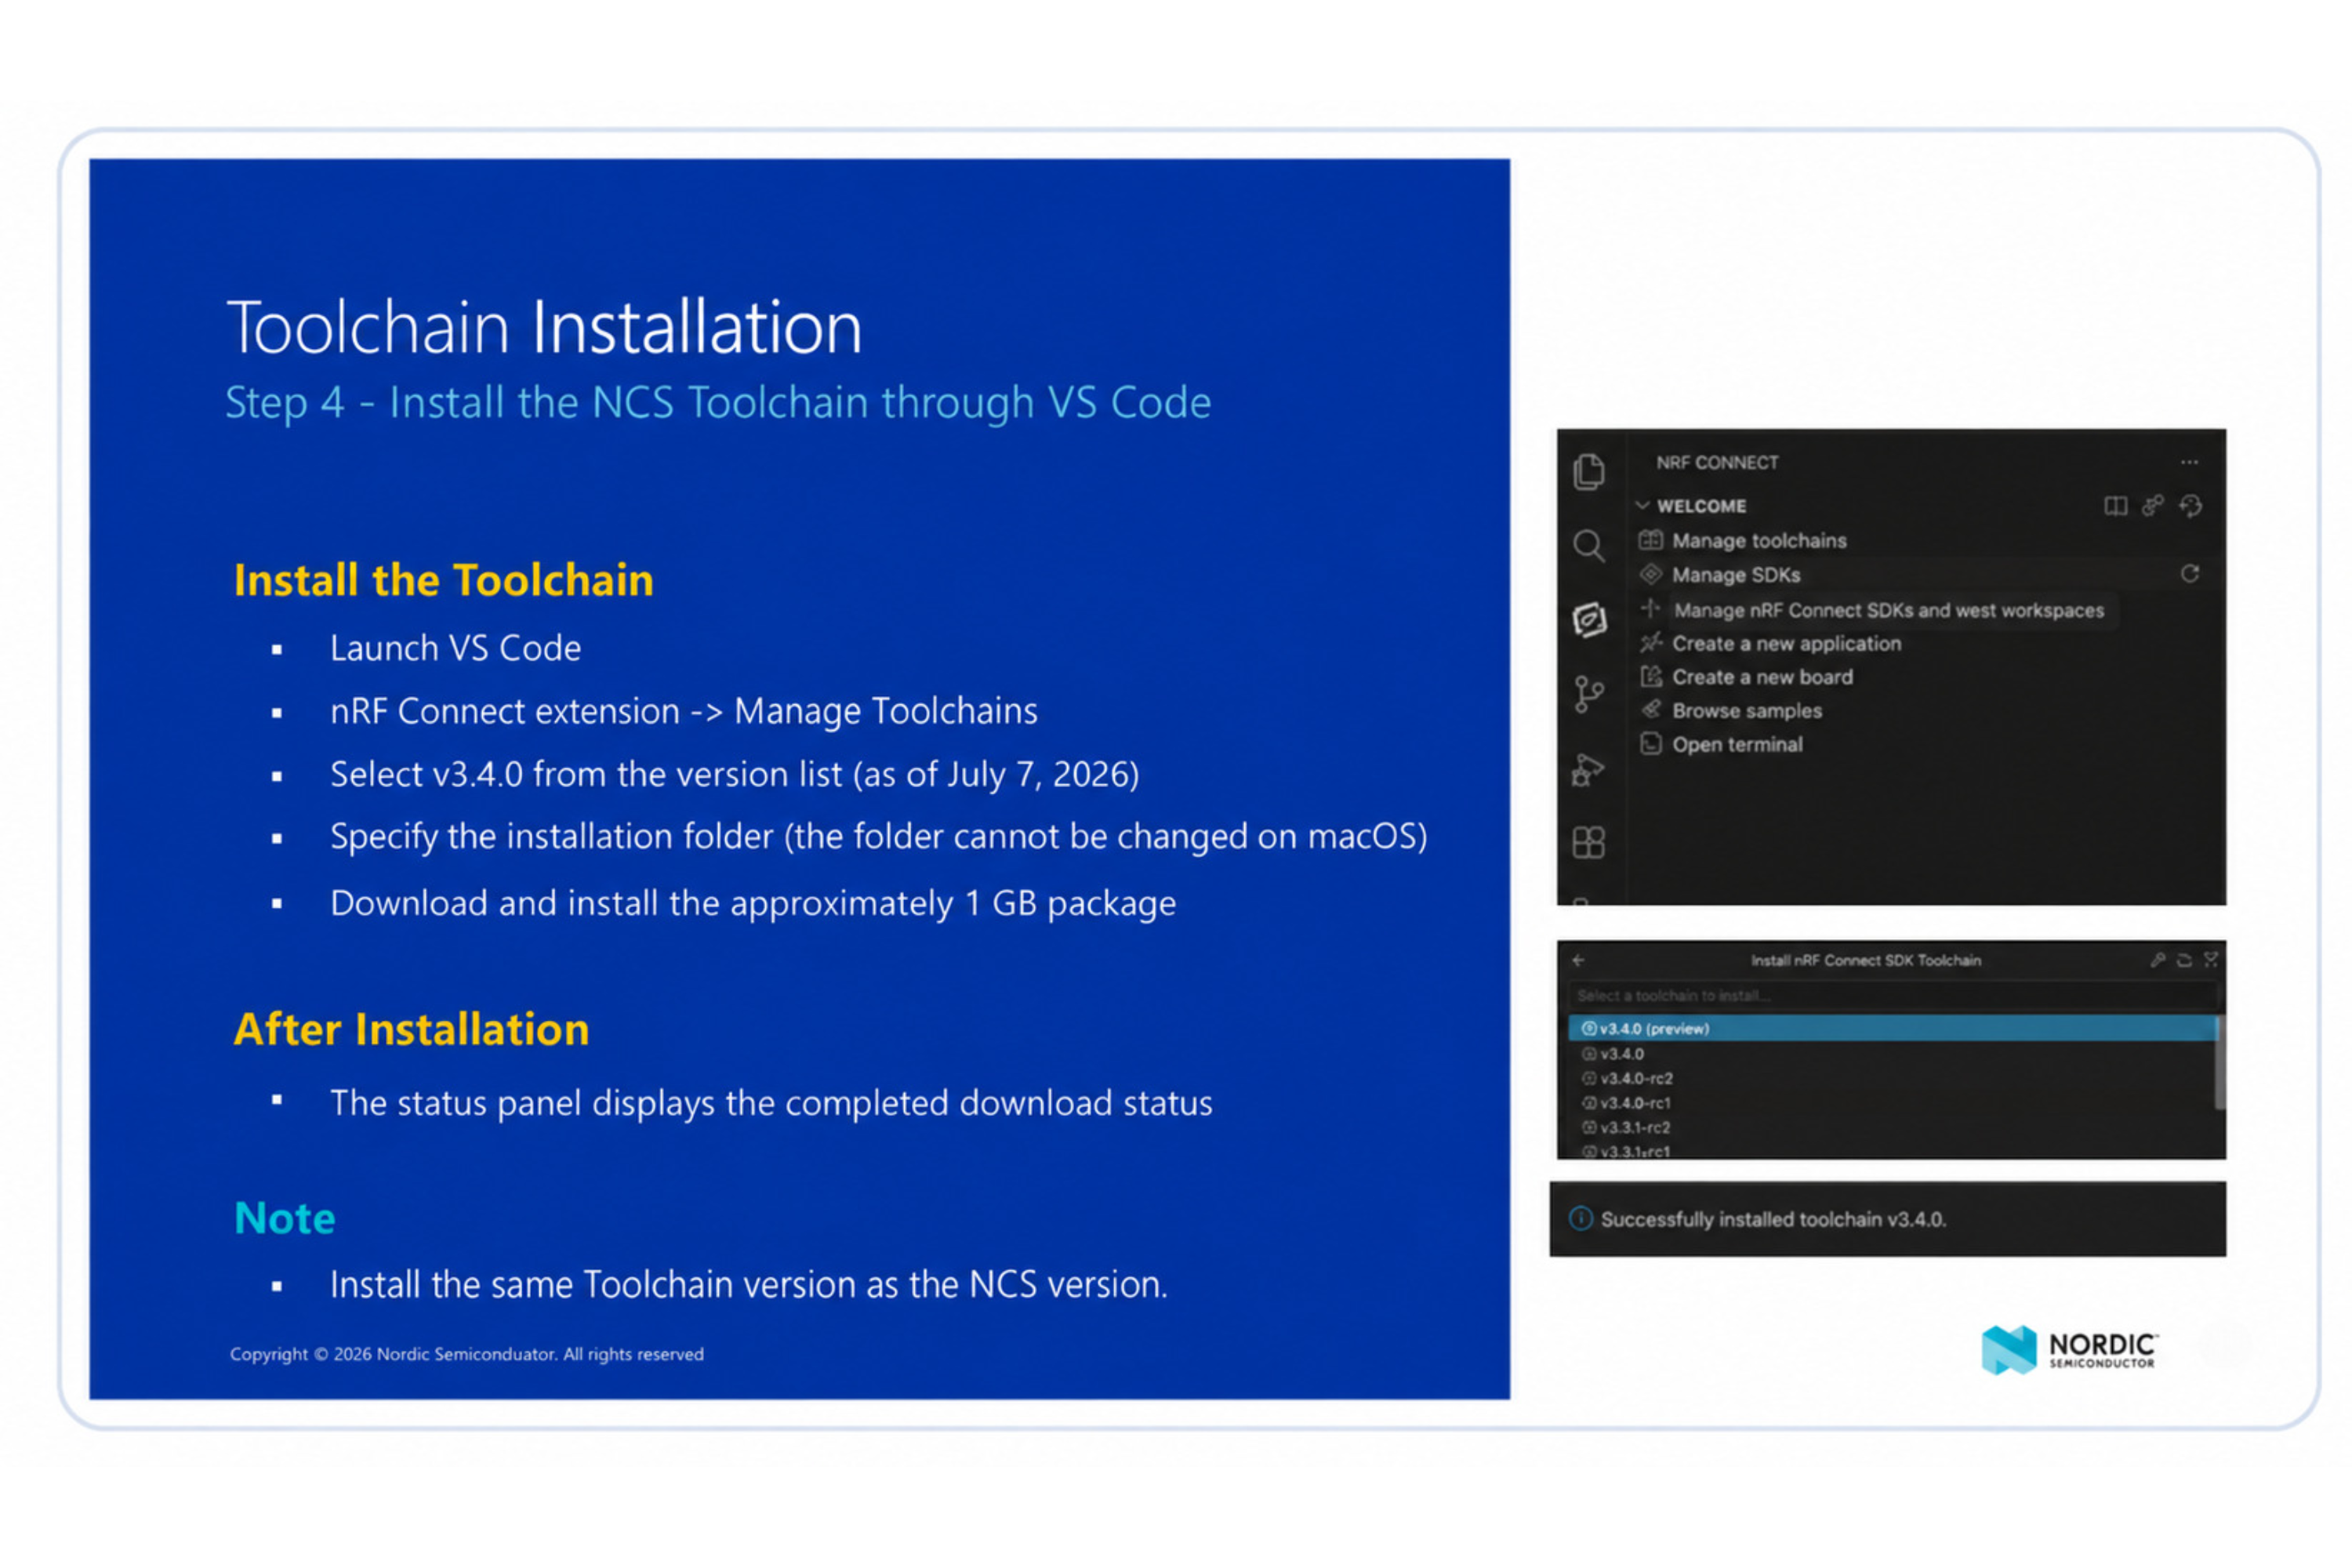
Step 5: Install the matching toolchain
- In the nRF Connect view, select Manage Toolchains.
- Install the toolchain that matches the approved SDK release.
- Wait until the toolchain status shows that the installation is complete.
The SDK and toolchain versions must match unless KORLINX R&D documents a supported exception.
Step 6: Install the SEGGER J-Link software
The NX development board uses an external SEGGER J-Link probe for programming and debugging through the SWD interface.
- Download the SEGGER J-Link Software and Documentation Pack.
- Install the package for your host operating system.
- Restart the host computer if requested.
- Open a terminal.
- Start J-Link Commander:
Windows: JLink.exe
Linux/macOS: JLinkExe
- Confirm that J-Link Commander opens and displays the installed software version.
- Enter
Exitto close J-Link Commander:
J-Link> Exit
Step 7: Open an SDK terminal
Open a terminal from the installed SDK and run:
west --version
Confirm that the command completes without an environment error.
Developer reference keywords: west workspace, Zephyr SDK, NCS toolchain, environment variables, J-Link runner
Step 8: Connect the NX development board through J-Link
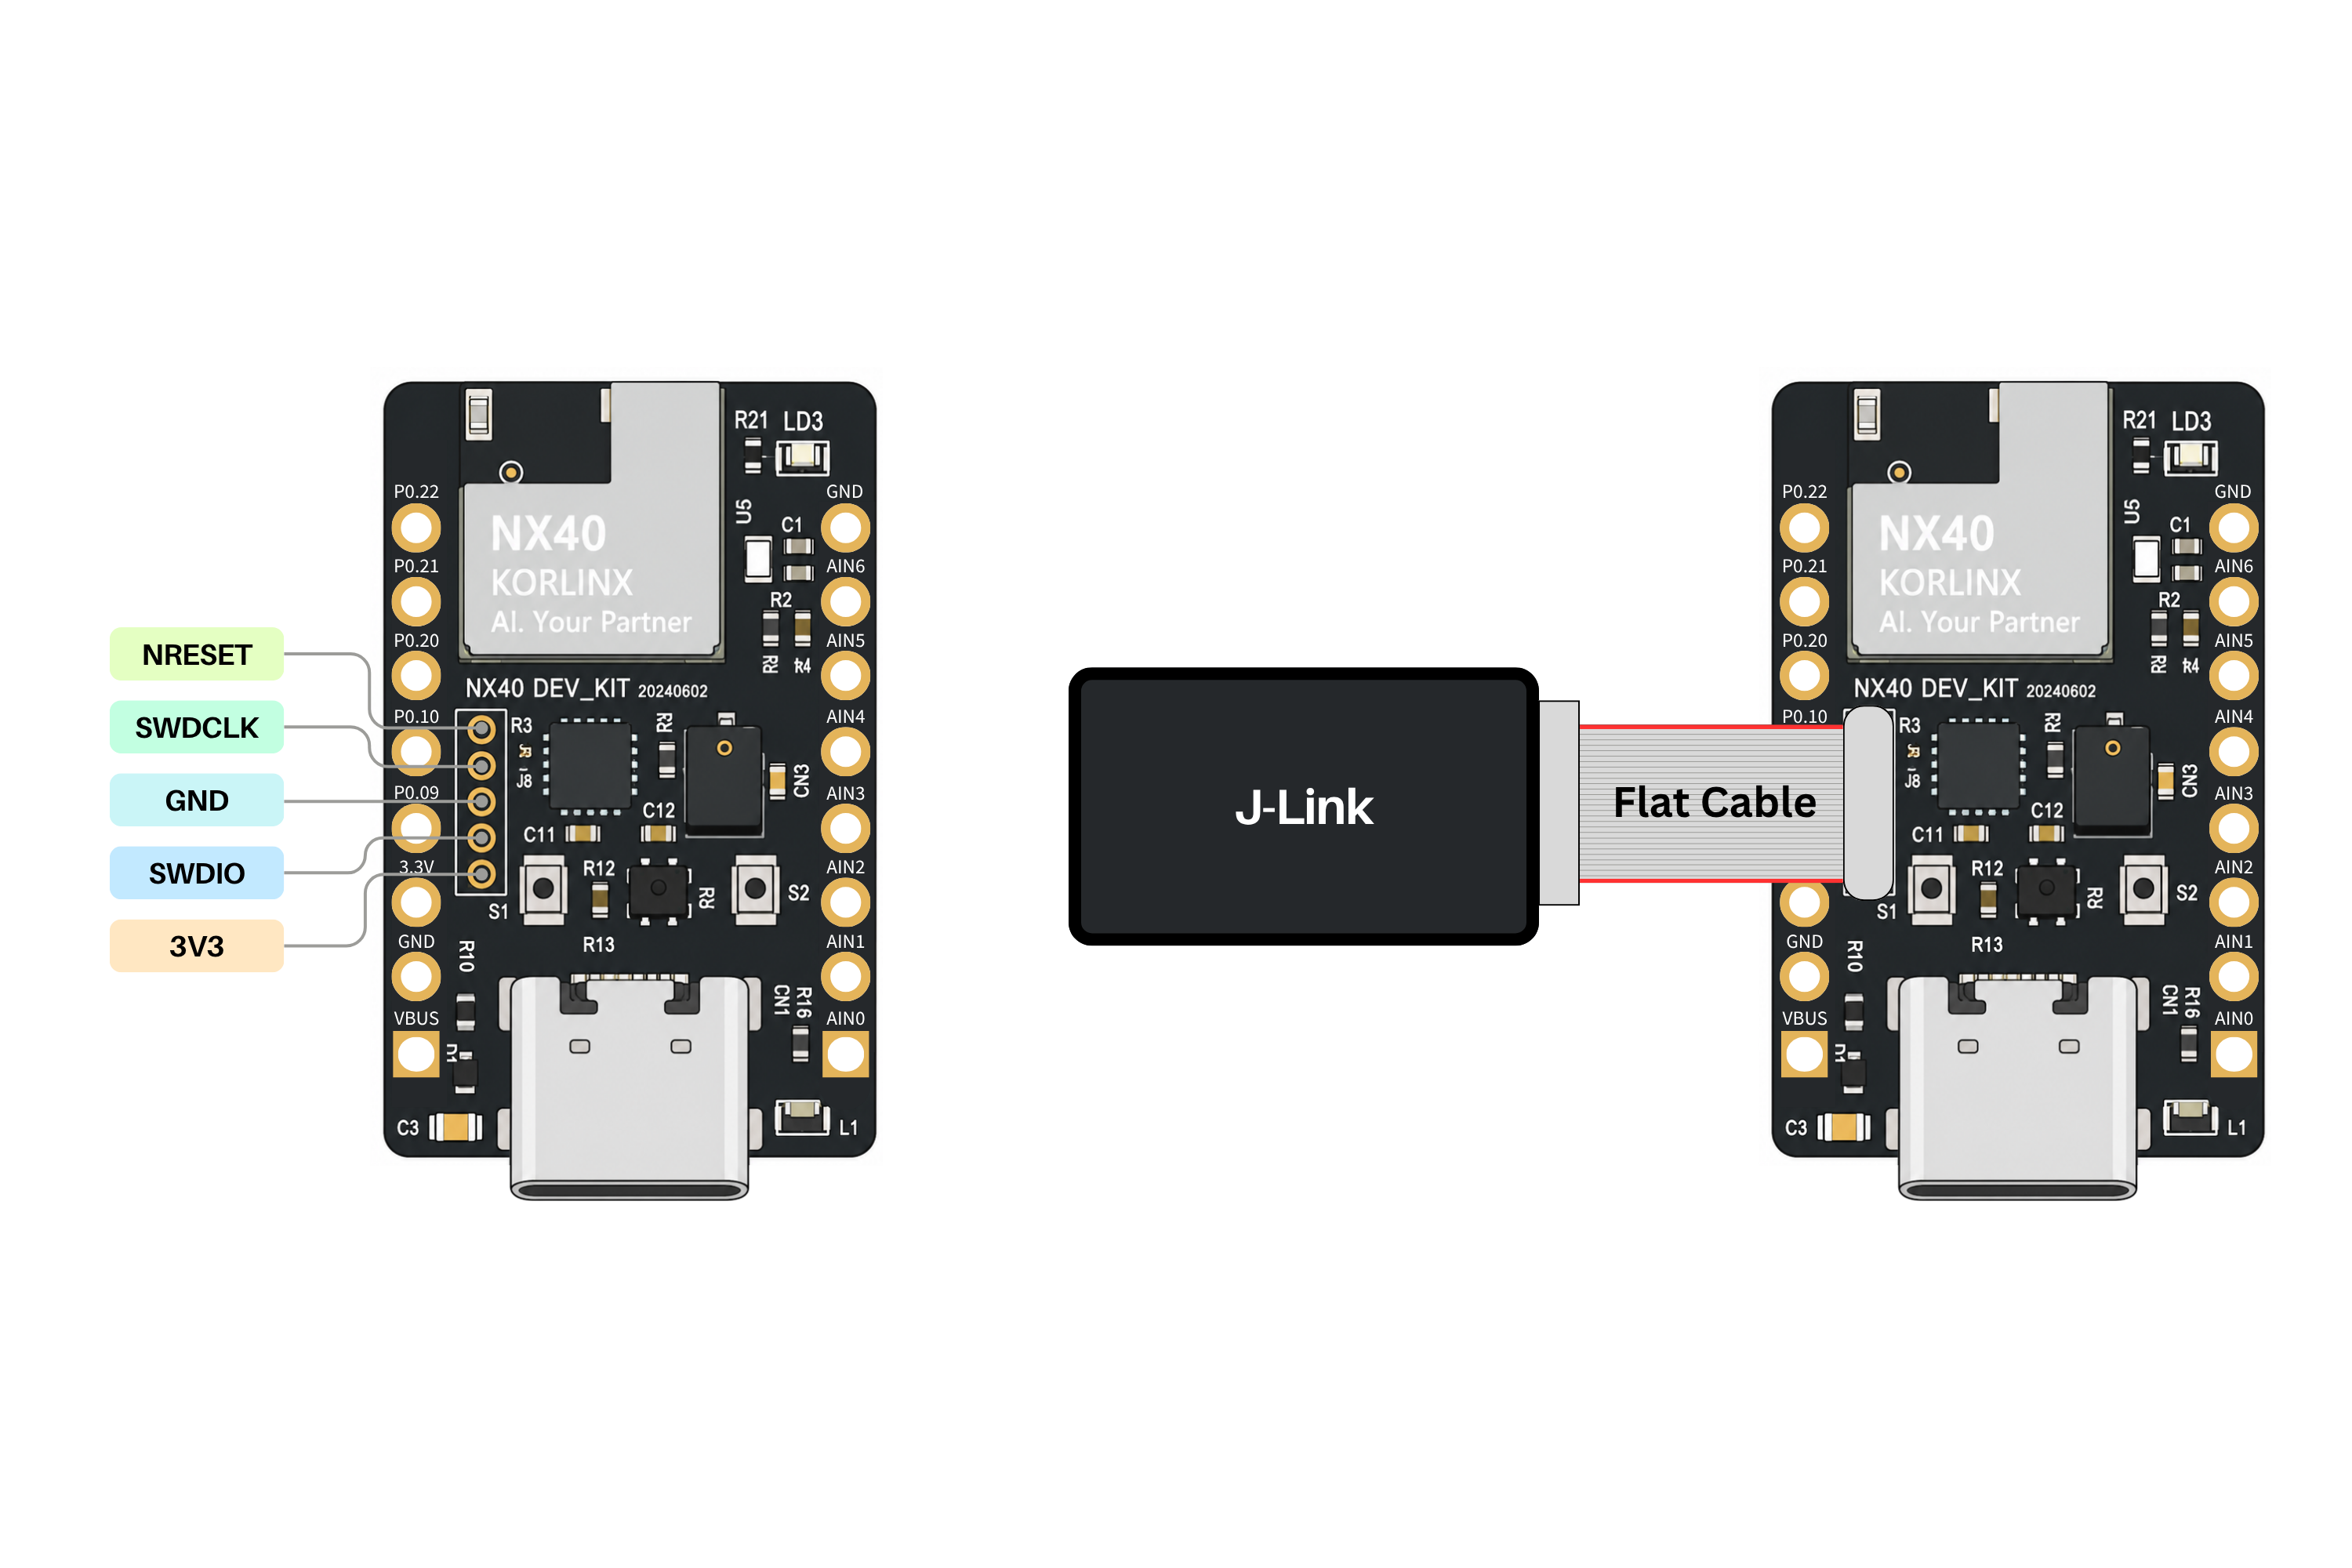
- Disconnect power from the NX development board.
- Connect the approved J-Link cable or adapter to the NX board's SWD interface.
- Confirm the required signals according to the approved hardware guide:
| J-Link signal | NX board signal | Purpose |
|---|---|---|
VTref | Target reference voltage | Allows J-Link to detect the target I/O voltage |
SWDIO | SWDIO | SWD data |
SWCLK | SWDCLK | SWD clock |
GND | GND | Common ground |
RESET | nRESET | Target reset, when required |
- Check the cable orientation before applying power.
- Connect the J-Link probe to the host computer.
- Power the NX development board using its approved power input.
- Start J-Link Commander:
Windows: JLink.exe
Linux/macOS: JLinkExe
- List the connected J-Link probes:
J-Link> ShowEmuList USB
- Confirm that the expected J-Link serial number appears.
- Select the KORLINX-approved target device and SWD interface:
J-Link> Device [CONFIRM: SEGGER device name]
J-Link> SelectInterface SWD
J-Link> Speed [CONFIRM: SWD speed in kHz]
J-Link> Connect
- Confirm that J-Link detects the target voltage and establishes a connection to the NX device.
- Enter
Exitafter completing the verification:
J-Link> Exit
Target power
Do not use the J-Link probe to power the NX development board unless the approved hardware guide explicitly permits it. VTref is used to detect the target reference voltage and must be connected as specified in the board connection guide.
Step 9: Verify serial access
The J-Link SWD connection is used for programming and debugging. Serial logs may use a separate USB-to-UART interface, USB CDC interface, or an approved J-Link virtual COM port, depending on the NX board revision and selected J-Link model.
- Confirm the approved serial-log interface for the selected NX development board.
- If an external USB-to-UART adapter is required, connect it according to the approved hardware guide.
- Open Serial Terminal in nRF Connect for Desktop or another VT100/ANSI-compatible terminal.
- Select the verified NX board serial port.
- Apply the KORLINX-approved serial settings.
- Reset the board.
- Confirm that the expected boot or application logs are displayed.
Serial ports normally appear as:
| Operating system | Typical format |
|---|---|
| Windows | COMx |
| Linux | /dev/ttyACMx or /dev/ttyUSBx |
| macOS | /dev/tty.* |
Use these values only after confirmation:
Baud rate: [CONFIRM]
Data bits: 8
Parity: None
Stop bits: 1
Flow control: [CONFIRM]
Serial interface Do not assume that the J-Link USB connection automatically provides the NX serial-log port. J-Link virtual COM support depends on the probe model and the NX hardware connection.
Expected result
The environment is ready when all applicable checks below are complete:
- VS Code opens the nRF Connect view.
- The approved SDK is installed.
- The matching toolchain is installed.
west --versioncompletes without an environment error.- J-Link Commander opens successfully.
- The connected J-Link probe appears in
ShowEmuList USB. - J-Link detects the NX target voltage.
- J-Link establishes an SWD connection to the selected NX device.
- The serial terminal can open the NX log interface, when supported.
- The expected startup log is displayed, when serial logging is part of the validated workflow.
Troubleshooting
| Problem | Action |
|---|---|
| The nRF Connect view is missing | Confirm that the complete Nordic extension pack is installed and enabled. |
| The SDK installation fails | Check network access, free storage, installation permissions, and proxy settings. |
west is not found | Open a terminal from the installed SDK or activate the SDK environment again. |
| J-Link Commander is not found | Install the SEGGER J-Link Software and Documentation Pack and reopen the terminal. |
| The J-Link probe is not listed | Check the J-Link USB cable, host USB port, driver installation, and whether another application is using the probe. |
| J-Link does not detect target voltage | Check NX board power, GND, VTref, and the SWD cable orientation. |
| J-Link cannot connect to the target | Confirm the SEGGER device name, SWDIO/SWDCLK wiring, reset connection, target power, and approved SWD speed. |
| The serial port is not available | Confirm the approved serial interface, connect the required USB-to-UART adapter if applicable, and check host serial-port permissions. |
| The serial port cannot be opened | Close other terminal applications and check host serial-port permissions. |
| The toolchain version differs from the SDK | Install and select the toolchain that matches the approved SDK release. |
Official references
- nRF Connect for Desktop
- nRF Connect for VS Code
- Matter in nRF Connect SDK
- SEGGER J-Link Software and Documentation Pack
- SEGGER J-Link Commander
- Zephyr: Building, Flashing and Debugging
🎉 You're Ready!
Your NX Matter Development Environment Is Ready
You've installed the required Nordic development tools and SEGGER J-Link software, and verified the approved connection path to your NX development board.
Your system is now prepared for the validated Matter Quick Start or build-from-source workflow.
- ✅ Installed nRF Connect for Desktop
- ✅ Installed Visual Studio Code and the Nordic extension pack
- ✅ Installed the selected nRF Connect SDK
- ✅ Installed the matching toolchain
- ✅ Installed and opened SEGGER J-Link Commander
- ✅ Verified the SDK terminal environment
- ✅ Connected the NX development board to J-Link through SWD
- ✅ Confirmed communication between J-Link and the NX target
- ✅ Confirmed serial access when supported
What's Next?
Matter Quick Start
Flash a validated Matter sample and commission the NX device without building from source.
Build from Source
Configure, build, flash, and test the Matter sample using the approved board target and J-Link runner.
Matter Concepts
Review the commissioning, Thread, and data model keywords used in the series.
Your tools are installed and the NX board connection has been verified through SEGGER J-Link. Continue with the validated Quick Start package before modifying the Matter source code.